• Uncategorized

    A Teatime Picnic – An Iced Tea Tasting

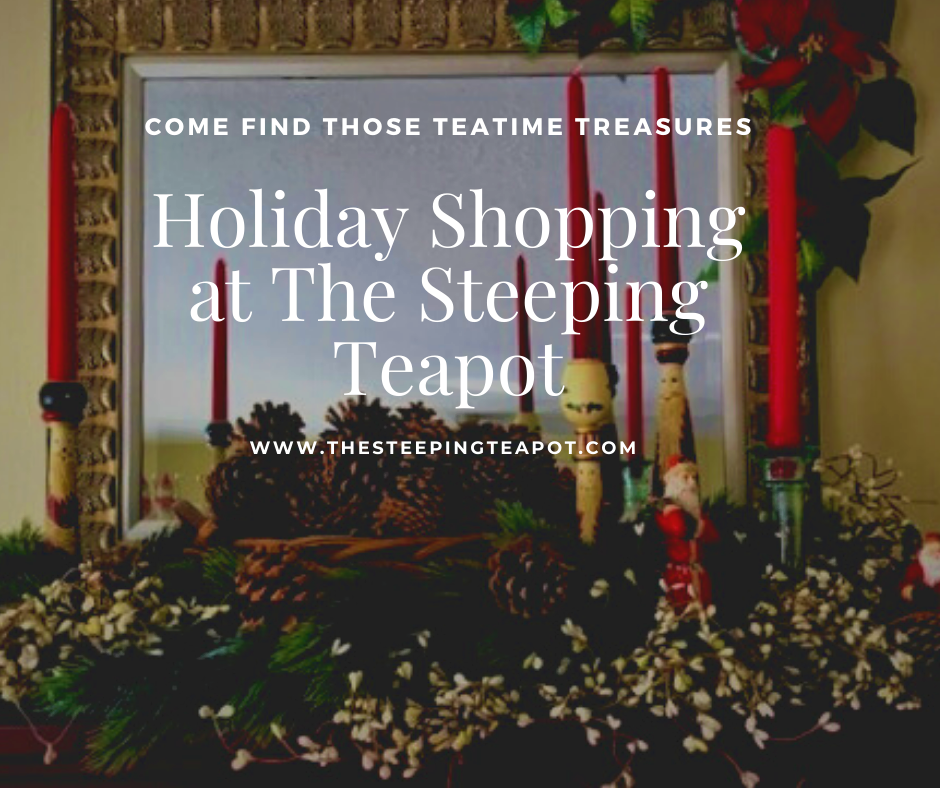
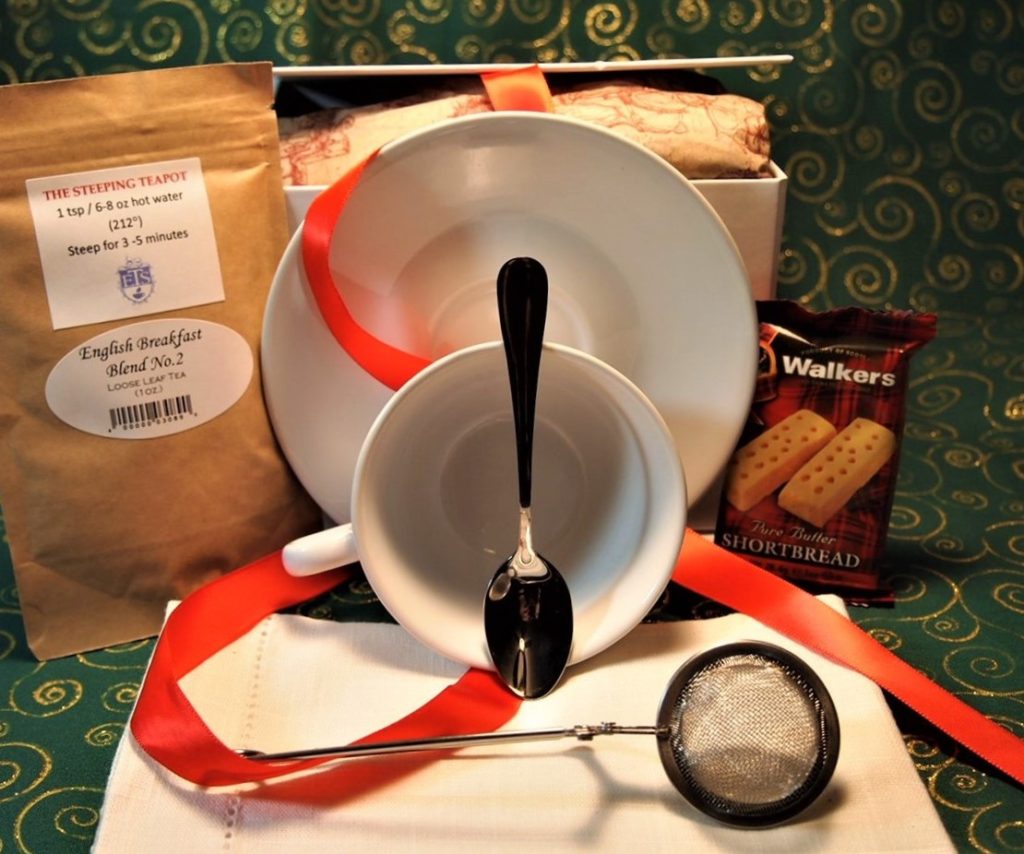
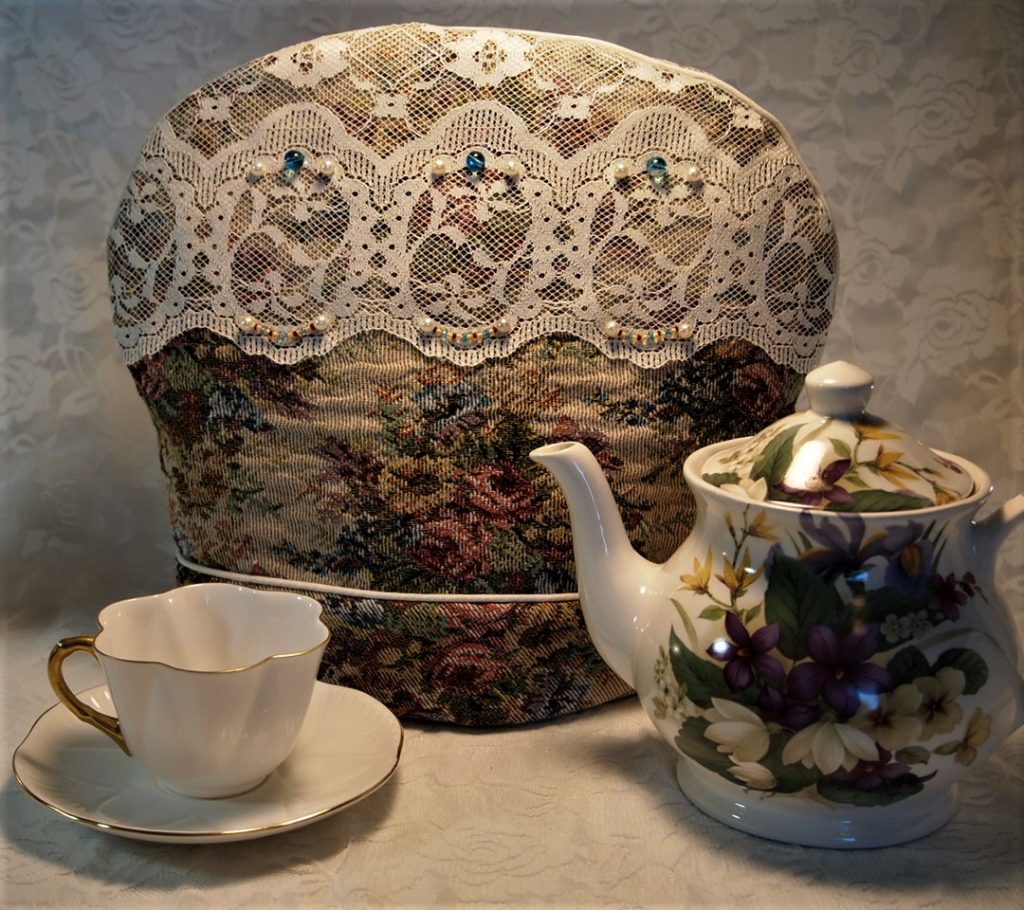
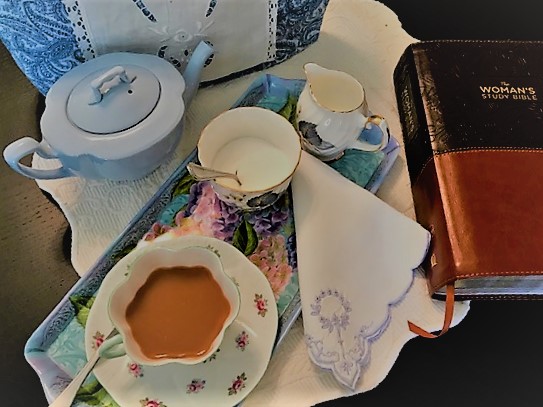
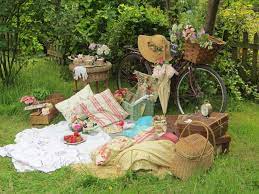
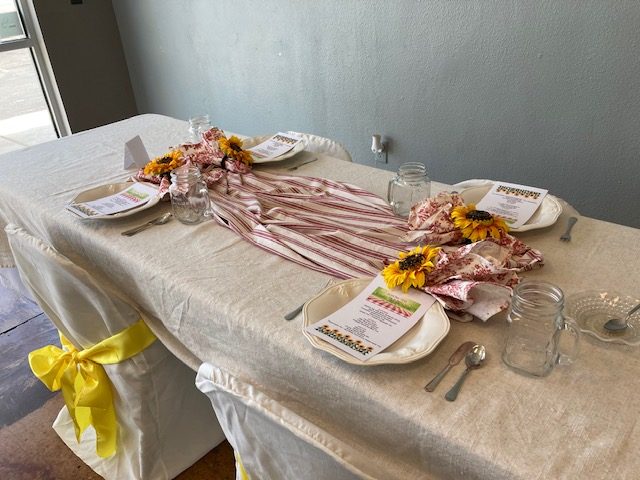
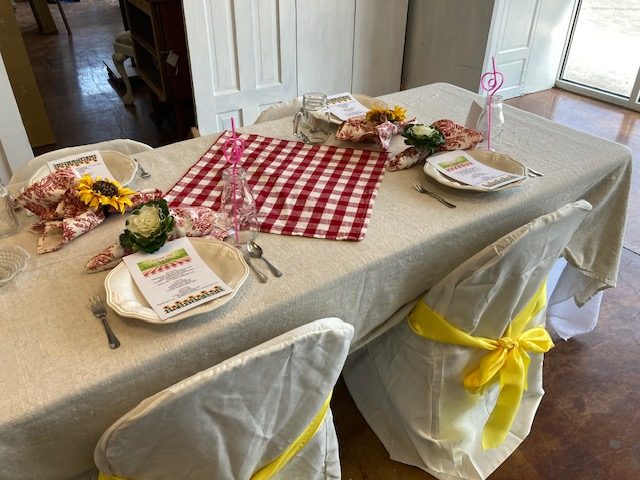
    The season is beginning to change but it is still time to have a picnic…a teatime picnic that is. I had the opportunity to host a picnic tea and incorporated the elements of an afternoon tea as a picnic. It was great fun and here is how it came together.

    A Teatime Picnic - an Iced Tea tasting - Victorian picnic basket

    The whole idea of a picnic was originally a 17th Century French word, picque-nique. Its meaning was similar to today’s meaning: a social gathering where each attendee brings a share of the food. The French piquer may have referred to a leisurely style of eating (“pick at your food”) or it may, simply, have meant, “pick” (pic).

    The Victorians were not only great at afternoon tea, they were skilled at picnics. Here is how to put a Victorian Picnic together. How To Have Victorian Picnic.
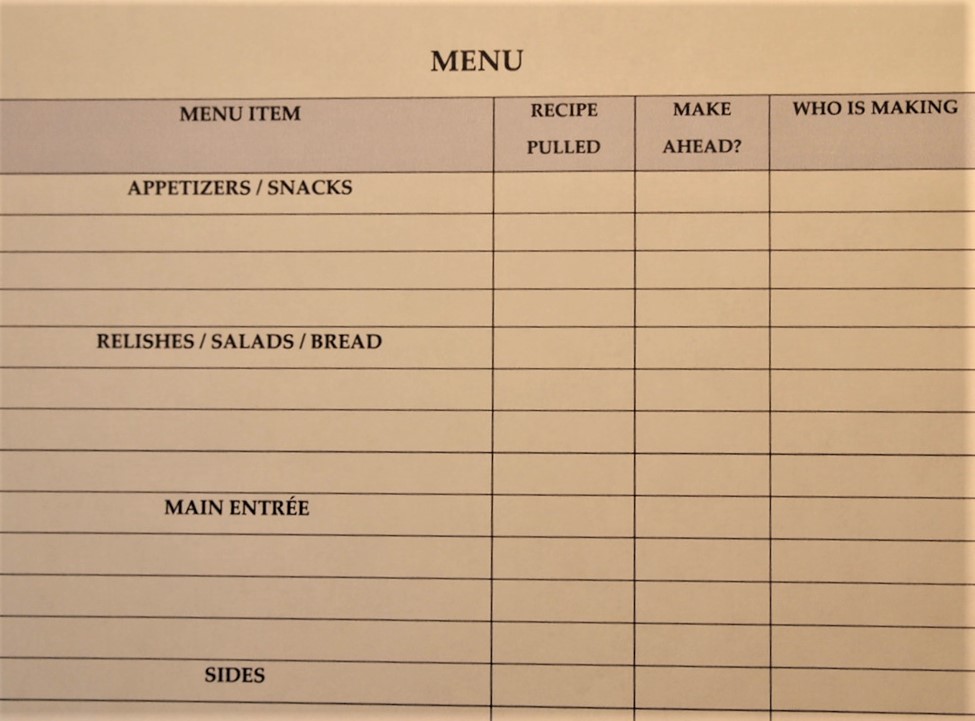
    Menu

    This menu was created to replicate small picnic food items but in the setting of an afternoon tea and in a small form. And rather than serving hot tea, several iced teas were served to my guests delight.

    The iced teas were made the night before and bottled. An iced tea was selected for each course of the tea, pairing with the food.

    Here is the menu and the recipes. Included are notes specific to how the recipe was presented and tips on making it for your own setting.
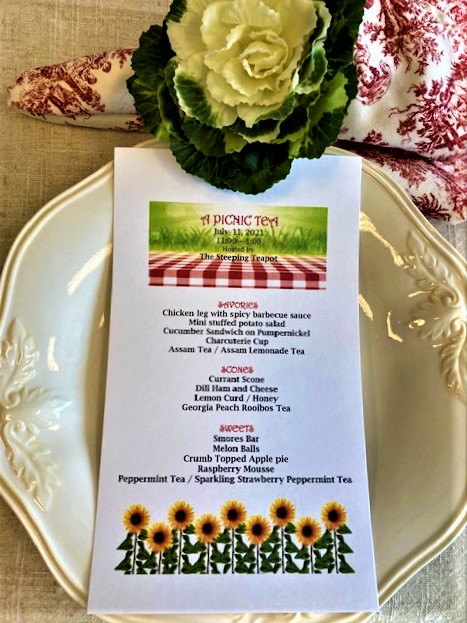
    A teatime picnic - an iced tea tasting - menu

    Savories

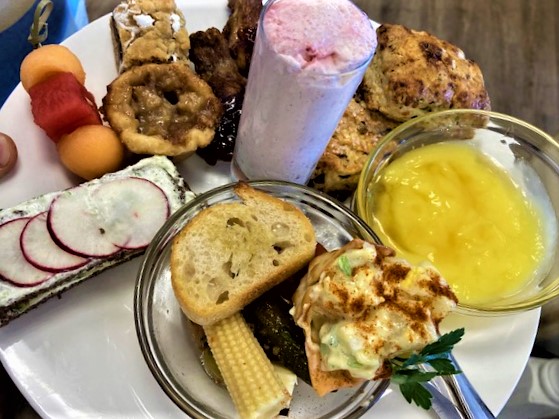
    Chicken leg with spicy barbecue sauce – This was simply a chicken wing leg dipped in a spicy barbecue sauce. Frozen wings were used, non-breaded but seasoned. The sauce was Scherger’s Kettle Spicy Raspberry Jalapeno jam. The end of the leg was dipped in the sauce then served on the plate. I had young guests and was sensitive to their palate but they enjoyed the light spice of the jalapeno.

    Mini stuffed potato salad – Every American picnic has potato salad. This was a small helping of a traditional potato salad. But the trick was how to serve it. I opted to make a wonton cup in a mini-muffin tin and then serve the potato salad in the cup. Both were edible.

    Spray your mini-muffin tin with cooking spray. Take a small wonton wrapper and tuck it into the mini-muffin tin. Bake at 350 degrees for 8-10 minutes or until crispy and brown. Remove from oven and salt. Let completely cool on rack. Store in air tight container. This can be prepared the day before. Uncooked wonton wrappers can be frozen for later use. And I must say – these turned out great!

    Cucumber Sandwich on Pumpernickel – Most afternoon teas contain some kind of cucumber sandwich. I am including a post I did on How To Make Cucumber Sandwiches. I substituted the white bread for pumpernickel. The filling can be made the day ahead. The sandwiches are best when prepared the day of the tea. And they were delicious.

    Charcuterie Cup – One of the things common to the early 17th century picnics as well as the Victorian picnic was a charcuterie board. I replicated this in a small form putting everything you might enjoy in a charcuterie selection in a cup, topped with a crostini.

    a teatime picnic - an iced tea tasting - plate of food

    Scones

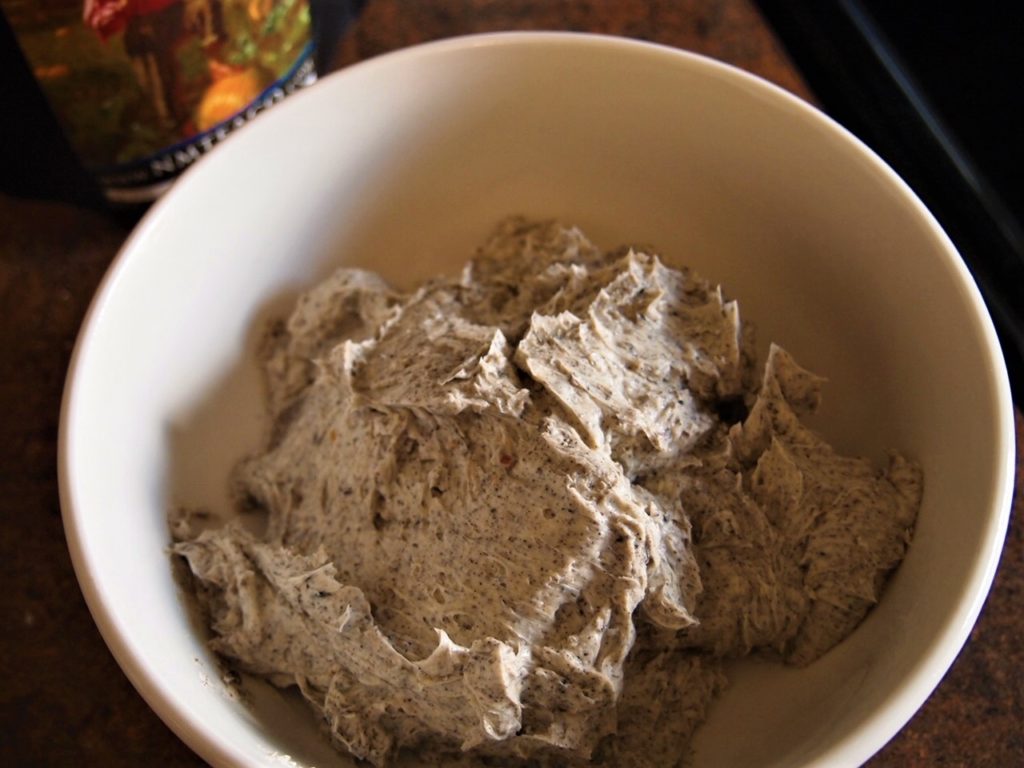
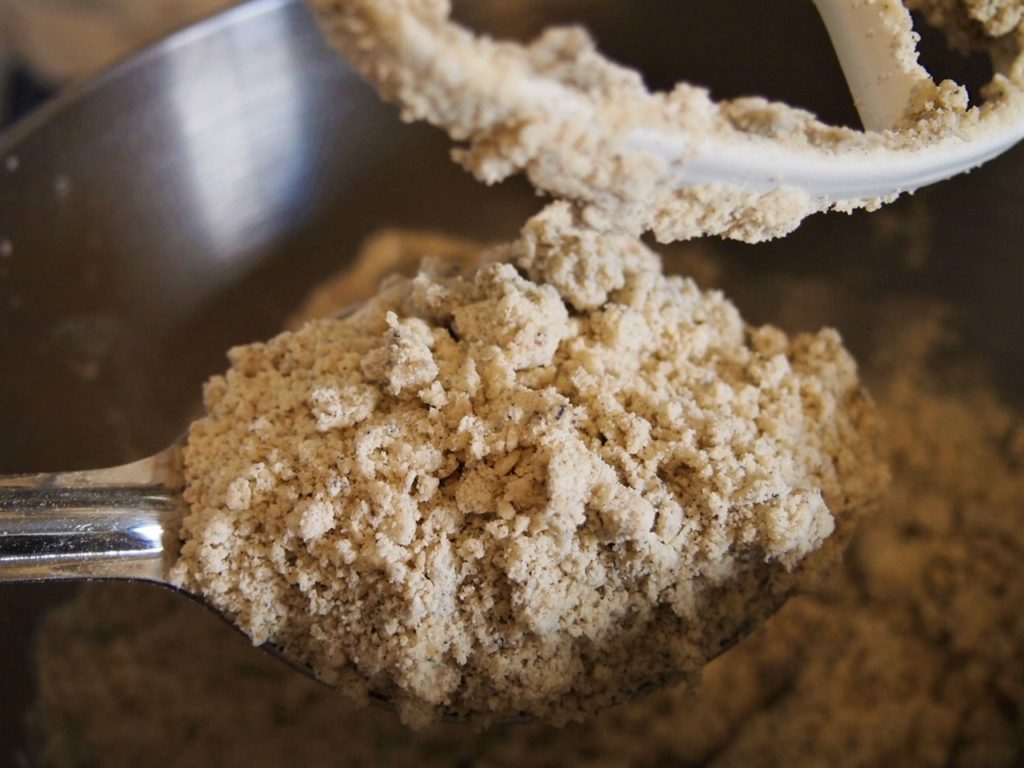
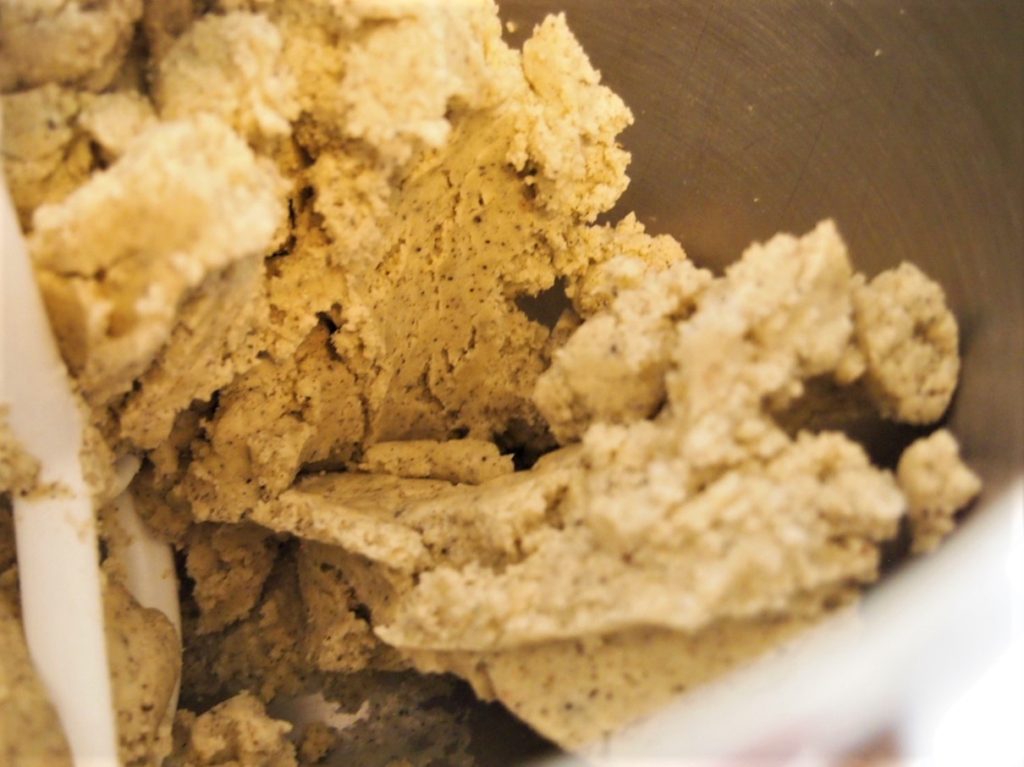
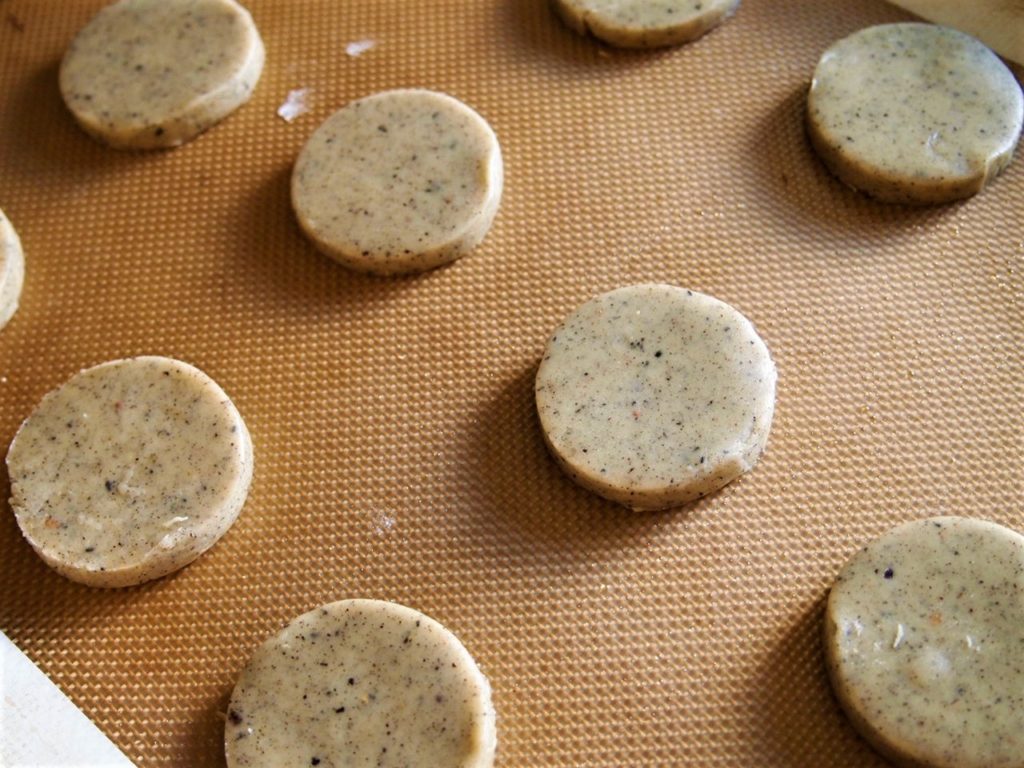
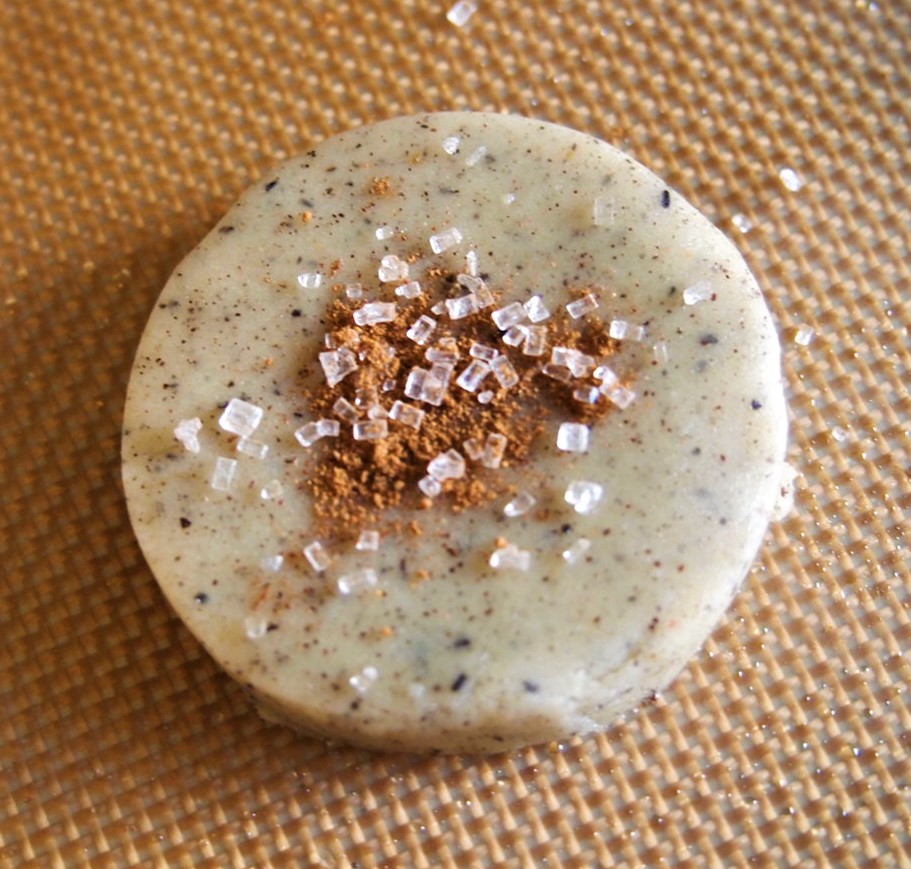
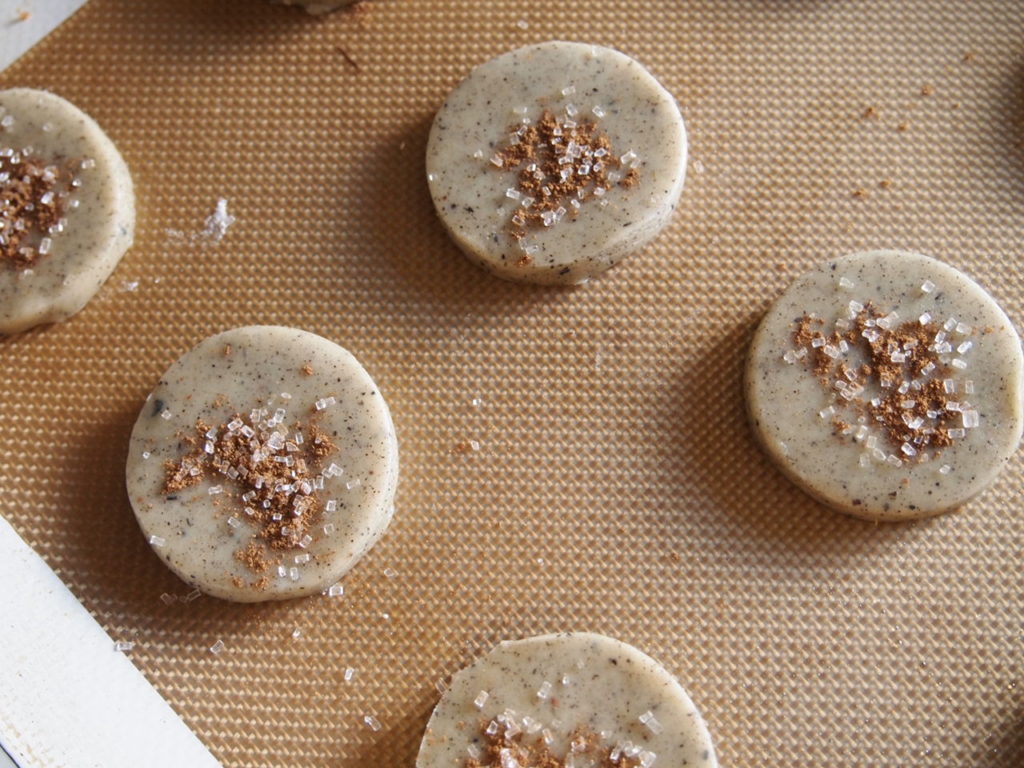
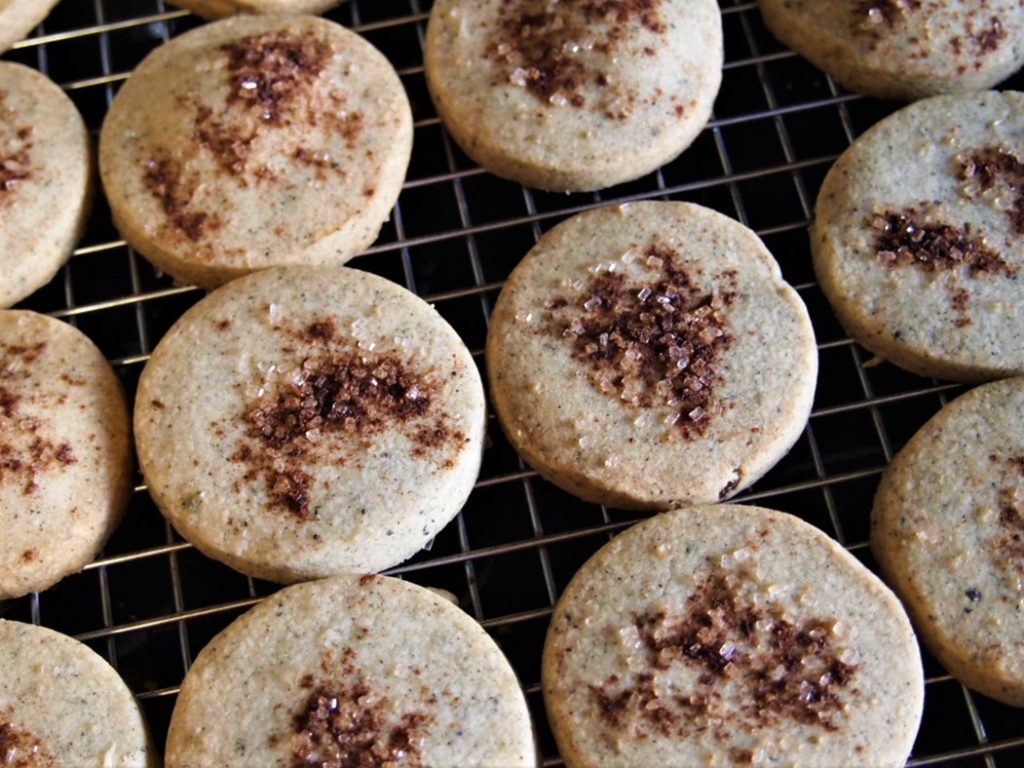
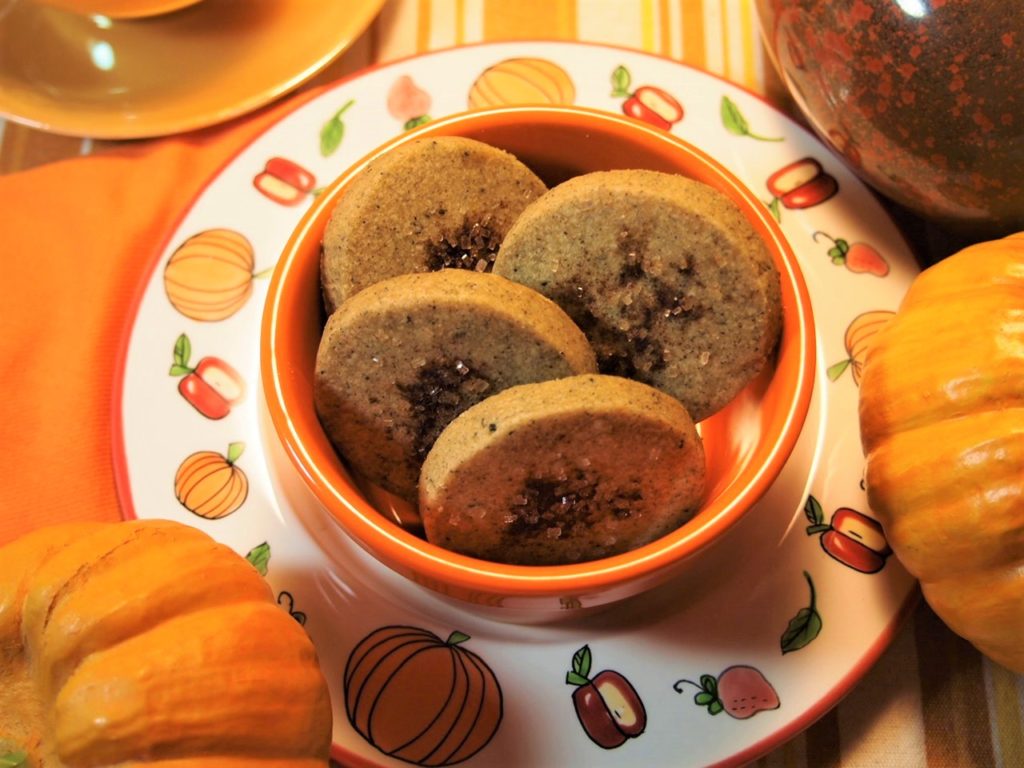
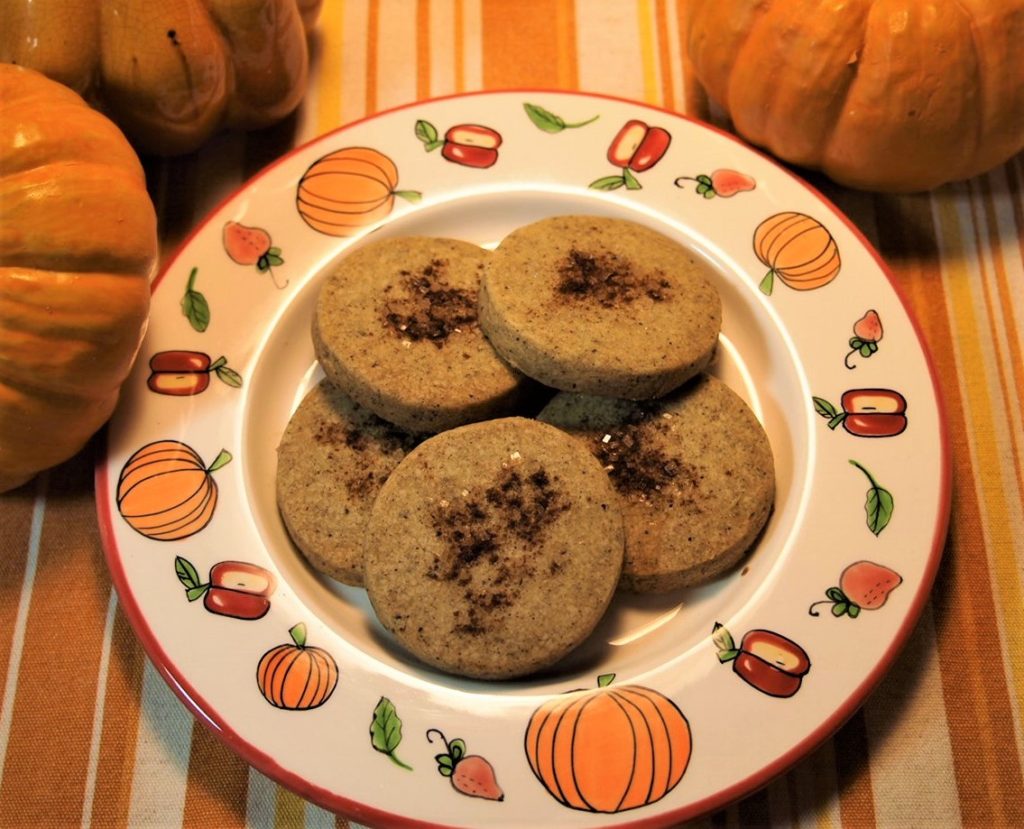
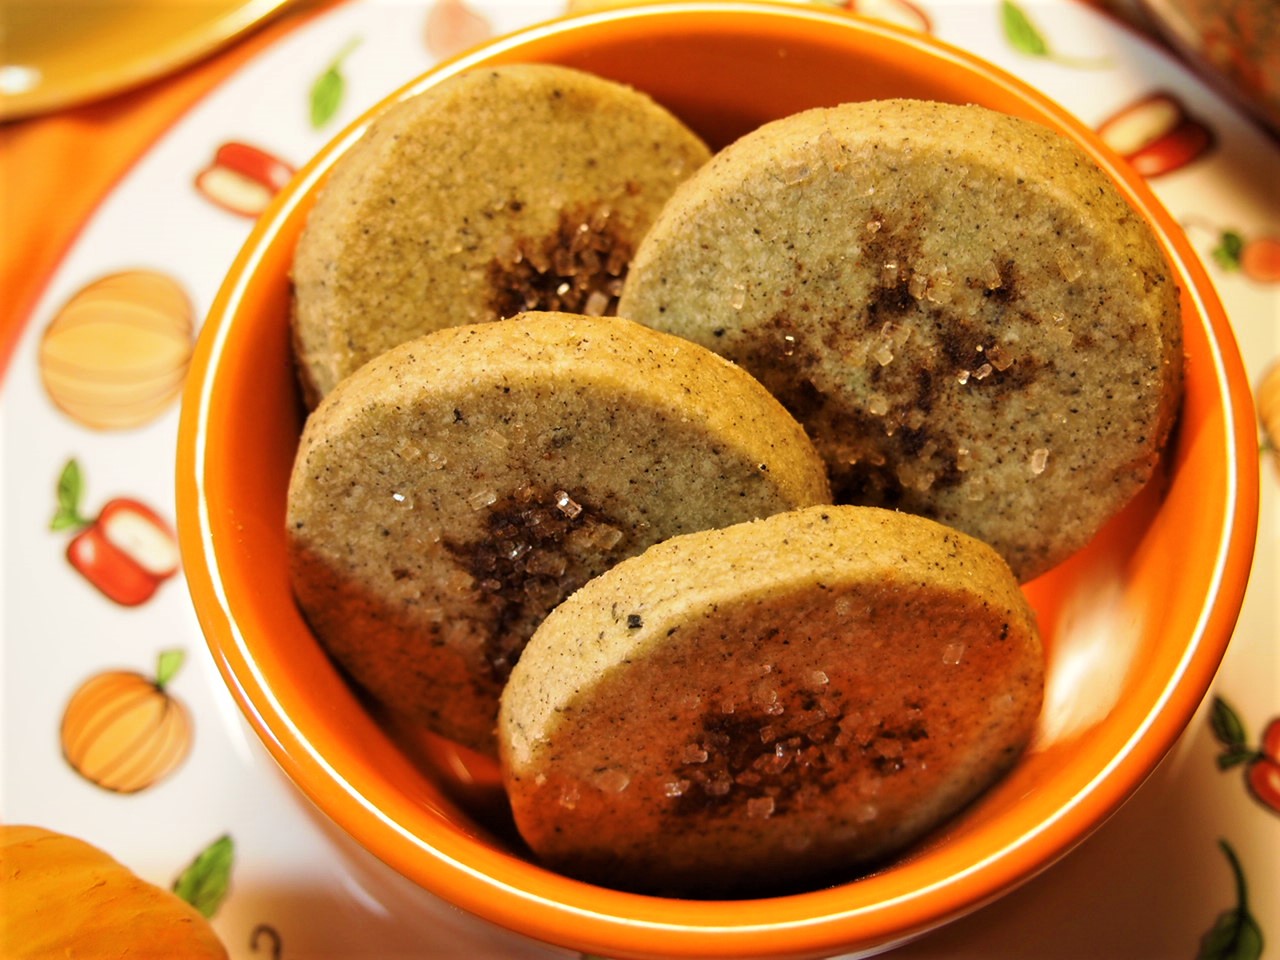
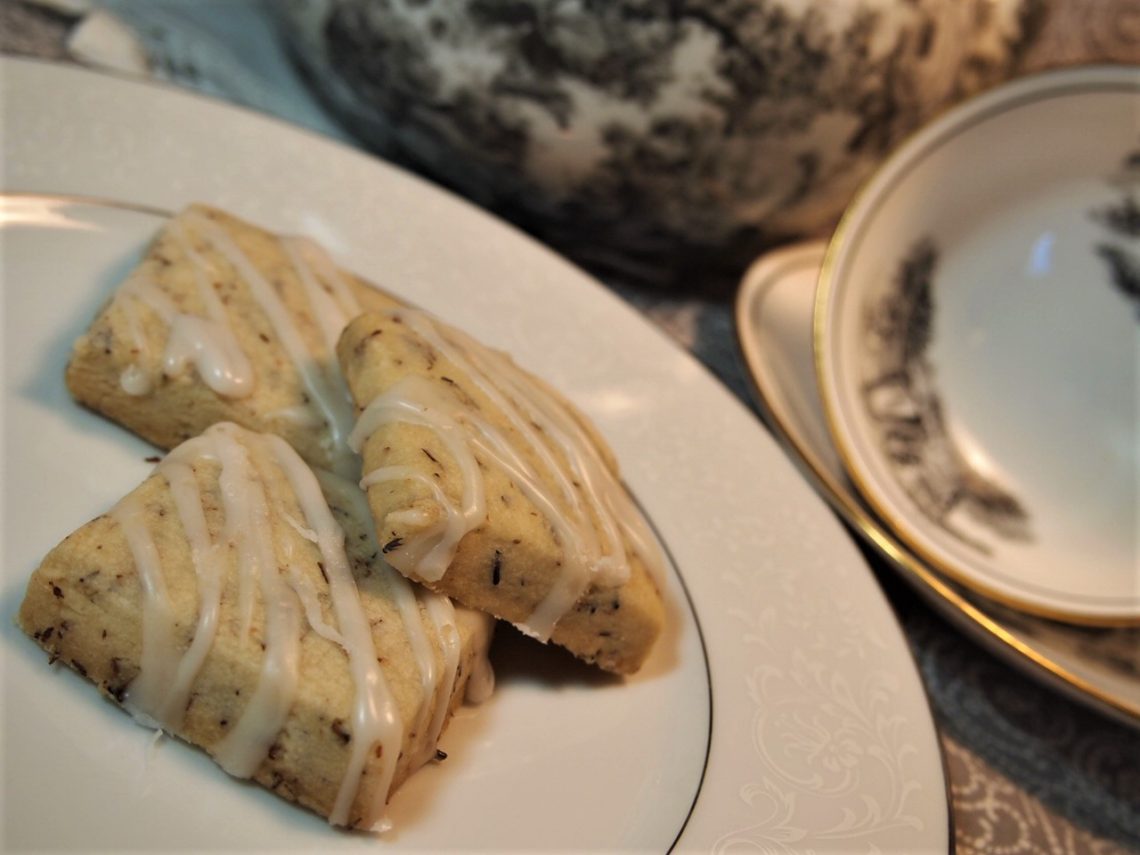
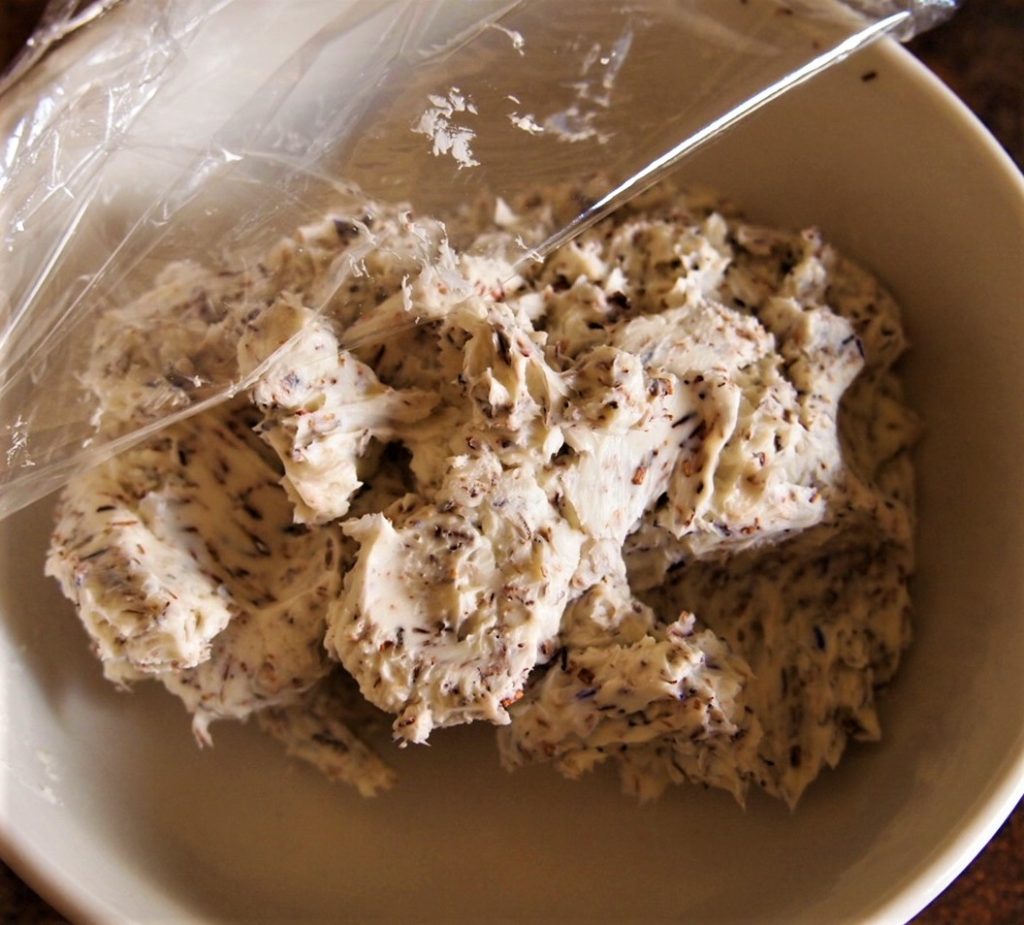
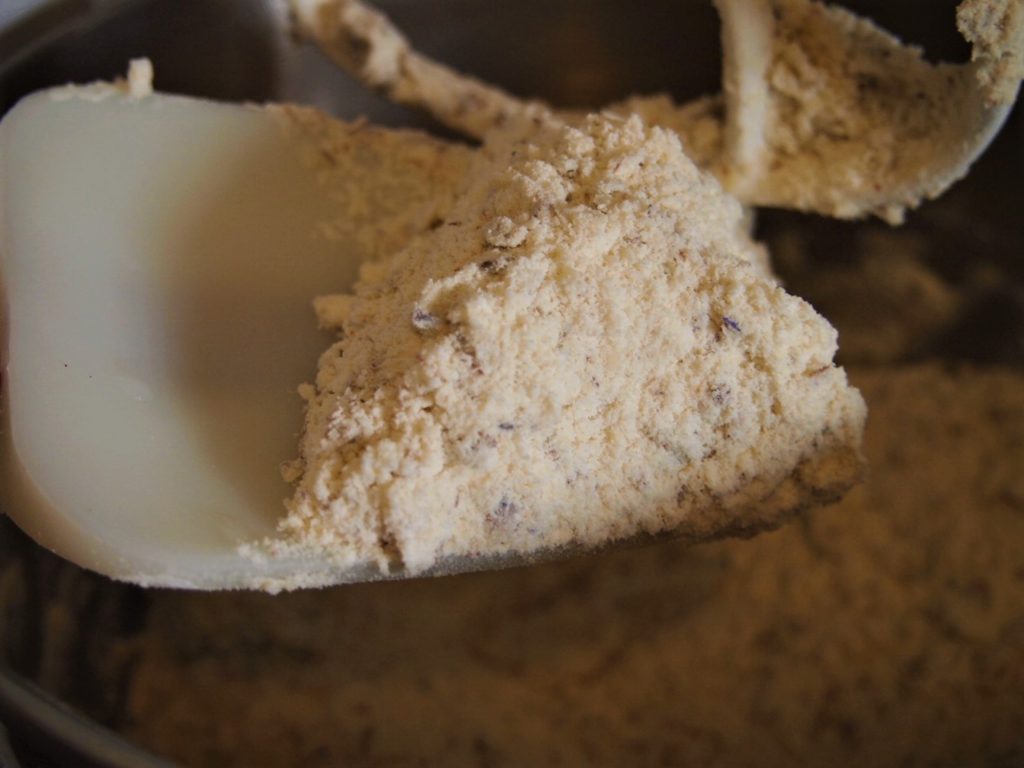
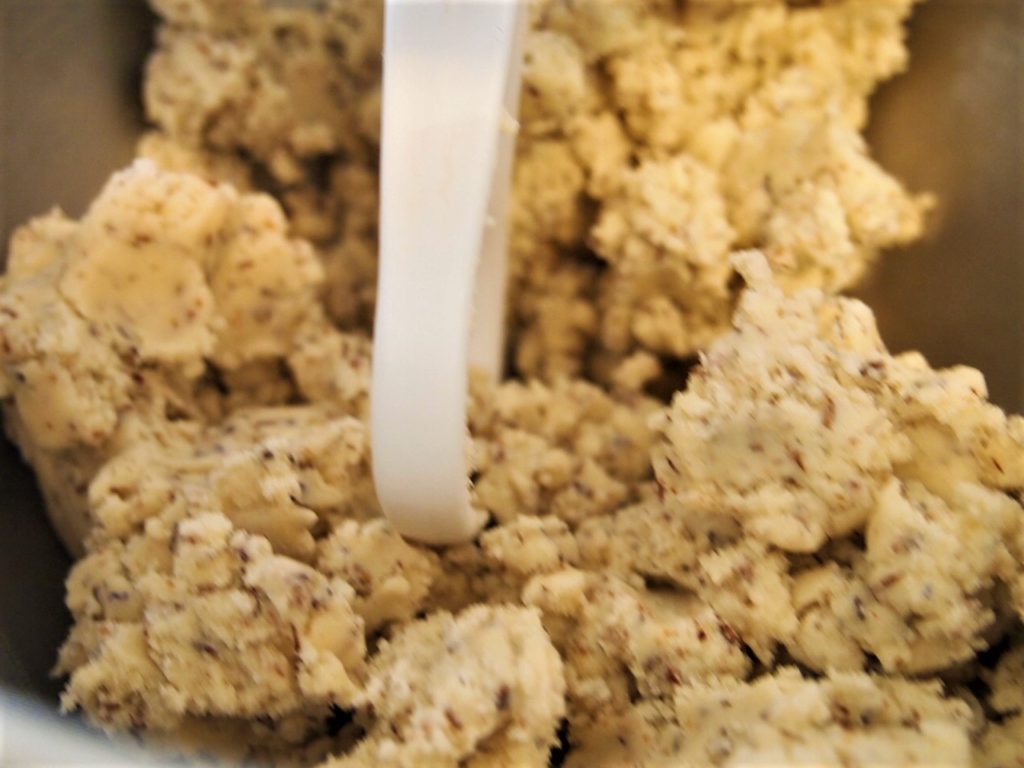
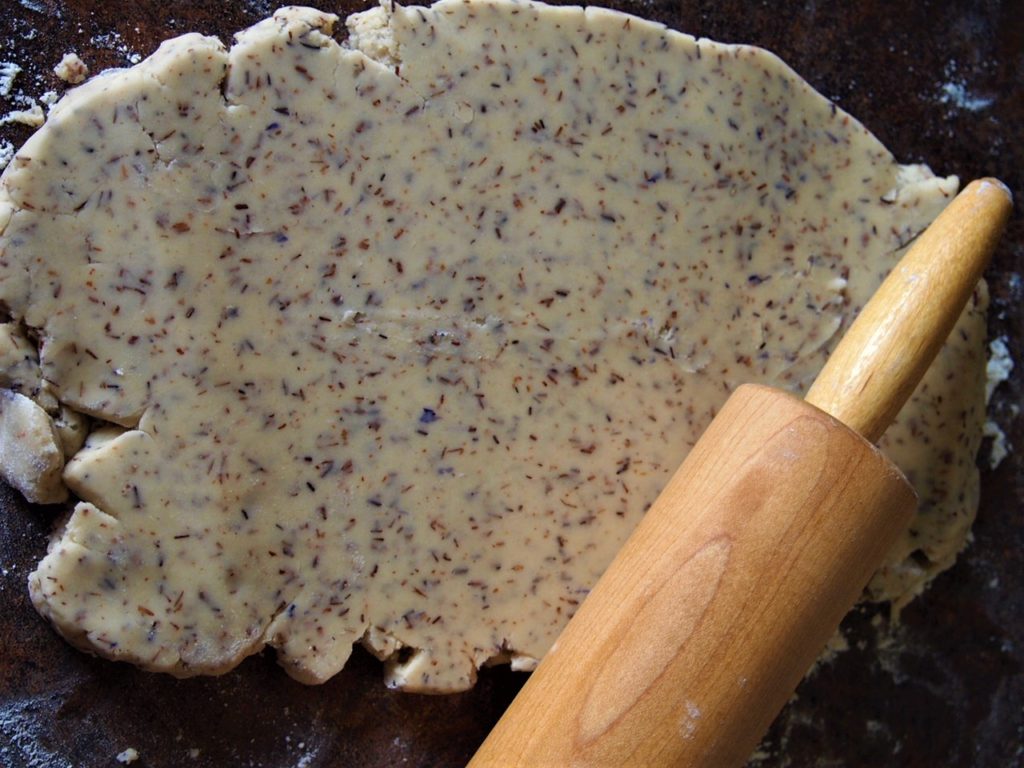
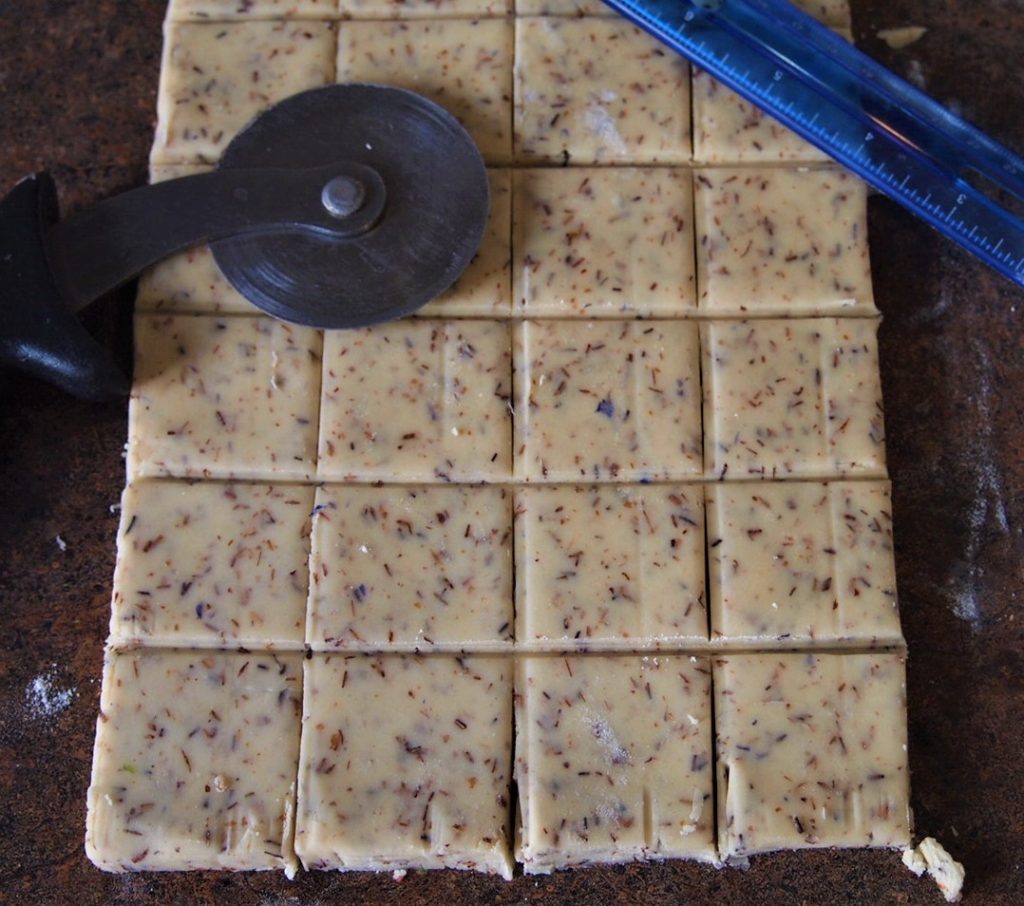
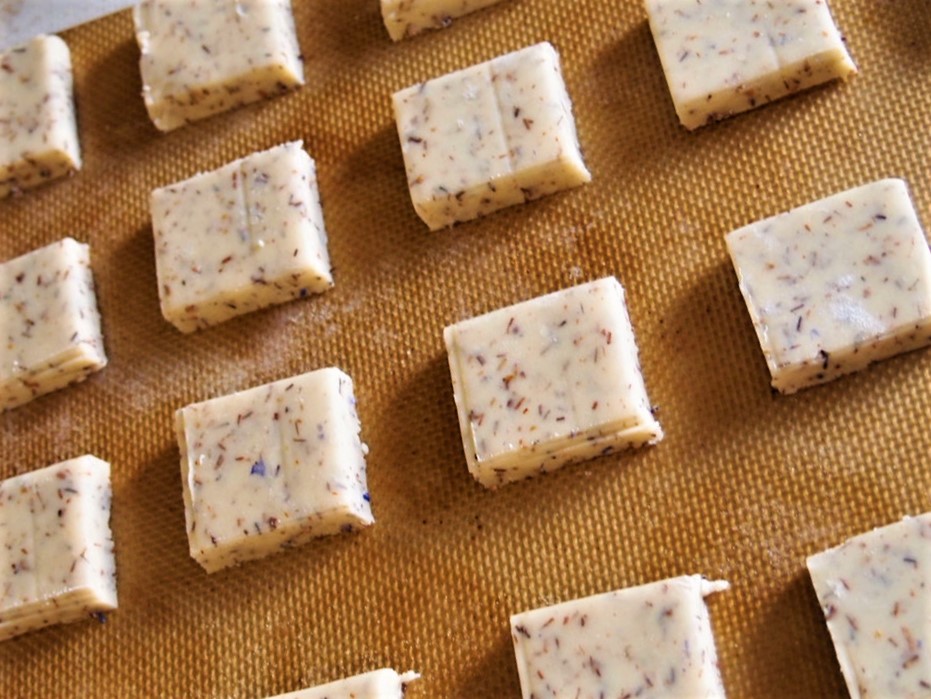
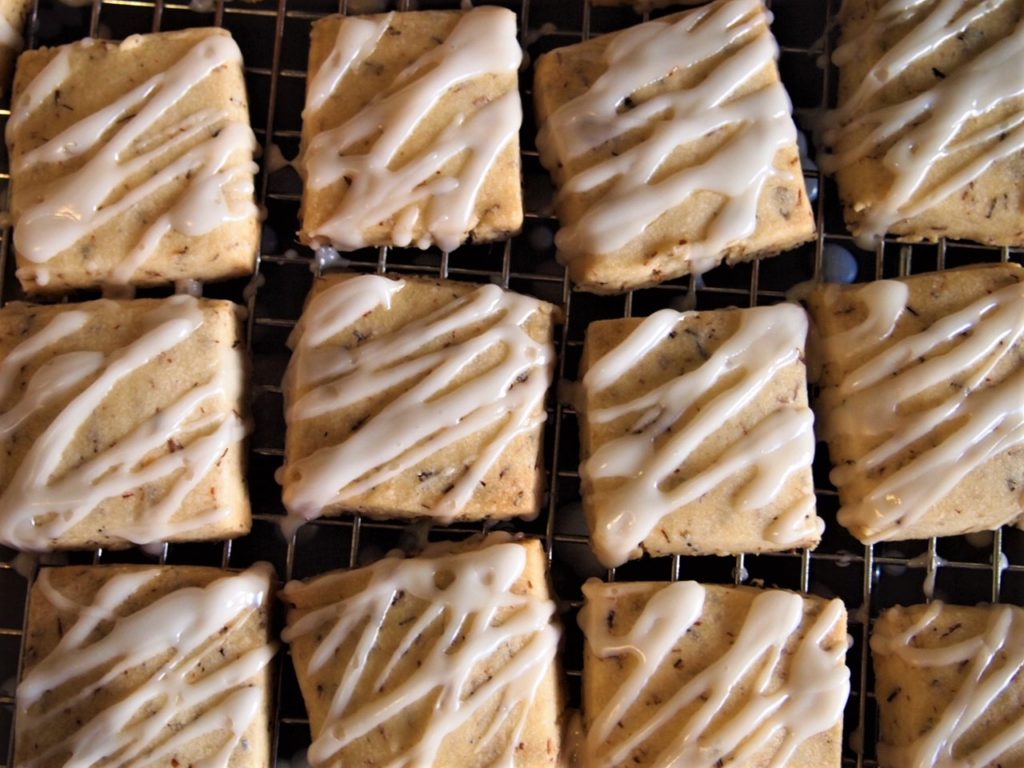
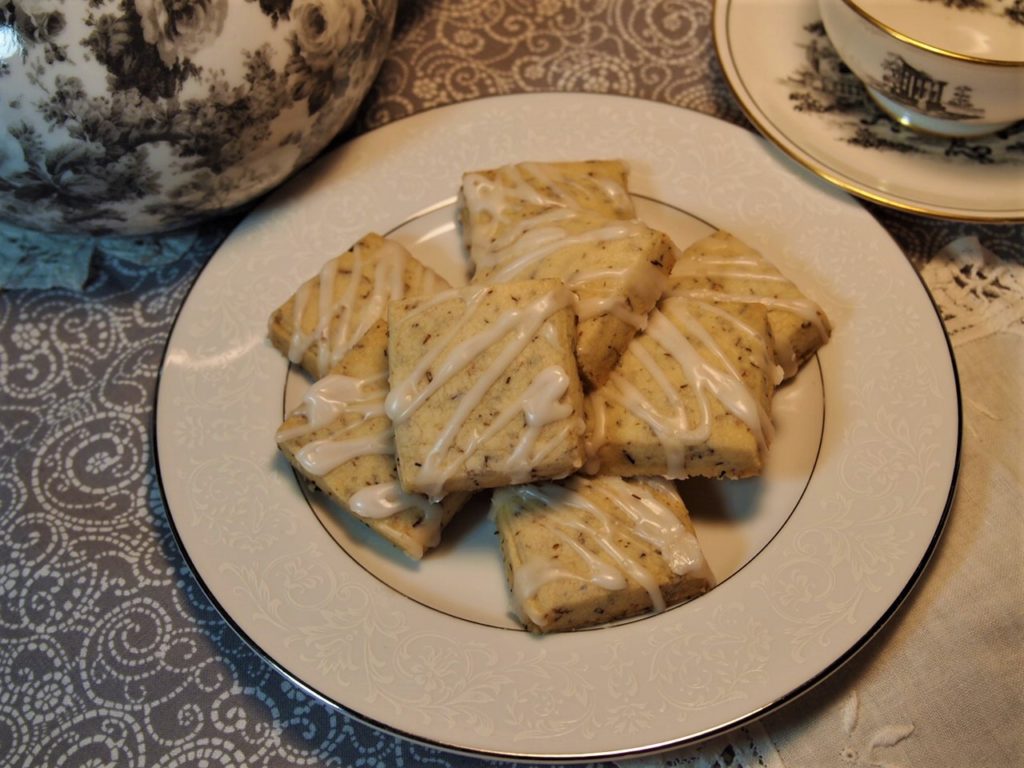
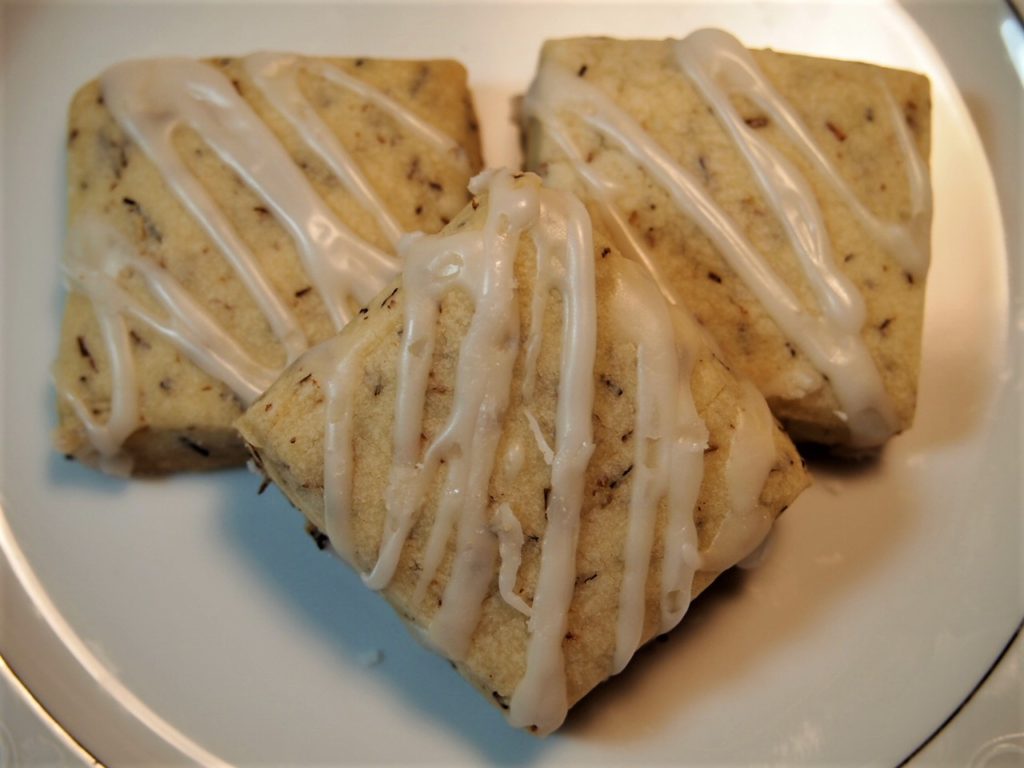
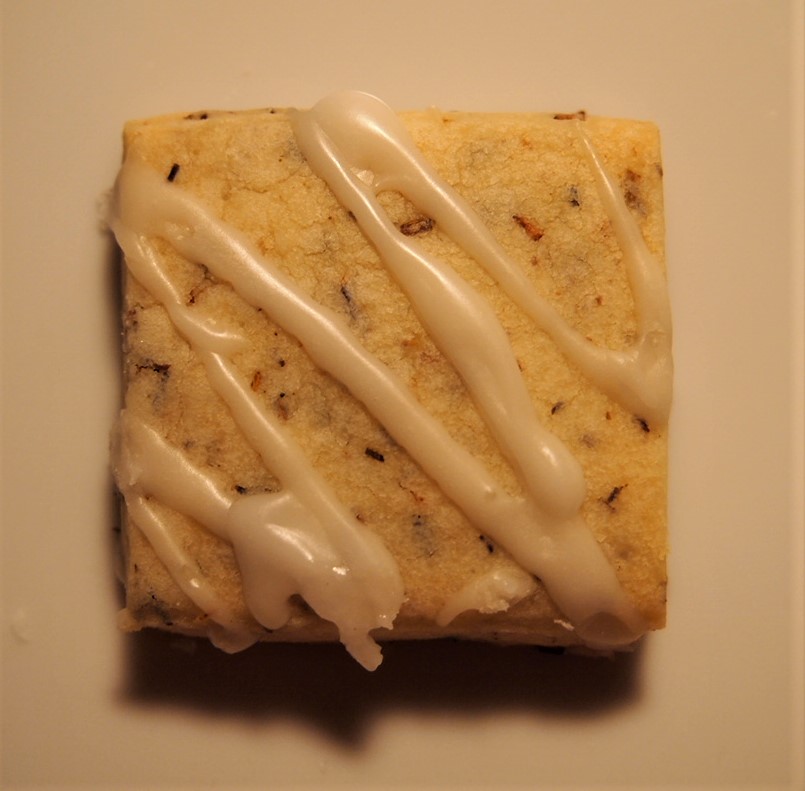
    Currant Scone – A classic for any afternoon tea and one that I serve as a standard for my afternoon teas. I have inserted the recipe post Currant Scones

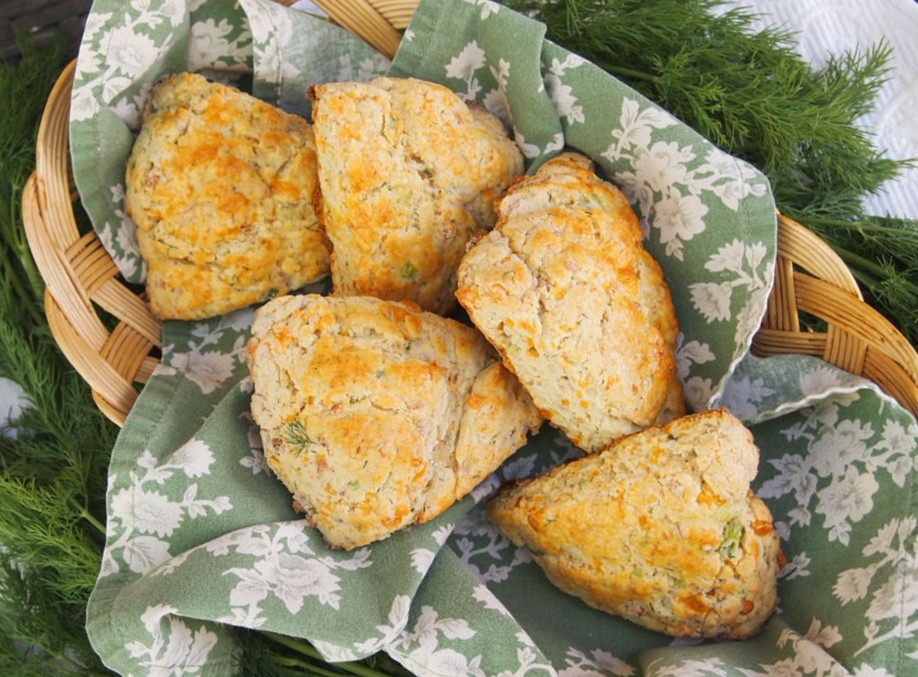
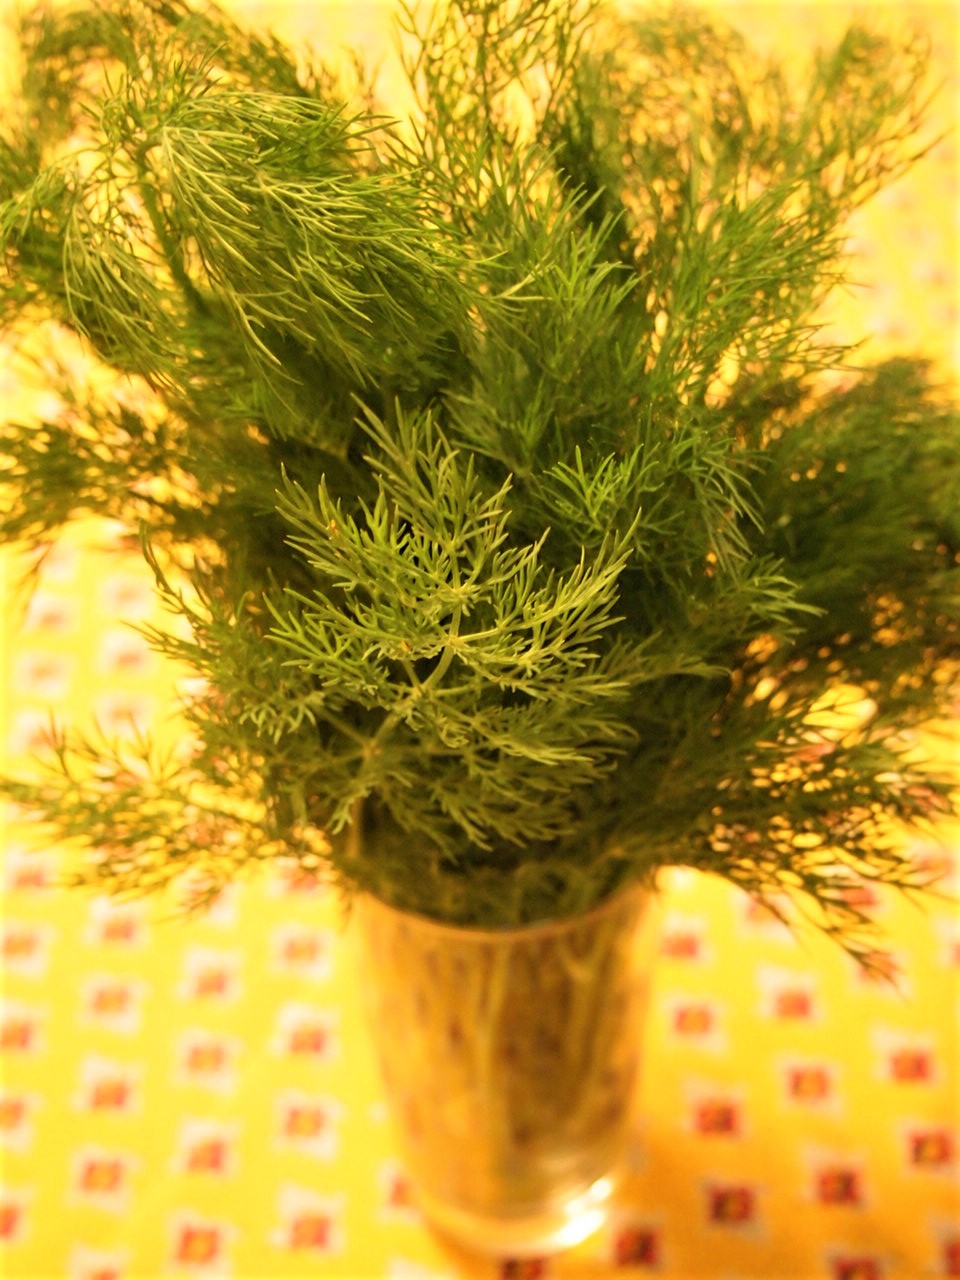
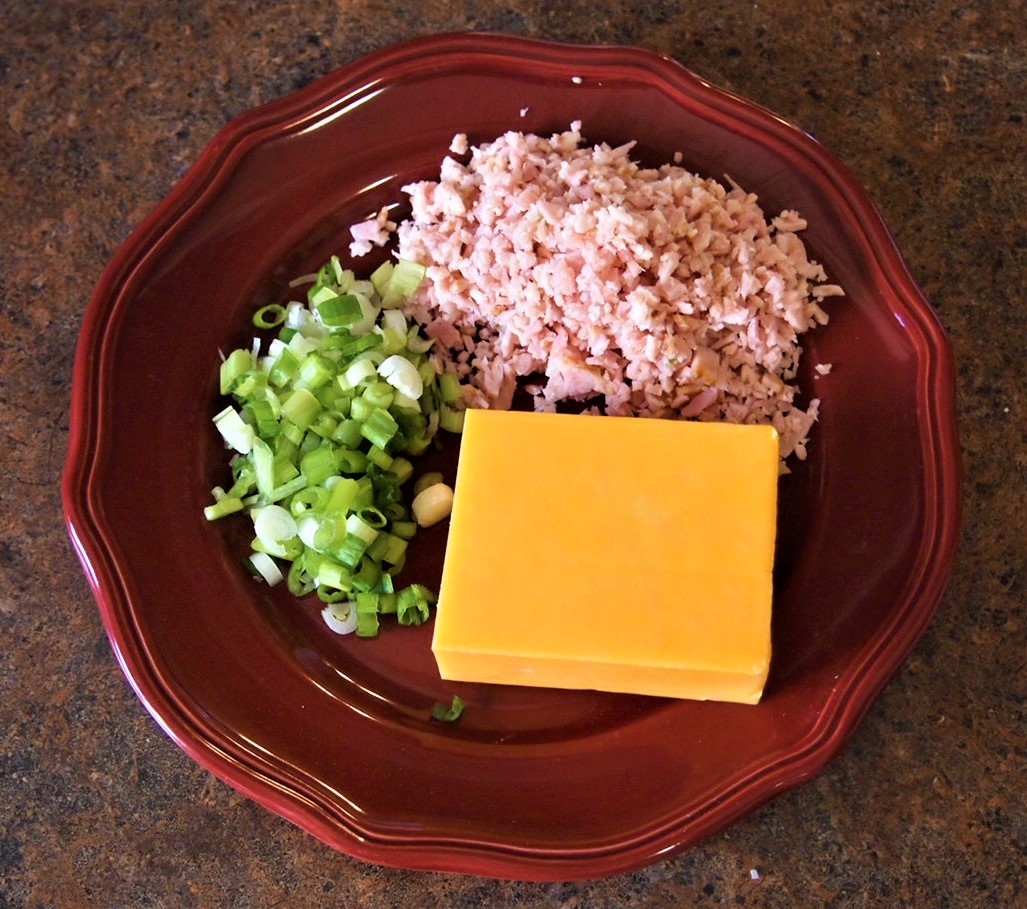
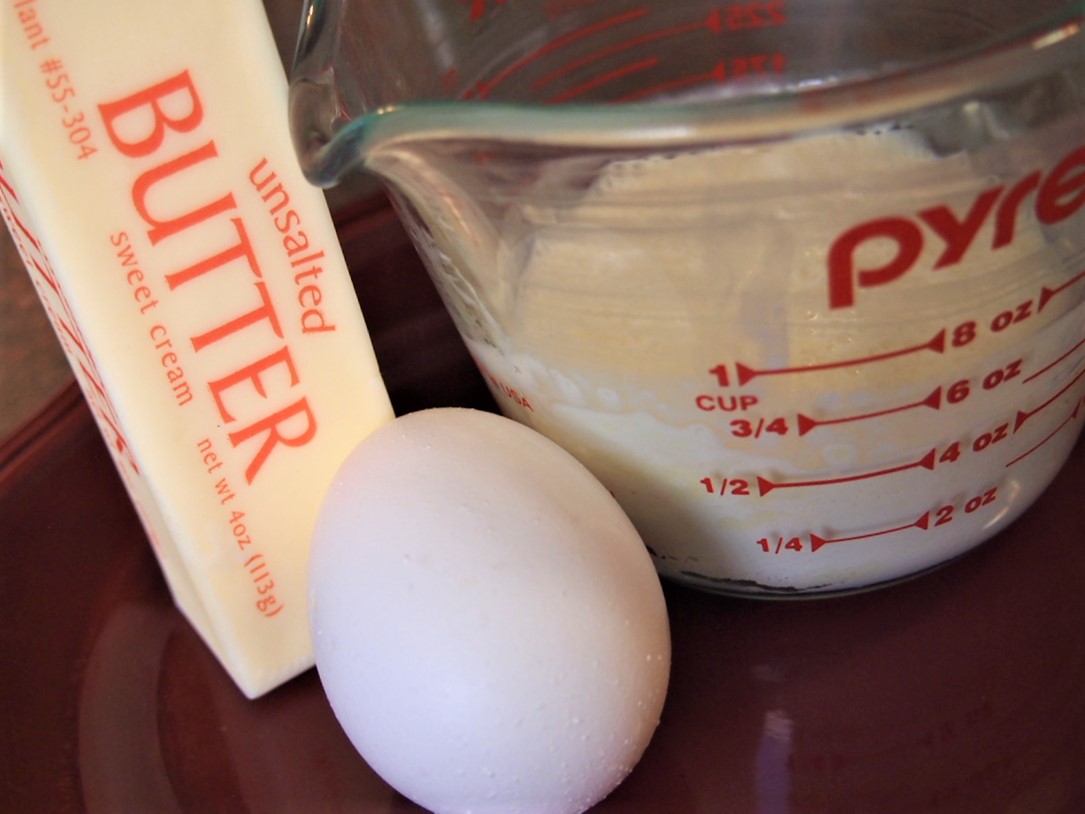
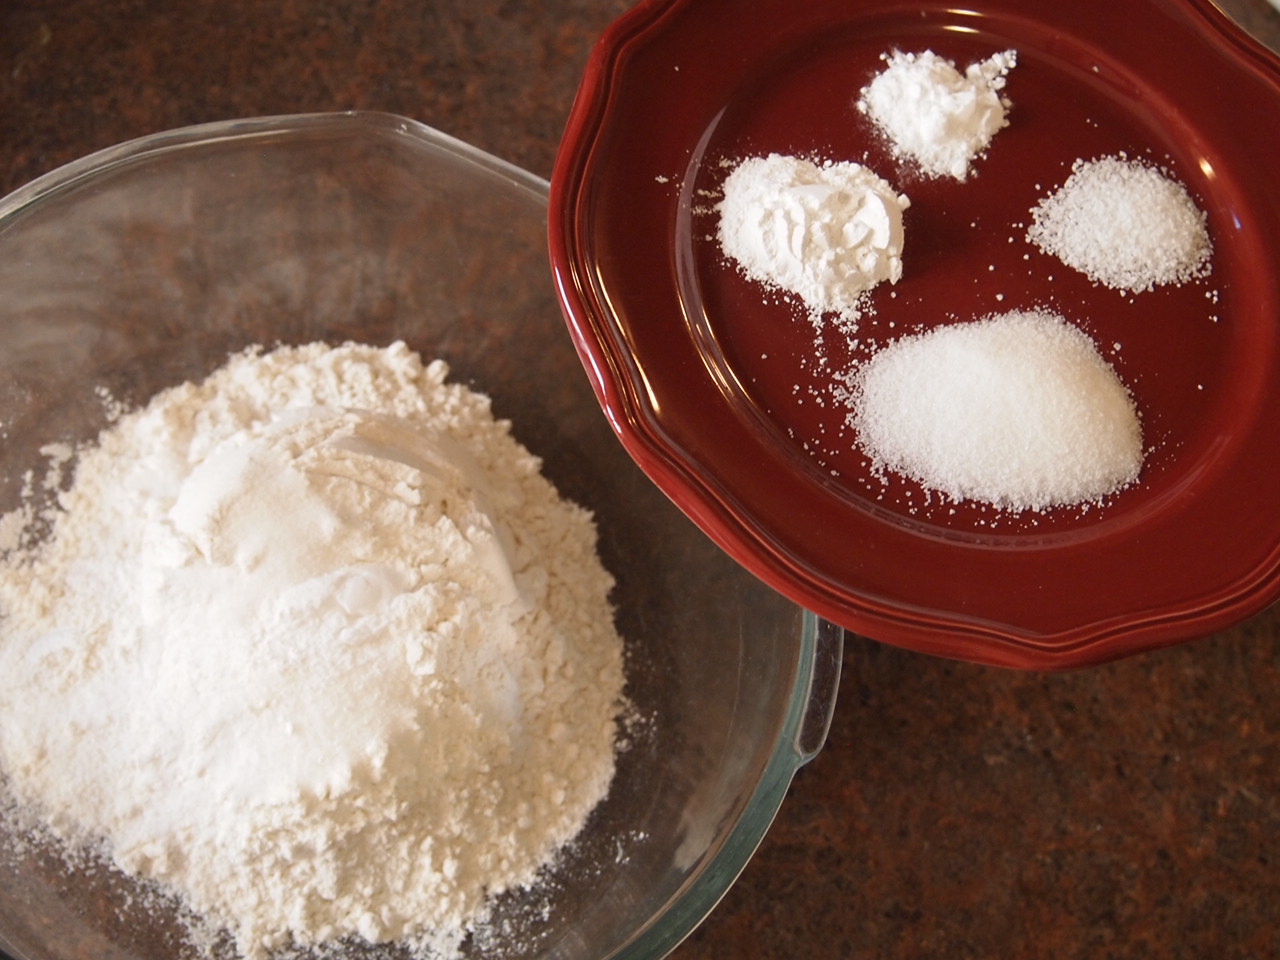
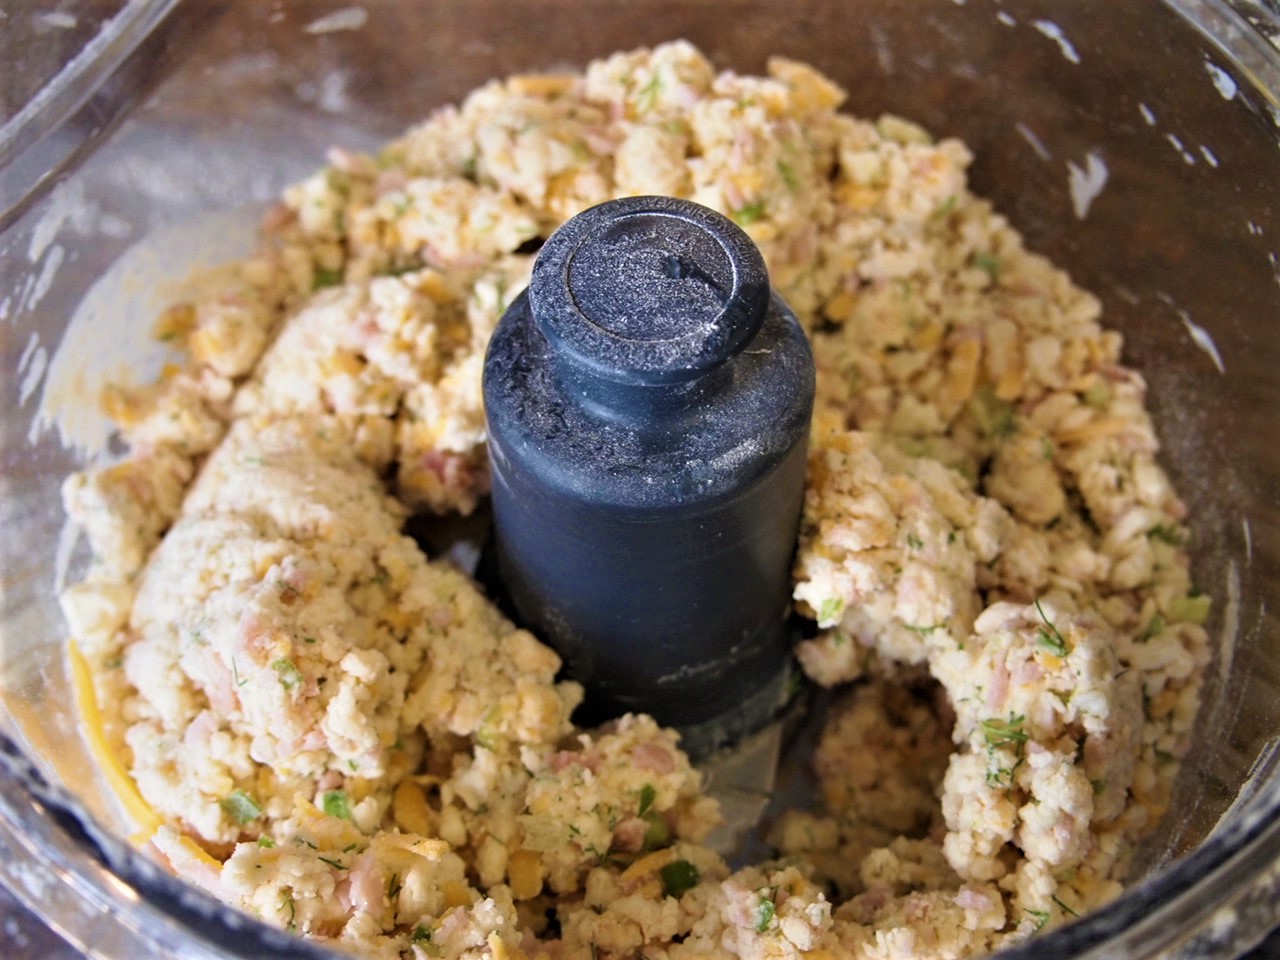
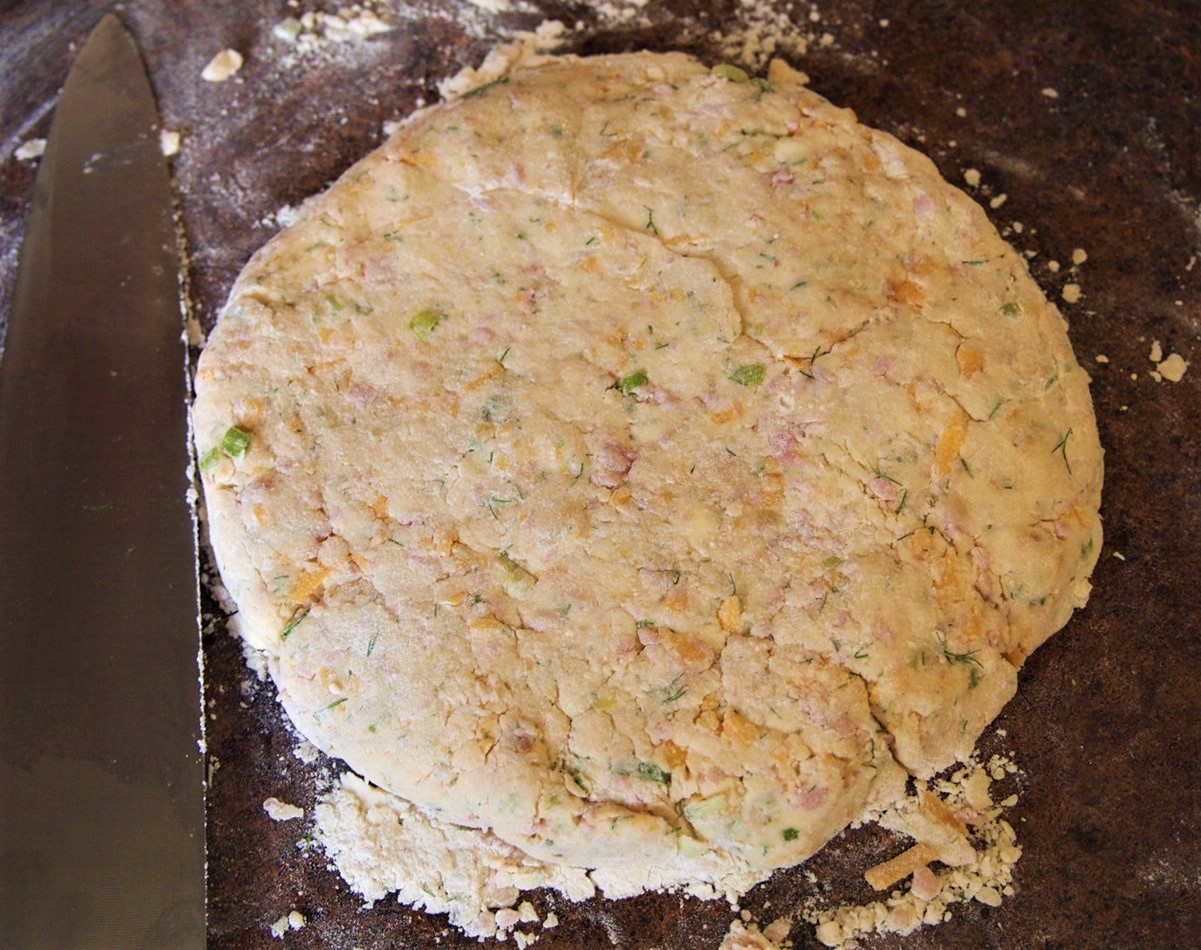
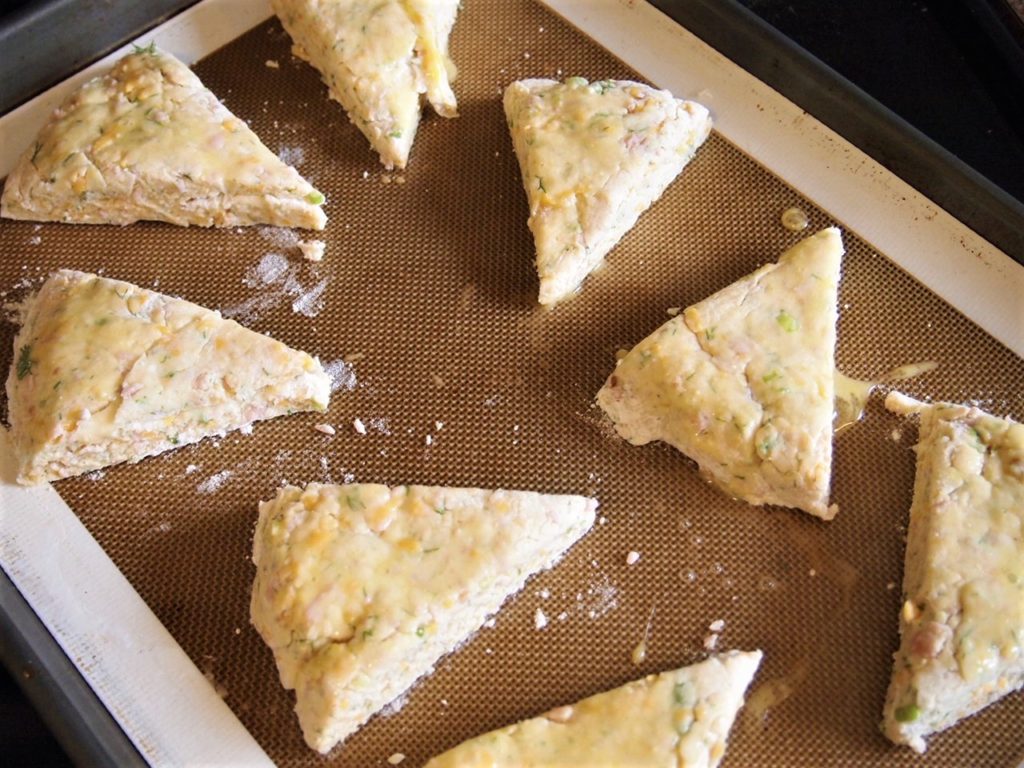
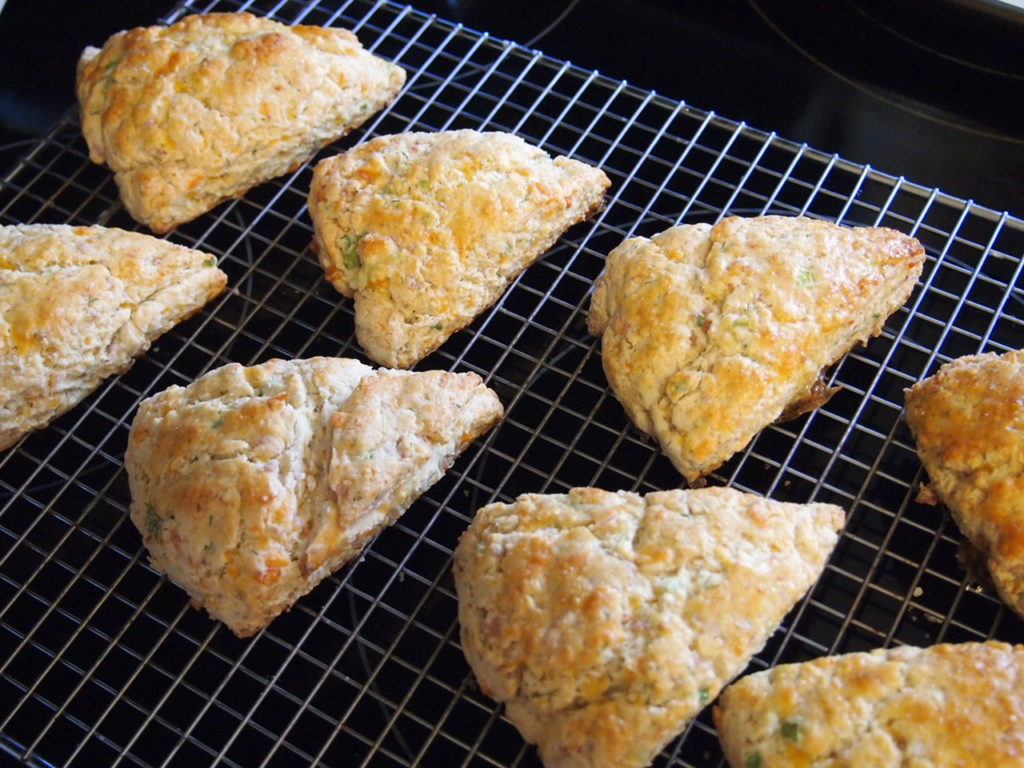
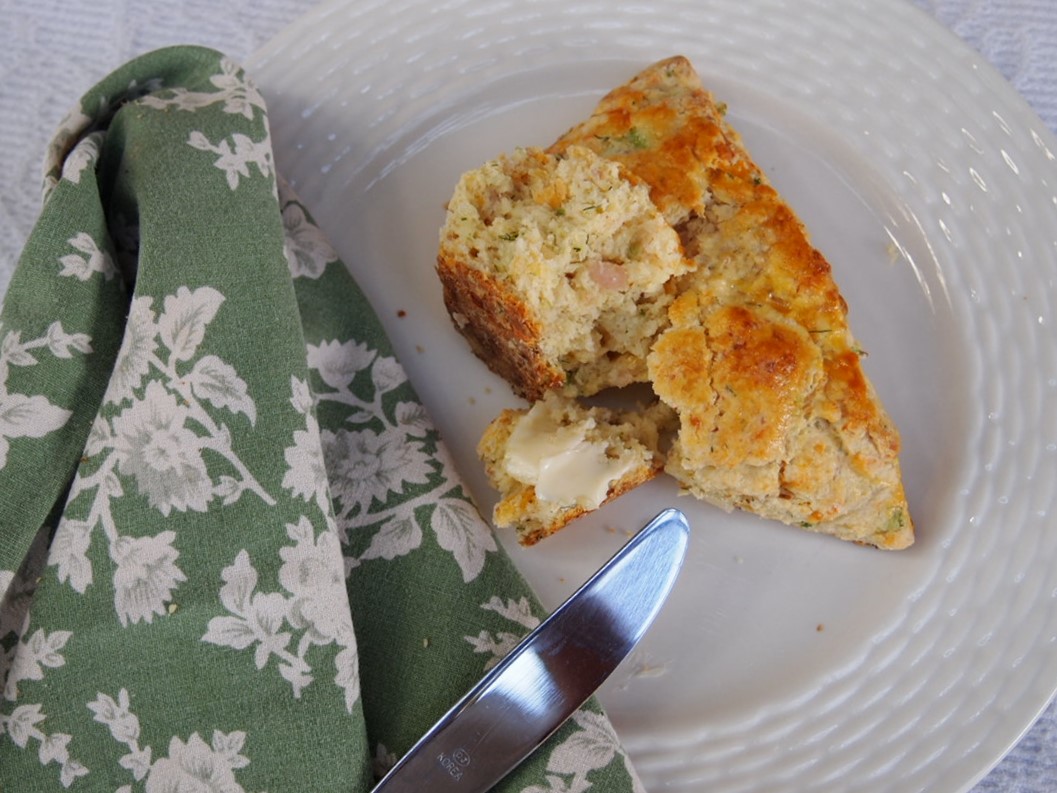
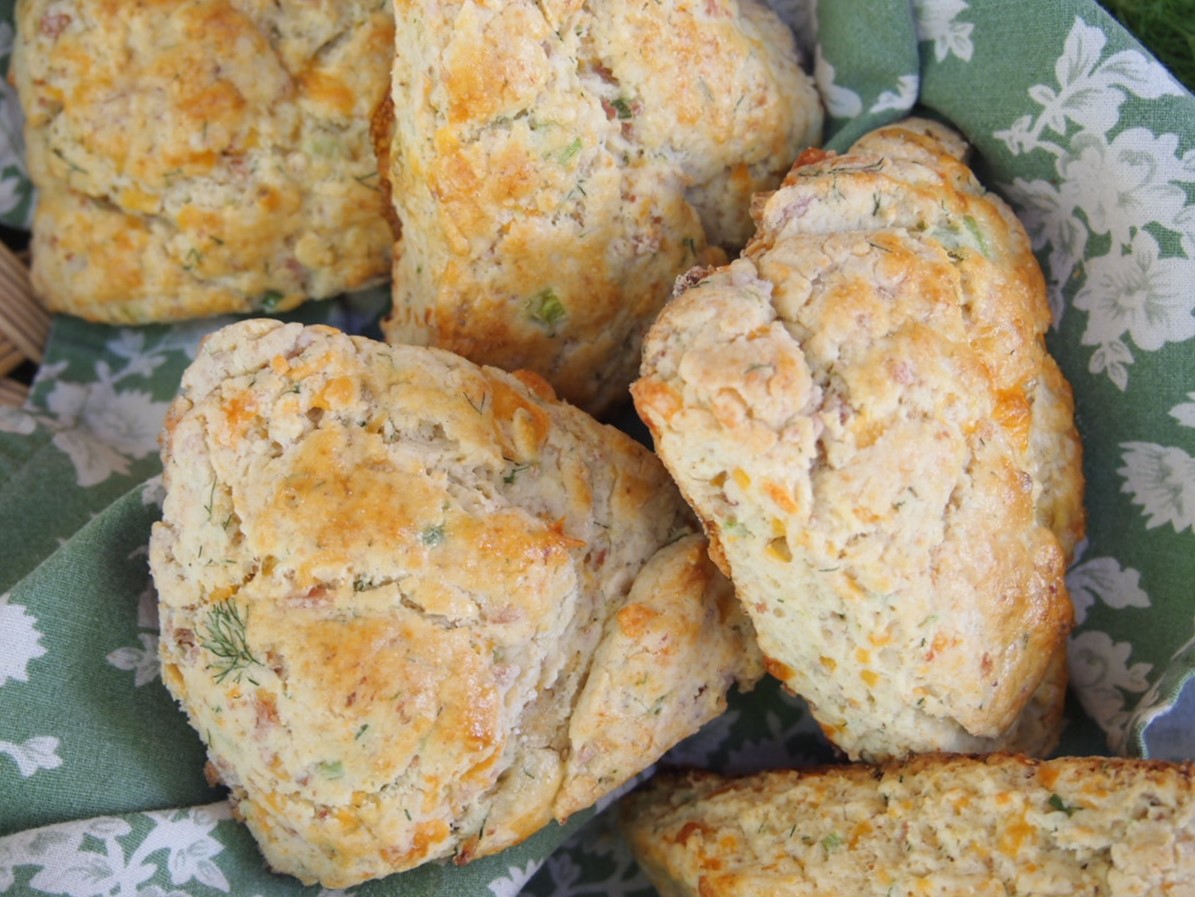
    Dill Ham and Cheese – This is a savory scone and fit a teatime picnic theme. Dill Ham and Cheese Scones

    Lemon Curd / Honey – I normally would serve lemon curd and Devonshire Cream, but with the savory Dill Ham and Cheese scone, I opted to drizzle honey on the lemon curd rather than have the additional sweetness of the Devonshire Cream. Here is the Lemon Curd recipe for your enjoyment.

    Sweets

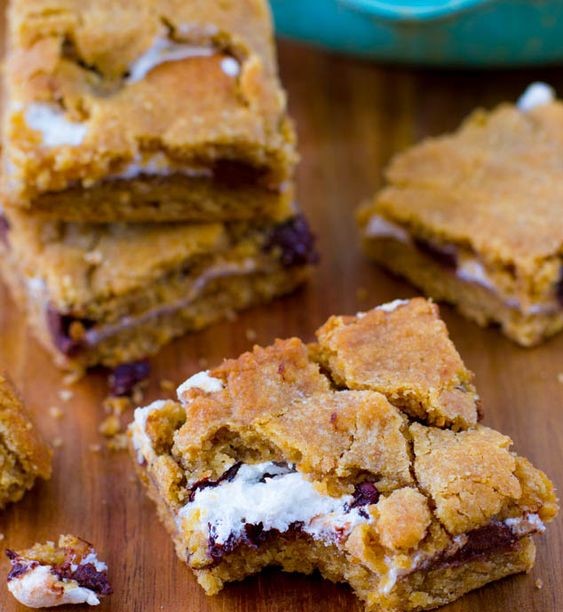
    Smores Bar – One of the traditional items for a picnic is to have a delicious Smore. Everyone gathers around the fire, toasting their marshmallows. This Smores Bar is that treat in one little tasty bite.

    Melon Balls – To help refresh the palate, cantaloupe and watermelon on a skewer. That simple. But no seed spitting please!

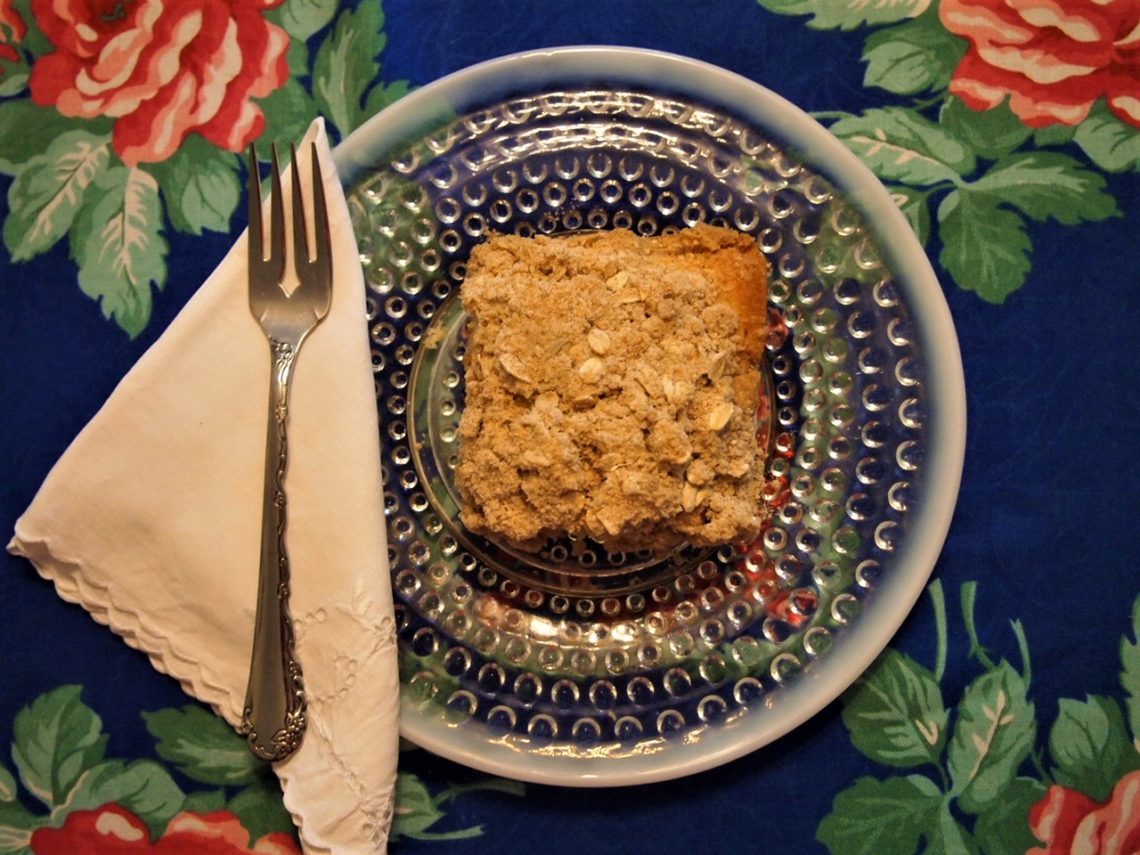
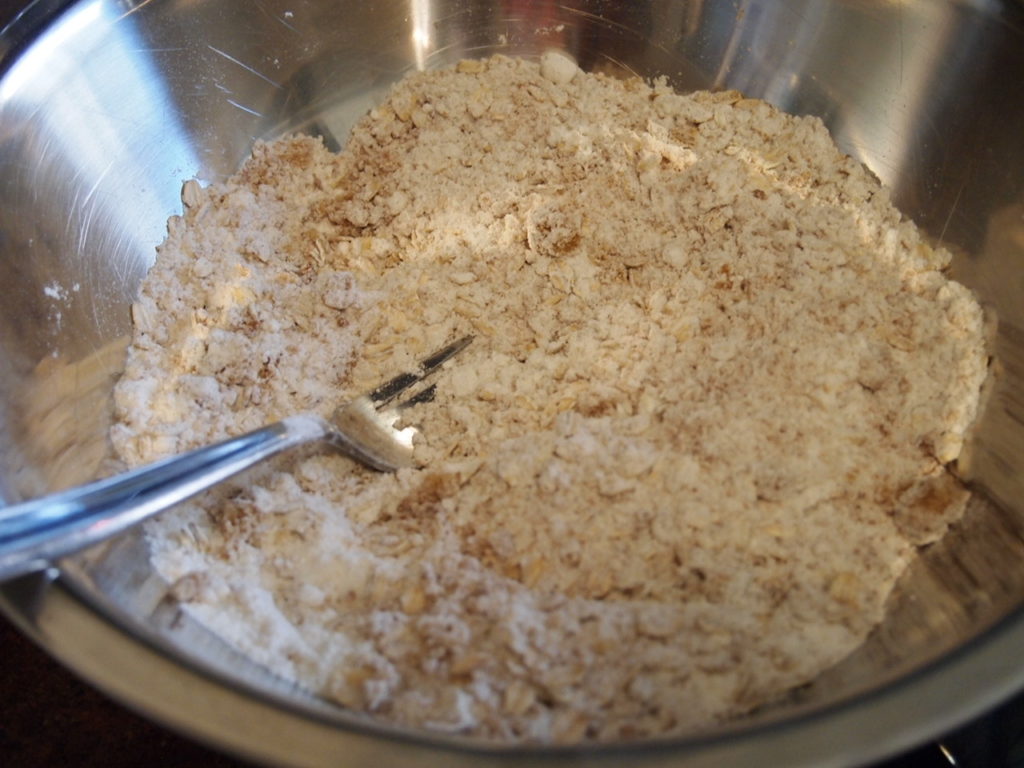
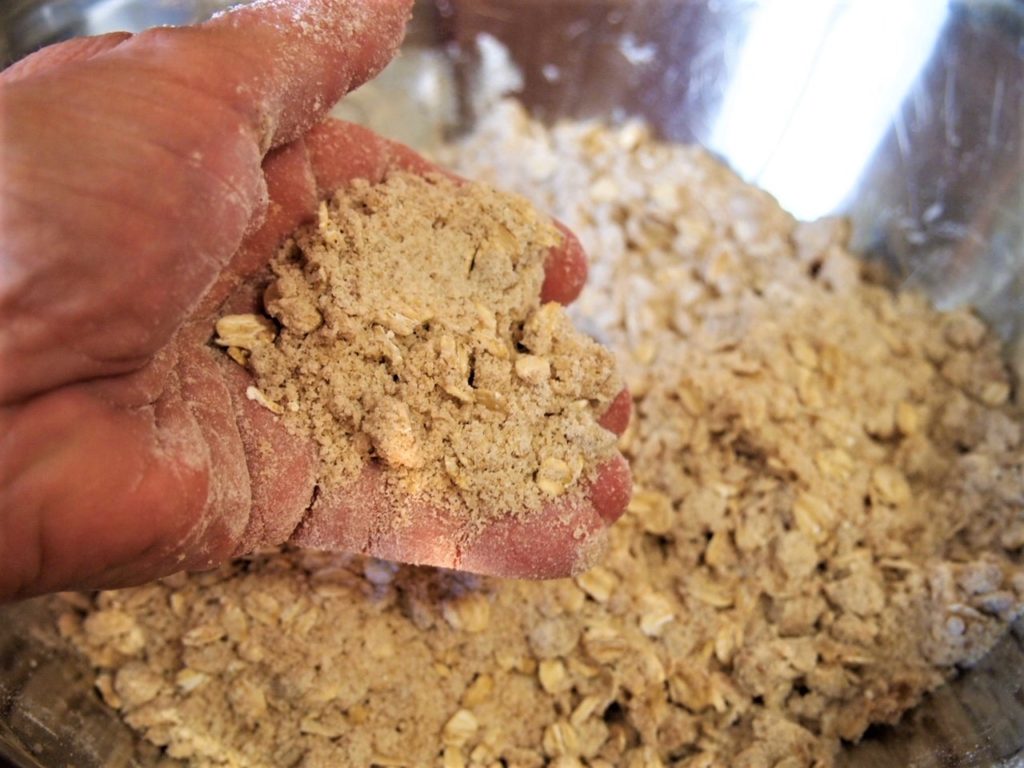
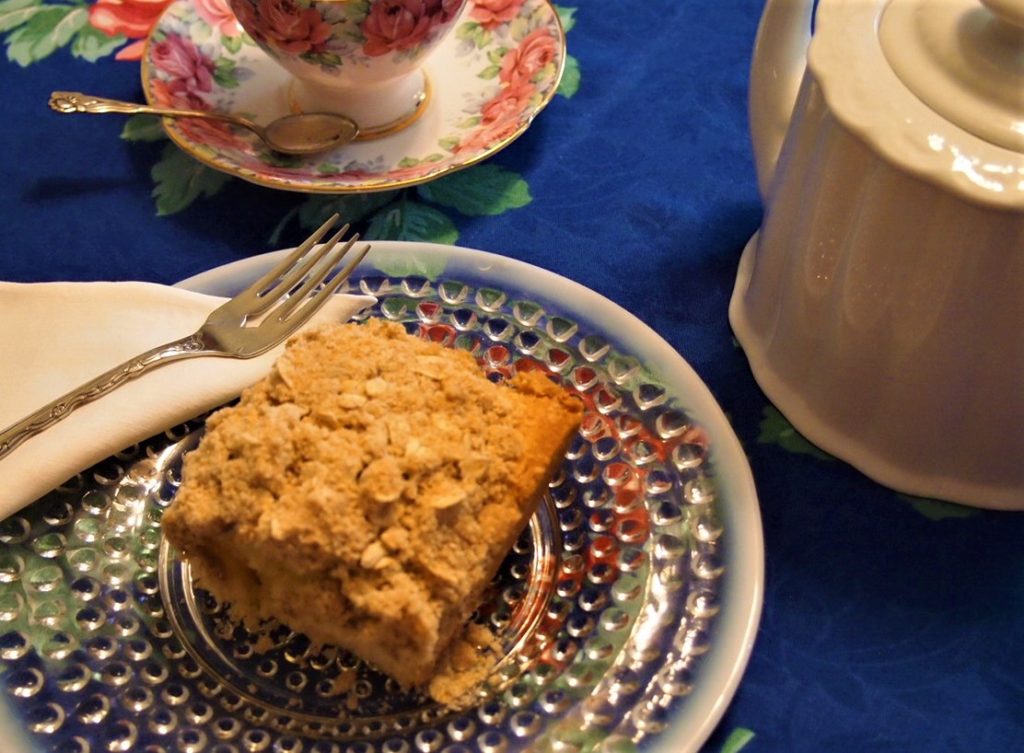
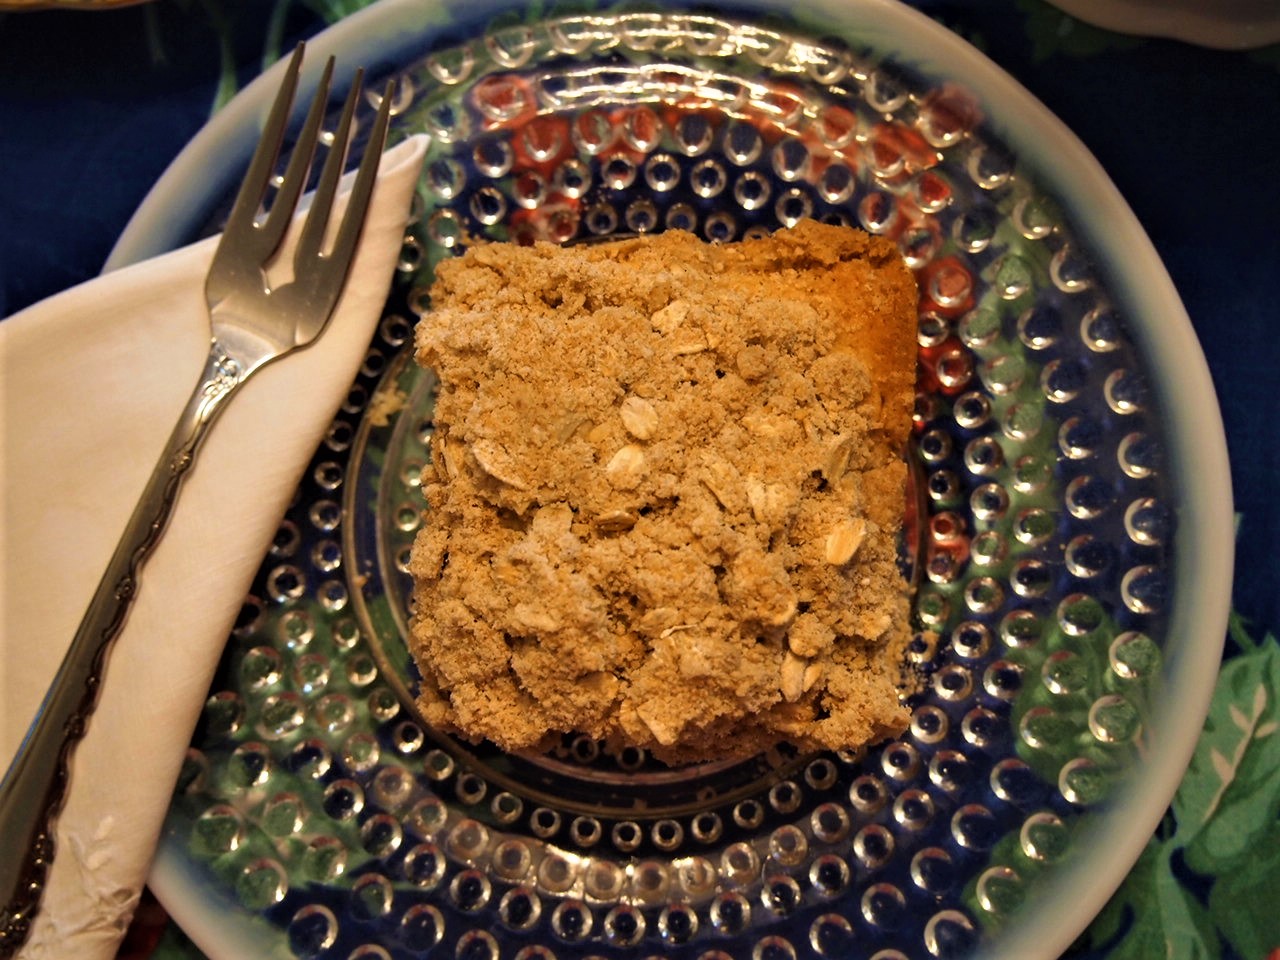
    Crumb Topped Apple pie – Another tradition is apple pie. This mini pie gave my guests a taste of that tradition with a Crumb Topped Apple Pie. The original recipe called for a regular size tin but I used a mini-muffin tin. I also used store-bought crust and topped with a crumb topping rather than a double crust. Small bitesize pies.

    Raspberry Mousse – This was a little treat of lusciousness, making a simple raspberry slurry and mixing it with whipped cream. This was served in a shooter glass, giving each guest just enough of the mousse to enjoy.
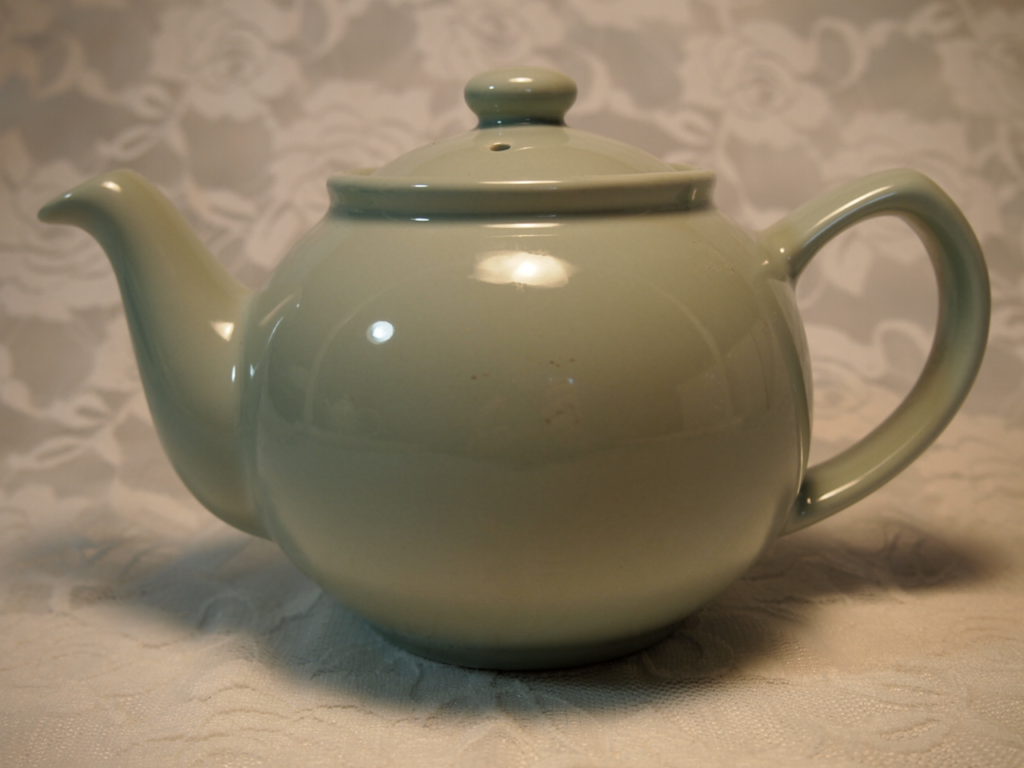
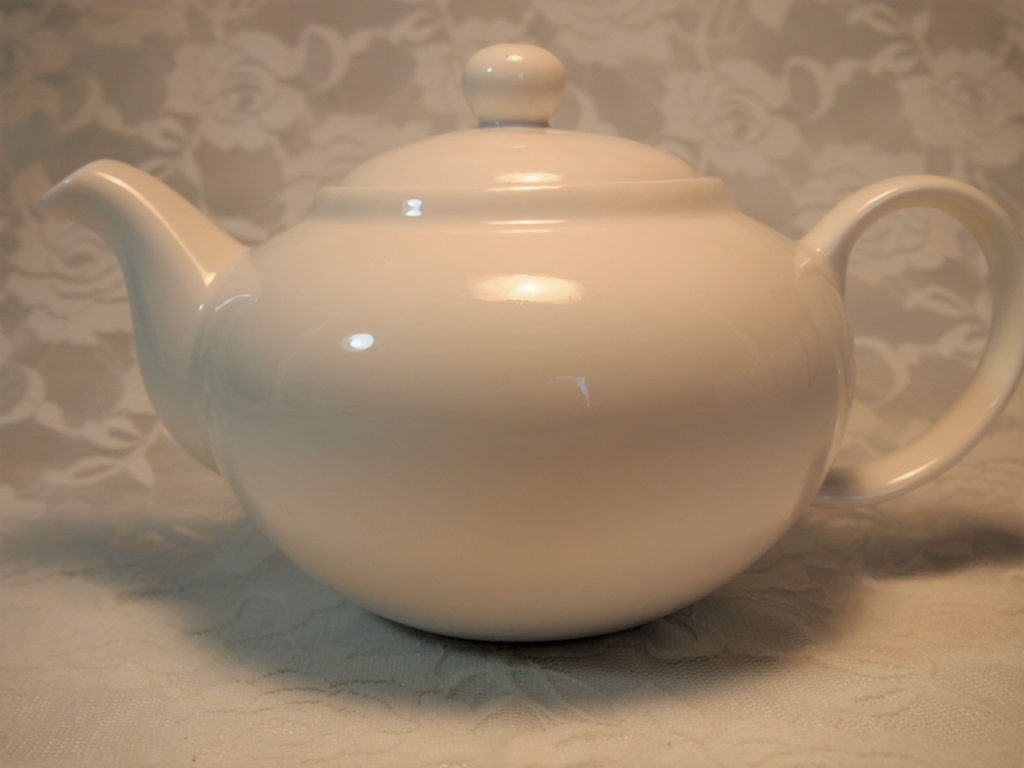
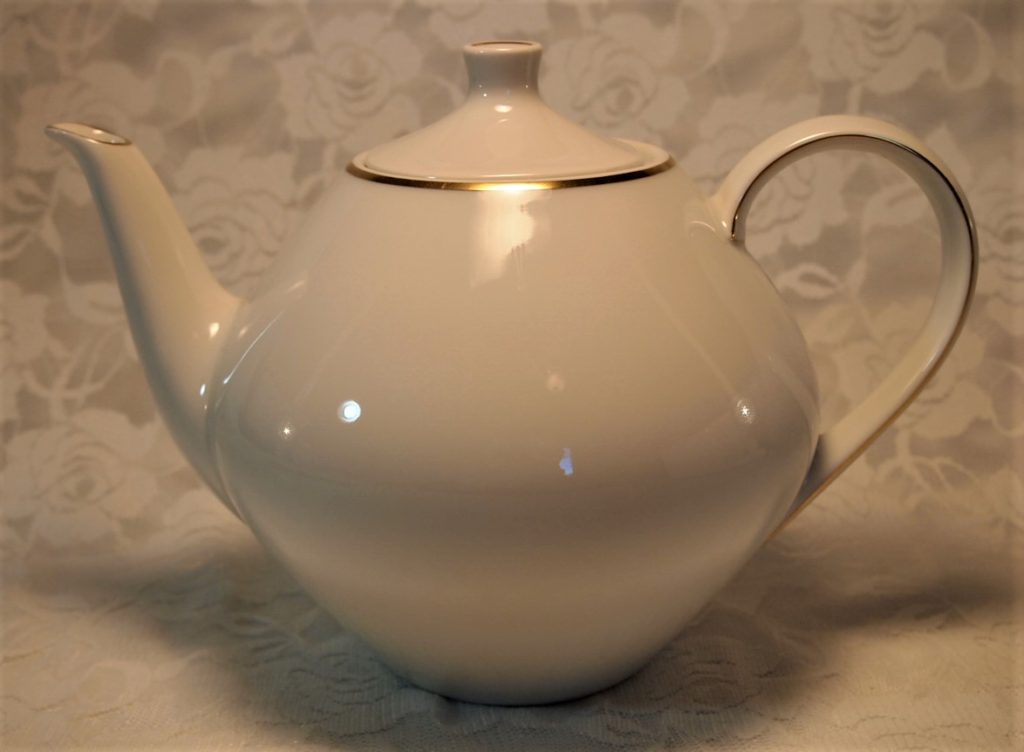
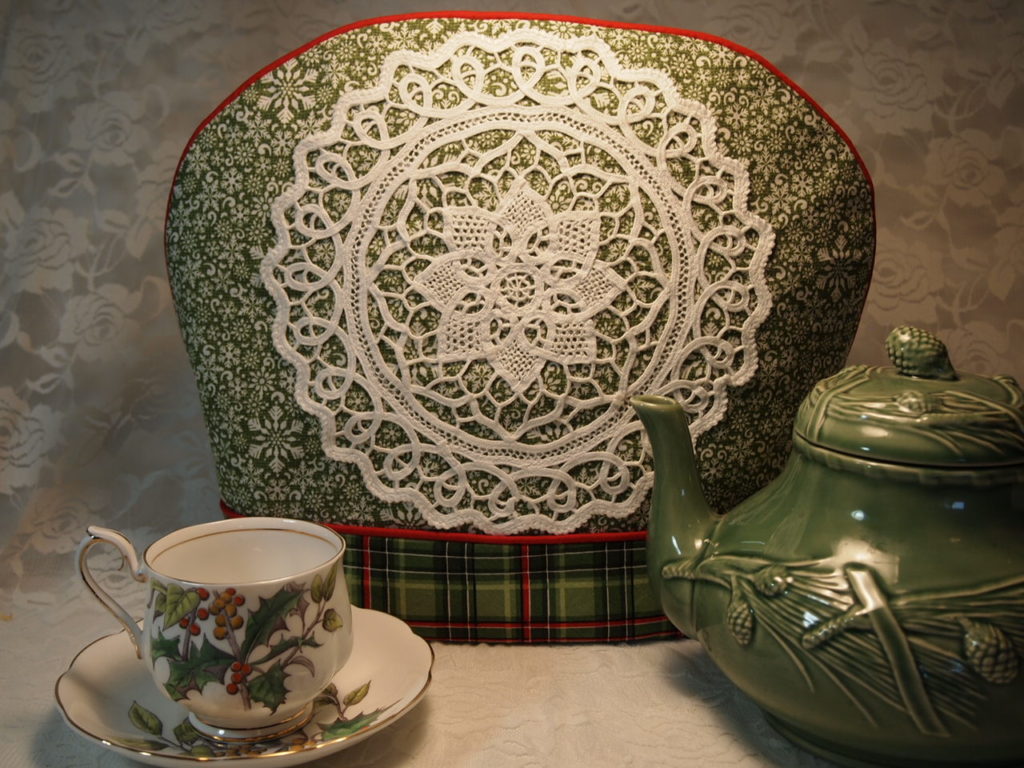
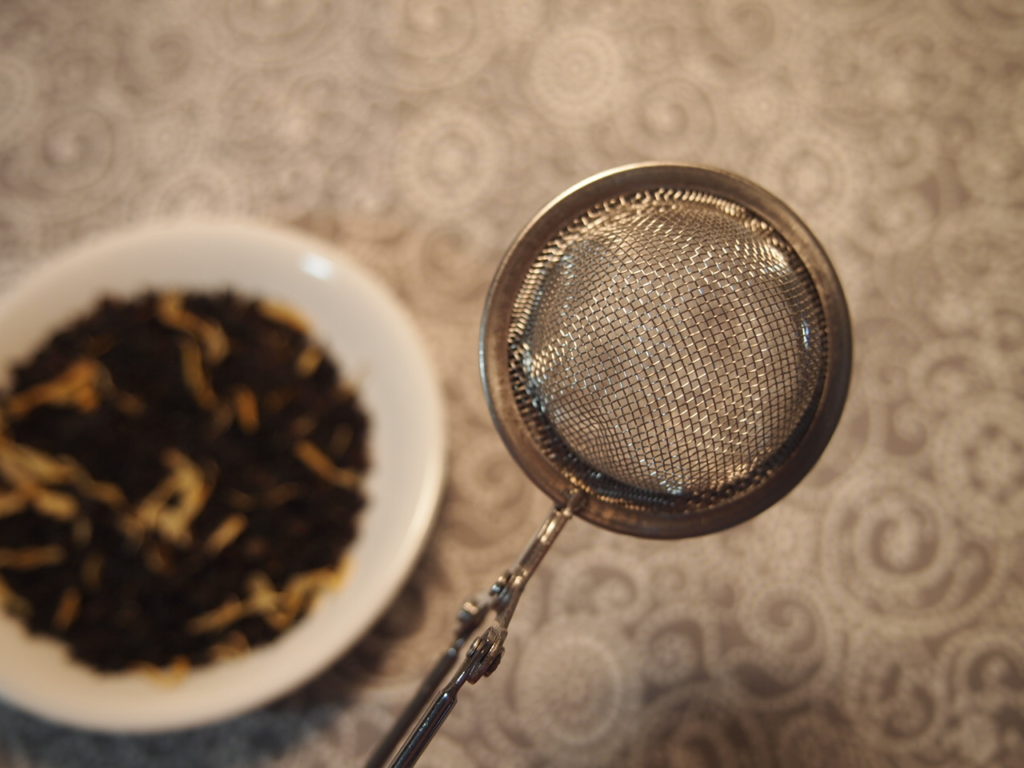
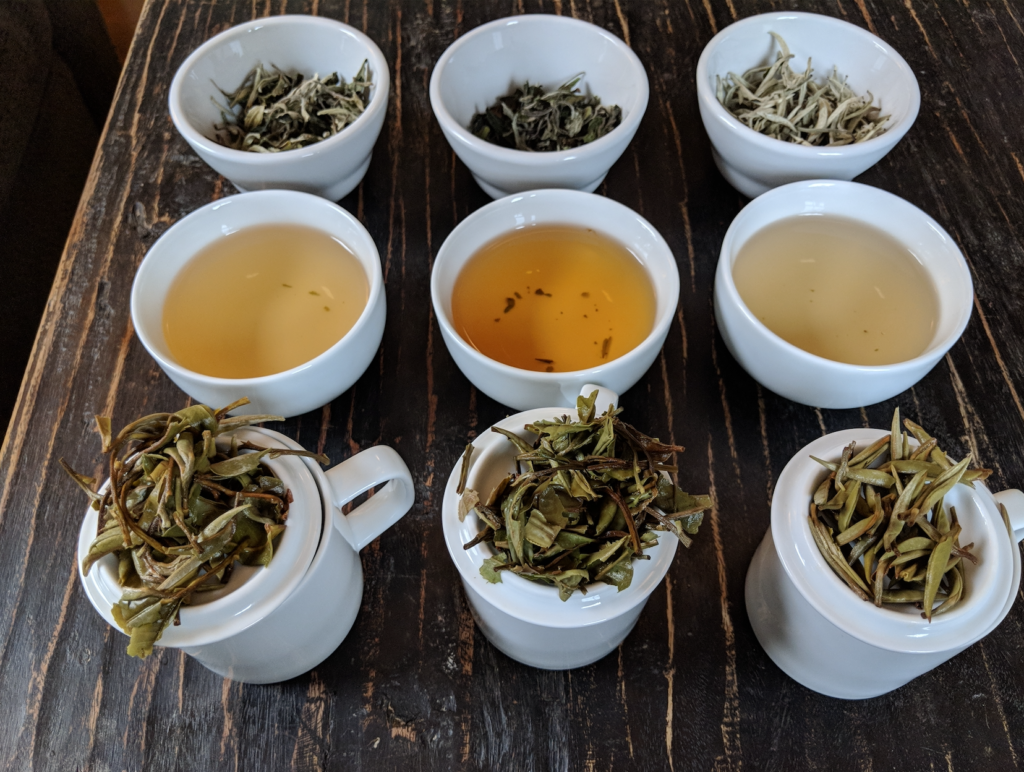
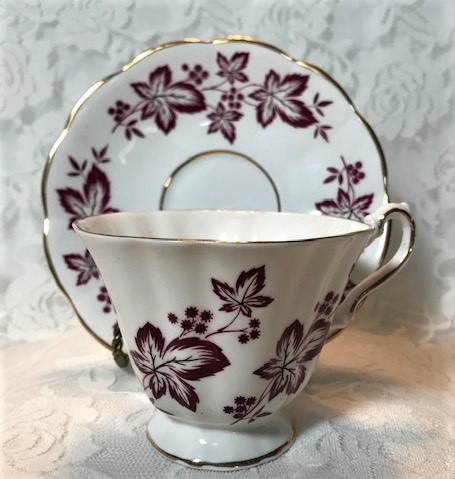
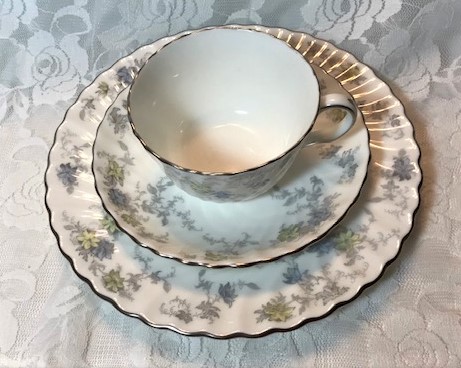
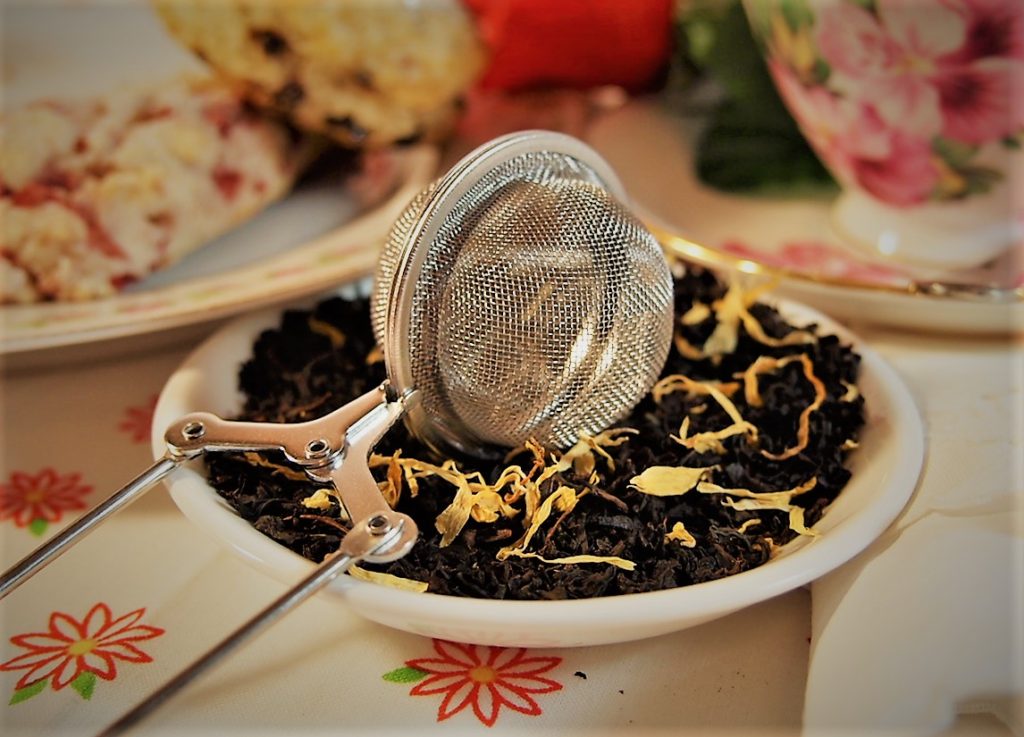
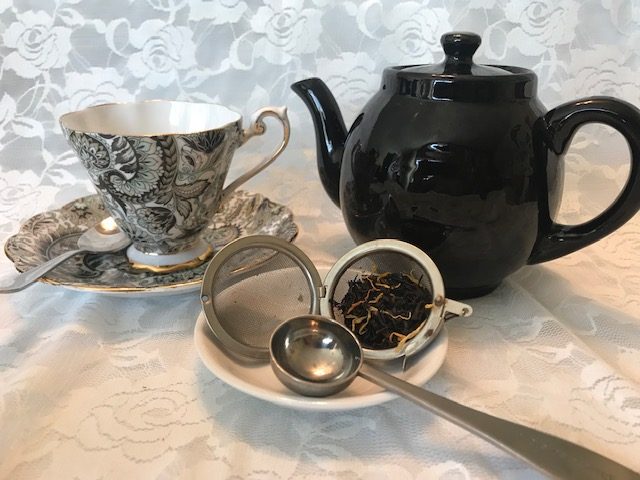
    The Teas

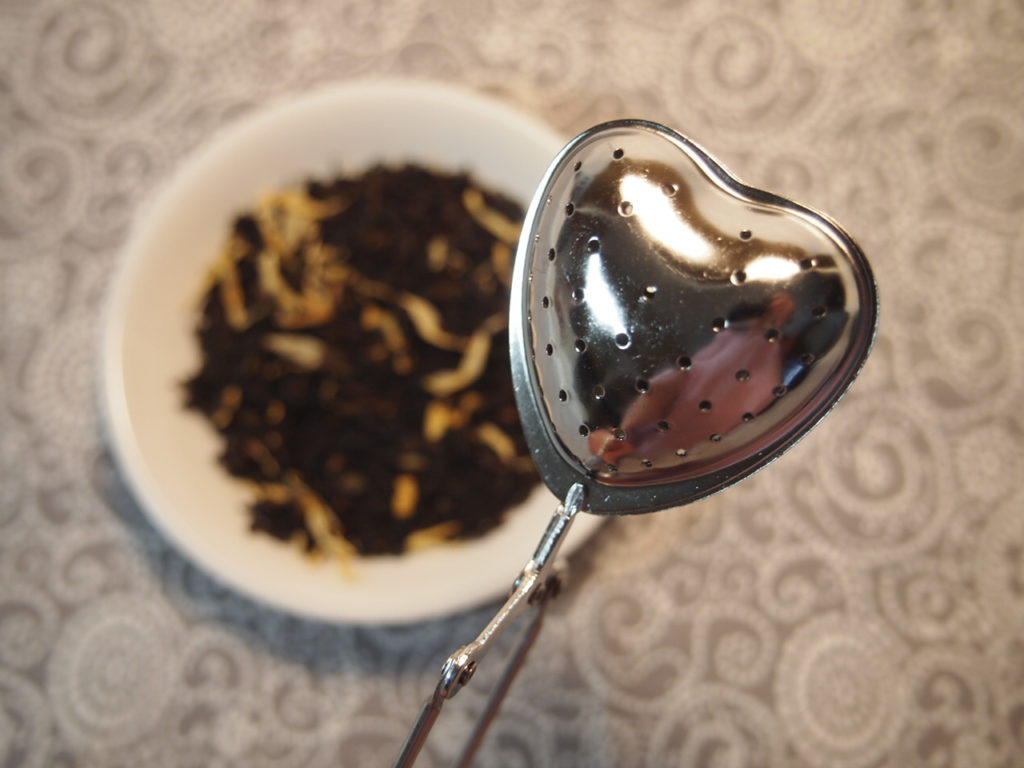
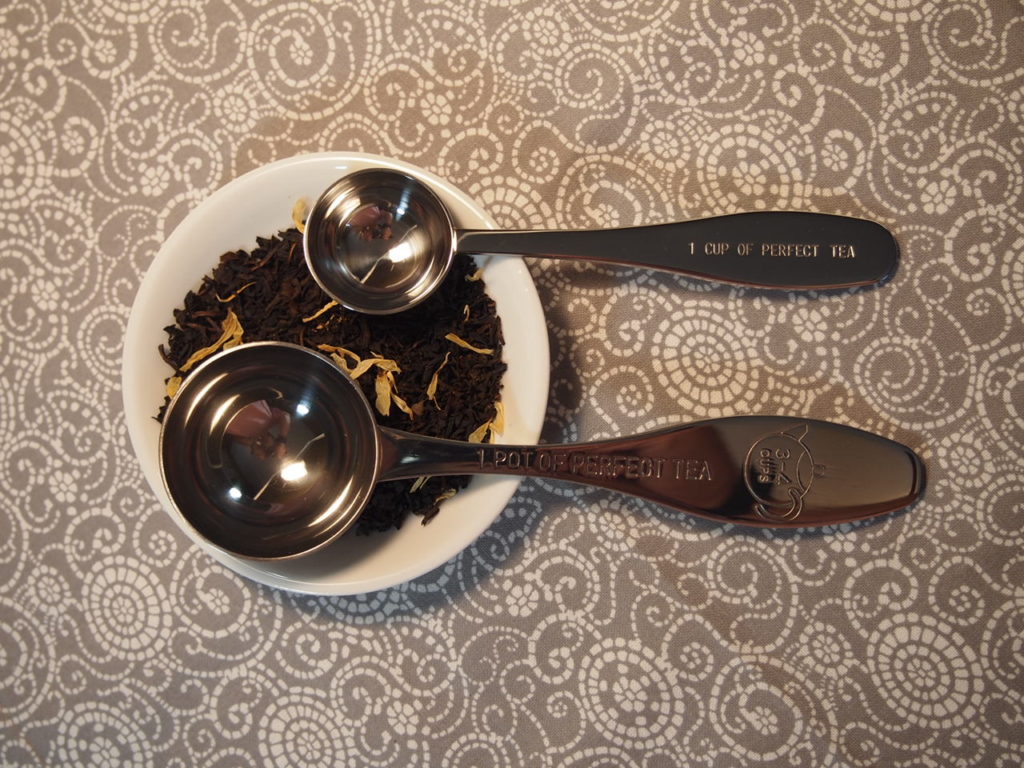
    I prepared these teas the night before and made sure they were very chilled. I offered ice to the guests but only if they wanted it. We had a lot of fun with these iced teas. I asked the guests to first sample the basic tea, then the variation of the basic tea. I did not offer lemon or sweetener during this tea – the goal was to have my guests taste and enjoy the teas in their pure form.

    Assam Tea / Assam Lemonade Tea – Assam is a great black tea. I first served plain Assam iced tea.

    Then served an Assam Lemonade Tea. This is basically using Assam tea as the basic tea and adding lemonade concentrate. Taste as you make this so it isn’t too sweet.

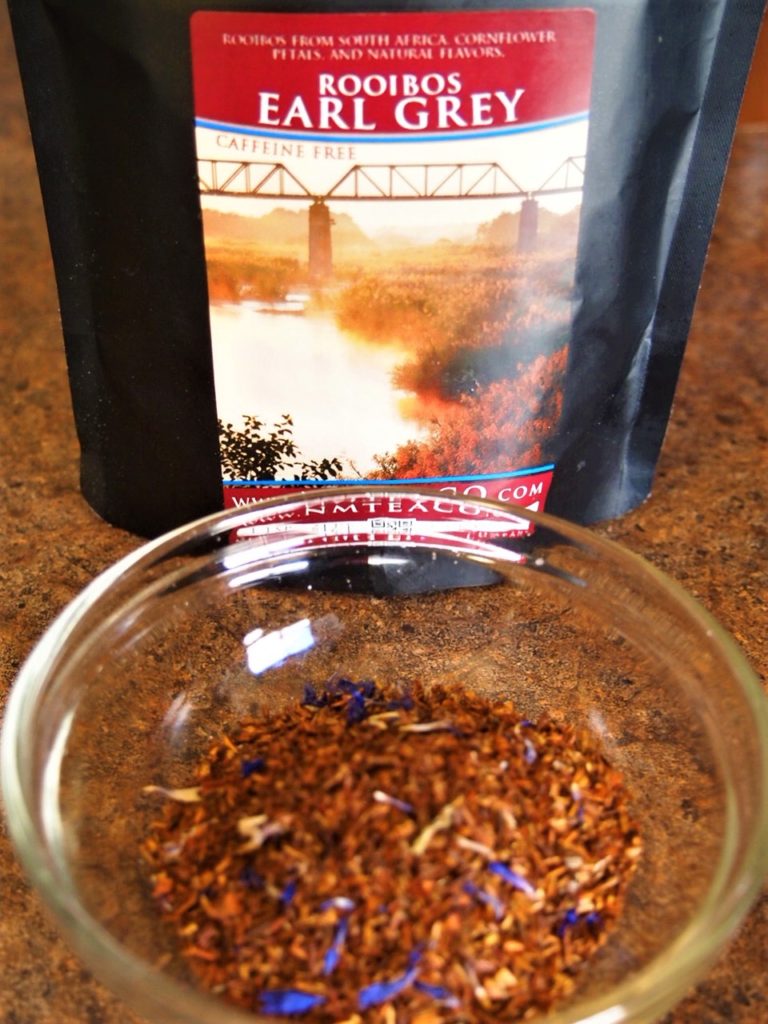
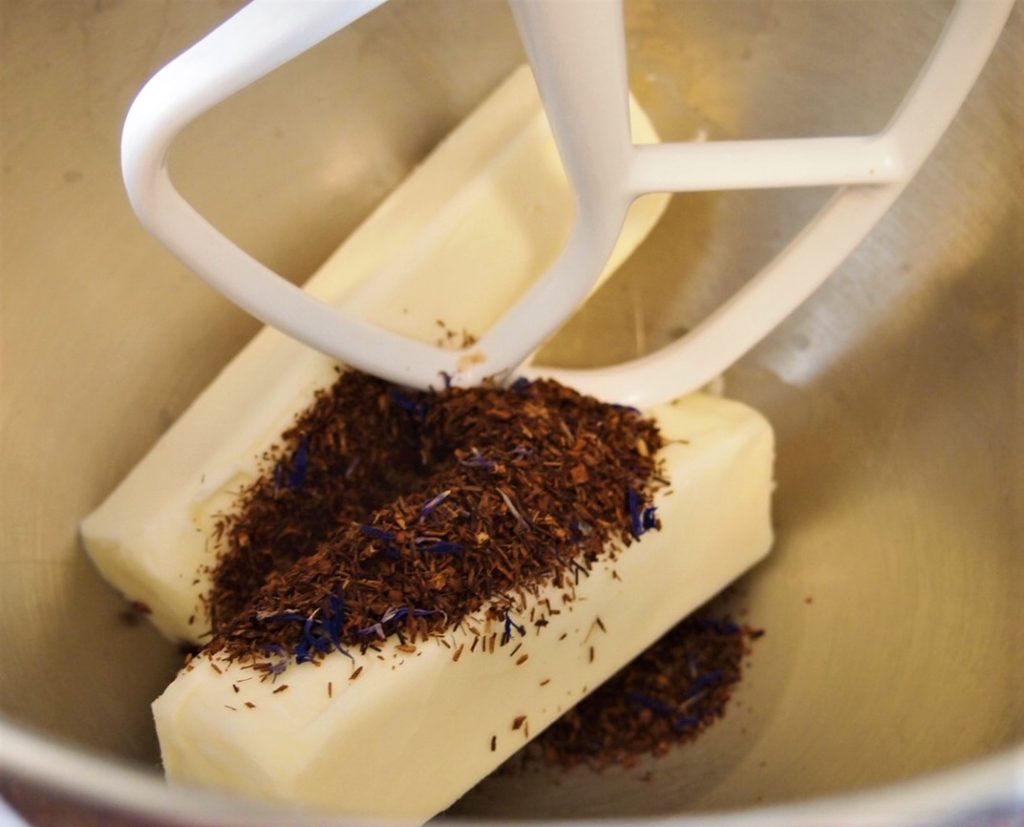
    Georgia Peach Rooibos Tea – This is an amazing Rooibos tea. Nothing added and no recipe other than chilling your brewed Georgia Peach Rooibos tea.

    Peppermint Tea / Sparkling Strawberry Tea – This was a delightful tea, I first served peppermint tea, which was great to help with all the food of the tea. It was very refreshing. The second portion of this tea was Sparkling Strawberry Peppermint Tea, which was simply adding a strawberry infused simple syrup to the tea.

    Strawberry Simple Syrup – Take 8-10 strawberries sliced. Add to 1 cup water and 1 cup sugar. Bring to a boil and simmer for 5 minutes. Add to your peppermint tea. Enjoy…its very refreshing and amazing!

    “There are few things so pleasant as a picnic eaten in perfect comfort.” W. Somerset Maugham

    Well at least….a teatime picnic! Give it a try, have fun with the menu, experiment with your teas

    and most of all, enjoy the company.

  • Uncategorized

    Holiday Shopping at The Steeping Teapot!

    It’s that time of year….when we begin to think about the Christmas holidays. We smell the scents of the season, hear the music playing and start thinking about gifting those special people in our lives. Holiday shopping is here!

    Holiday Shopping is Here! Vintage Gift box

    The Steeping Teapot is a place where you can go to get your afternoon tea gifts….even for yourself. The Steeping Teapot is a virtual store that allows you to pick and choose that particular item to make your gift memorable.

    Let me guide you through what we have for this season…and make some suggestions. Let’s view our Holiday Treasures.

    Teacups

    The Steeping Teapot has a beautiful selection of both holiday and every day teacups. Sit back and enjoy your tea in a teacup and saucer…it will help your day start out.

    Teapots

    You will need a good teapot. We have some great teapots and in particular some individual ones that make your teatime very personal. I am showing you a small 2 cup, 3 cup and 4-5 cup teapots – you have options. My personal favorite is the 3 cup – just enough for me in the morning.

    Tea Cozies

    I feel that a tea cozy is an essential to enjoying your tea nice and hot. We feature the BiltonCottage Cozies. These cozies are sold exclusively through The Steeping Teapot and are a piece of unique fabric art, many of which have vintage materials incorporated in their design. These cozies are keepsakes.

    Tea Accessories

    Let’s talk about the tea accessories. To complete the tea experience you will want to equip your present with all the pieces necessary. The Steeping Teapot has two kinds of infusers….mesh ball and a whimsical heart shaped infuser. Both are for individual cups of tea and work great to give that daily enthusiast a perfect cup of tea. Single Teabags are also available if you prefer having a teabag. Along with that are the Perfect Cup and Perfect Pot of Tea measuring spoons. I have these and use them all the time.

    Tea In A Box

    A very special gift that we have for the tea drinker who is just starting out is called Tea In A Box. This box includes all the elements of what your special person will need to get started in the delight of drinking loose leaf tea. Each box includes a teacup and saucer, teaspoon, mesh ball infuser, shortbread, tea and napkin – all in a special gift box. The color of the cup and the tea can be selected to your preference.

    Vintage Tins

    The Steeping Teapot offers a selection of vintage tins that can be used for so many things. Holding treasures, tea and of course cookies. Here’s just a little selection.

    Some new items to enjoy!

    We’ve recently added some beautiful tea towels, Christmas plates and a great Christmas mug.

    Holiday Shopping Is Here! Holly border

    Come make Christmas and the Holiday season special. Come over to The Steeping Teapot and shop to your delight.

    Remember that shipping is free at The Steeping Teapot. And if you have any questions about any of these items, just email beth@thesteepingteapot.com

    Holiday Shopping is here!  The Steeping Teapot holiday logo

  • Uncategorized

    Attending A Virtual Tea Festival

    When you would usually attend conferences in person, we are now exploring alternative ways to stay connected. Recently I had the pleasure of attending a virtual tea festival! That’s right…the International Virtual Tea Festival delivered on some great tea time activities.

    Just like when you attend a conference in person, there was a vendor floor complete with demonstrations and swag bags. Keynote speakers and main events were available for those attending as well as breakout sessions and classes. The whole function ran on one platform and used Zoom meetings to connect. Once you registered, you received your link and you were off and running. It was very well organized. My sisters and I donned our tea time hats and got ready to attend our first ever virtual tea festival.

    I want to share some of the classes I attended but first let’s hit the vendor floor!

    VENDOR FLOOR

    The vendor floor was open from 9AM to 5PM, so you had plenty of time to “walk the aisles” and see what was happening in the tea world. With over 40 vendors your schedule was full just checking out all the sites!

    Each vendor told their own story and displayed their products. As well, many had videos on teas and live sessions to interact with the vendor and other attendees. Contests were held for merchandise and downloads of all sorts. From recipes to educational as well as coloring pages for the young tea drinkers, there was an abundance of resources. And of course, you could just shop if you wanted. Just enter the booth and browse or connect through a group. Many of the vendors followed up with an email to say thanks and just check in for any questions. Just like a live conference, you could spend hours there.

    Pictures of available vendors for attending the virtual tea festival.

    ABOUT THE CLASSES

    Just a little about the classes. There were multiple classes available. Some live…some recorded…and some a combination or hybrid. You could easily have filled your day with online classes to participate in. I chose ones that I had an interest in. Though the subject matter was all about tea, the rest was anywhere from travels, cooking, history, or health benefits. It seemed like an endless catalog of options. Each instructor contacted you ahead of time to let you know what you needed for the class and posted any downloads you would need. A couple even had shopping lists for the class. When it came time to go to class, you simply went to your agenda and got started. Here’s a sample of the classes I attended.

    COOKING WITH TEA: How To Infuse Your Recipes

    COOKING WITH TEA: How To Infuse Your Recipes was taught by Marlys and Alan Arnold, owners of Adventures with Tea. These two have a wealth of knowledge and experience between the two of them and presented 9 techniques for cooking with tea. The class was presented in a hybrid model, meaning one portion was recorded and the second, a Q&A, was live. Chat comments and questions were going on all the time. I came away with recipes and techniques to continue my journey of cooking and baking with tea.

    Marlys and Alan Arnold, Adventures with Tea

    This dynamic couple have been cooking with tea for years. Their presentation was packed full of techniques and ideas. Here’s the list of techniques:

    1. Substituting tea for water in recipes
    2. Poaching
    3. Flavor pairings (see chart)
    4. Marinades and Brines
    5. Stock or Soup Bases
    6. Cold Infusions
    7. Blended
    8. Ground as a spice
    9. Sauces and Syrups

    From drinks to desserts, vegetables and meats, the opportunities to cook and bake with tea is only limited by your imagination. Encouraged to experiment with teas that you enjoy as a drink, this class opened up a world of possibilities. It was pretty amazing to see all the beautiful dishes that could be made with tea!

    COCKTAILS WITH TEA

    Well I have baked and cooked with tea, but I haven’t made cocktails with tea. Yes, cocktails with tea. This class showed you how to make cocktails that had a base of tea! I was intrigued. Agnieszka (Agnes) Rapacz, a Certified Tea Sommelier (German School) from Tea Gschwendner, taught Cocktails with Tea and went through 4 cocktails using 4 different teas –

    • Earl Grey MarTEAni
    • Proseco with White Tea Elderflower
    • Bergamot and Blossoms (using Hibiscus tea)
    • Hazelnut Moments (using Hazelnut Chocolate tea)
    Earl Grey MarTEAni for Attending A Virtual Tea Festival
    Earl Grey MarTEAni

    The Ear Grey MarTEAni uses Vodka that has been infused with Earl Grey tea. Add the vodka, Cointreau, shake and serve in a martini glass with a lemon twist. That easy and that delicious.

    This class was live and we could make the cocktails along with our presenter. From infusing a tea in vodka to mixing steeped tea with a simple syrup, these cocktails presented a delicious taste adventure for tea drinkers.

    Agnieszka Rapacz from Tea Schwendner from International Virtual Tea Festival
    Agnieszka (Agnes) Rapacz, Tea Gschwendner

    With the winter season coming soon, the class finished with t amazing drink!

    Hazelnut Moments
    Hazelnut Chocolate tea brewed in hot water for 2 minutes. Add 4 oz of Appleton Estate Jamaican Rum and 1.5oz of condensed milk. Mix and enjoy! Give me a blanket and a nice fire….a Hazelnut Moment would be perfect.

    As you can imagine, sometimes the technical aspect of things can be a challenge. This was the case for our speaker but she graciously connected with each of us, sent us a sample of the teas that were used in the drinks along with a teelamaas (German for measuring spoon). I am excited to give these all a try with my new teelamaas.

    ESSENTIALS OF TEA TASTING

    This was another great class and the last of the live sessions that I attended. It was Essentials of Tea Tasting by Suzette Hammond, an award winning teacher from being tea. This class was a live meeting where we went through the process tasting 4 different teas.

    Teas lined up for tasting with Suzette Hammond while attending a virtual tea festival
    Teas ready for tasting

    Suzette expertly guided us through the process of tasting teas, explaining about the equipment, each tea, temperatures, and most fun – the tasting process. She shared a tool that helped outline how to describe what you would taste and smell. The class focused on 4 teas with a broad range of tastes. We practiced looking at the leaf, examining the color when steeped to learning the art of slurping and sipping – this was a great class. Though a very preliminary step into the whole tea tasting journey, it equipped us daily enthusiasts with the tools to taste teas and began our understanding of the distinctions between different types of teas.

    READY FOR ANOTHER VIRTUAL FESTIVAL

    We thoroughly enjoyed the tea festival. Would we do it again? Absolutely. We would have enjoyed to be in person but this was a great alternative. And surprisingly, the time went by very quickly.

    I have only scratched the surface of what was offered. Not only in the speakers but in all the vendors and presentations. I have included the links of the 3 speakers – their sites are full of great information and products.

    After the festival, the organizers made sure that the sessions were made available for several months afterwards. There was only so much time in the day and space on the internet! Such a wealth of information and you could jump in and access at any time. No travel time, no lodging costs…..just a lot of great tea and fantastic memories.

    This was a great experience. I look forward to being able to attend in person, but in the meantime – I will absolutely be attending a virtual tea festival again!

    Ready to be attending the virtual tea festival

  • Uncategorized

    How to Meal Plan for the Holidays

    We are beginning the holiday season and all the preparations will be in order for those great family meals with everyone sitting around the table enjoying each other and the food. And along with that comes the hard work. In this post, I will share how to meal plan for the holidays.

    In a previous post, Thanksgiving Prep – Planning Ahead, I shared some of things I do to get ready for guests and then the big meal. This year, I am revisiting some of those same helpful hints and expanding on them with the actual tool I use. And though this year may need some adjusting, planning is always a good thing.

    The holidays and especially the meals can evoke some strong memories. The smells and the sounds bring us back to some delicious times. And if you are the preparer of those delightful meals, if can also mean some stressful times when you are trying to get everything done. You just sit down and its time for dessert. The dishes are barely finished and your guests are sneaking around the kitchen for something to eat! Well my secret is to plan ahead, prep ahead and then sit down to a completely prepared meal.

    I am a planner. I love planning and preparing ahead of a function. I do this for any tea I give, enjoying the menu development, and preparation or when I have guests come to stay at my house. The holidays provide a perfect time to use these skills and techniques. Let’s go through some tools and steps.

    IDENTIFY YOUR GUESTS

    I start the planning by identifying who will be coming to dinner. The number is important….so if Great Aunt Lolo and Aunt Barb are coming, then we need to set a couple more places. If they are bringing the gang, I will have to think on a larger scale.

    The next step is identify if they are coming for a few days or just for the main meal. You will use the same approach but just expand on the planning.

    This same approach is great not just for meal planning but also for things that you might need to do prior to your guests arriving – cleaning, making up rooms, shopping, etc. And the whole concept of this tool is just good planning and can be used for many things.

    PLAN THE MENU

    The first page of the planning tool is the menu. I will sit down and map out a menu, thinking of those favorite items that are traditional for the meal. If I am having guests, then I will map out each meal that they will be staying for. These can always change, but without a plan, it can become chaos.

    Once the menu is mapped out, I identify anything that my guests might want to contribute. Depending on the holiday and who is coming, I might reach out to my guests and see if they have a special dish they would like to bring. I won’t want duplicates but also want to include those special family dishes.

    THE TOOL

    1. MENU – The first in the packet, it becomes the platform for your planning.
      • Identify items for your menu.
      • PULL YOUR RECIPES….this is a crucial step for planning, shopping list needs, and prepping
      • Look at each item and determine if it can be made ahead. This is a great time to think outside the box (I will give you examples here in a minute).
      • Identify who is going to be making the dish. Might be all you or your Great Aunt Lolo.
    How to meal plan for the holidays - Menu Tool
    1. SHOPPING LIST
      • Once you have your menu outlined and have reviewed your recipes, you can put your shopping list together.
      • Your list may include several stores, different times, etc. Note this on your list.
    How to meal plan for the holidays -  Shopping List
    1. TASK / CHECK LIST
      • List out those things that you need to get done. This is my thinking list – what is it that I need to get done before the day? Brainstorm all the things that keep you awake at night.
    How to meal plan for the holidays - Task Checklist
    1. SCHEDULE – CRITICAL STEP
      • Taking your menu and your task / checklist, schedule out these items. From making your pies to setting the table. On some occasions, you need to start early. And you will want to start early to keep ahead of things.
    1. CALENDAR
      • I include a calendar. This is all about pacing, so using a calendar is helpful.
      • On the actual day, I will put times in for when I need to do critical things (put the turkey in the oven, etc). When I give an afternoon tea, the schedule for the day is posted in my kitchen so I am sure to stay on task.
    Holiday Meal Planning Tool - Planning Calendar

    PREP AHEAD HOW-TO’S

    So what can be prepared ahead. Well here are some suggestions.

    • If having guests, breakfast meals, casseroles, or items like coffee cakes or sweet breads. And of course scones!
    • Pies or their pie fillings can be made ahead of time. And even your dough can be made ahead and frozen for up to 6 months in the freezer. Or if you buy your pie dough, that can also be frozen before using. But even the pie fillings can be made ahead of time. I will make my mincemeat ahead of time and freeze it.
    • Stuffings / Bread – I generally make a sausage stuffing. The mixture of sausage and onion I can make ahead and freeze. I will also tear up the bread, let it dry and then bag it up.
    • Sauces like your cranberry sauce can be made ahead and easily frozen. Homemade cranberry sauce can be kept in your freezer for up to 2 months.
    • Appetizers are a great thing to be made ahead and frozen. Meatballs, sausage rolls are easily frozen. I will also freeze goat cheese in logs.
    • Your entree may be done early, depending on what you are doing. Like for Thanksgiving, you can roast your turkey the day before and have your gravy all ready. Just make sure to keep snacking fingers out of it until the main meal!
    • Any dish I look at, I will ask myself if it can be made ahead of time. Everything labeled and dated, my freezer will be bursting by the time the holiday comes around.
    How To Meal Plan for the Holidays - Freezer

    PUTTING IT ALL TOGETHER

    Using the last page of the planner and depending on the menu and plenty of coffee, I start my day early and get to checking off those items as their time stamp comes up. I have usually set the table the evening before and even labeled what goes in each serving dish – it helps expedite plating.

    When dinner comes, my guests are ready to sit and enjoy one another and so am I. This approach takes some deliberate effort but is well worth it. How to meal plan for the holidays will help you get everything done and still be able to partake in the meal and you will be able to sit and enjoy a very well deserved meal as your guests shower your with numerous compliments. And you will have the satisfaction of being able to put those feet up and be pleased with your efforts. Its all good as I like to say.

    How To meal Plan for the holidays - Feet up and resting after the big meal.
  • Uncategorized

    The Steeping Teapot – Grand Opening

    Welcome to the Grand Opening of The Steeping Teapot, an online store filled with vintage china and other tea time treasures. This store is owned by Beth Shields, the author of Teas The Season, a blog devoted to celebrating the art and enjoyment of tea.

    The Steeping Teapot is arranged so you can browse and enjoy walking through our virtual aisles, looking for just that right piece of china or tea time accessory. Sit back, relax and take your time.

    What’s In the Shop

    Click on the title and you can check out the many items for sale. Whether looking for china, maybe some tea or just tea time accessories – we have something for you. The inventory is always changing as new items get added so keep us a favorite! Let’s take a look stroll through the store.

    Tea In A Box

    I am especially excited about this new offering…..Tea In A Box. This gift is a great way to introduce someone special or even yourself, to the fun of drinking tea and steeping your own cup.

    Tea In A Box comes with a teacup and saucer, a teaspoon, a teaspoon infuser, a little treat of Scottish shortbread, a linen napkin, and some loose leaf tea from our English Tea Store collection. All contained in a special gift box, Tea In A Box comes ready to instruct and pamper all at the same time. And if you want something even more special, replace the teacup and saucer with one of the vintage teacups in The Steeping Teapot collection. Either way, you can’t go wrong. And of course…..as always, guidance and instructions along the way are included.

    A perfect gift as a single or even as a group gift. Check out Tea In A Box….a special tea time treasure.

    TEA IN A BOX
    INSIDE TEA IN A BOX - THE STEEPING TEAPOT
    INSIDE TEA IN A BOX

    So come on in and look around. If you have questions, feel free to contact me at beth@thesteepingteapot.com and will answer any questions you have.

    Its been a long journey but we’re finally open and excited. The Steeping Teapot gives you the chance to browse away to your heart’s content.

    Take your time….we’re always open and shipping is free!

  • Pumpkin Spice Tea Shortbread - Baking With Tea
    Uncategorized

    Pumpkin Spice Tea Shortbread – Baking With Tea

    Welcome to Part 2, Pumpkin Spice Tea Shortbread – Baking With tea. In this recipe, we will be making shortbread cookies with Pumpkin Spice Tea. This is the second in a series of shortbread cookies using tea infused in the butter. They are a delicious addition to your cookie repertoire adding a unique style of cookie. As with the Earl Grey Rooibos Shortbread cookies from Part 1, these Pumpkin Spice Tea Shortbread will follow the same recipe with some adjustments. So enjoy – its easy and fun to do.

    Ingredients

    • unsalted butter at room temperature
    • Pumpkin Spice Loose Leaf Tea
    • powdered sugar
    • all purpose flour
    • salt
    • Pumpkin Pie Spice
    • casting sugar

    Preparing the Tea

    This recipe uses a tea that I previously highlighted in Fall Tea Tastings. Its Pumpkin Spice Tea and is delicious. The loose leaf is rough and visibly you can see the spices, so the tea needs to be ground. I use a coffee grinder and it gives me a beautiful powder. And remember, if you don’t have a loose leaf tea, you can use tea from a teabag. Just pour the contents into a bowl and measure from there.

    Pumpkin Spice Tea loose leaf and ground.  From New Mexico Tea Company.

    Put the tea and the butter in your mixer. Using the paddle, blend the tea and butter and then let it sit. The tea and butter mixture should sit for 1 – 2 hours. The longer it sits, the more intense the flavor is. This is tea and it will continue to intensify as it sits – even in the baked cookie.

    Preparing the Dough

    Once the infusing time has passed, you can get ready to prepare the dough. Combine the infused butter with powdered sugar and blend. Then add the flour and salt.

    You will initially think that something is wrong with the mixture. It will be very dry and crumbly. But continue to let the mixer work and the mixture will turn into a nice soft dough.

    Turn the the dough out on a slightly floured surface and roll out to 1/4 inch thickness. I love this dough – so easy to work with. You can use any cookie cutter you like. I chose to use a 2 inch circular cutter which yields 30 cookies. The dough gives nice clean edges that stay when baked.

    Place the cookies on a prepared baking sheet. I like to use a silicon pad but you can also use parchment paper.

    I topped the shortbread with a simple mixture of Pumpkin Pie Spice and casting sugar. Mix these two and then just put a generous pinch on top of each cookie.

    Bake in a preheated 350 degree oven for 15 minutes or until lightly brown. I had to bake for 20 minutes, but started checking at 15.

    Pumpkin Spice Tea Shortbread ready for the oven

    Remove the cookies and allow to cool. You are now ready to enjoy!

    Pumpkin Spice Tea Shortbread - out of the oven and cooling

    Serving these treats

    These cookies have the nice flavor of shortbread infused with the essence of Pumpkin Spice – perfect for the fall. The sprinkling of spice and casting sugar give it an extra little sweetness. This cookie would be great with hot cocoa, coffee and of course a hot cup of tea!

    Pumpkin Spice Tea Shortbread - Baking With Tea

    Easy to make, using only 5 ingredients for your basic shortbread, these cookies will become a favorite for sure. As my second experiment with tea, I will definitely be making these again. Pumpkin Spice Tea Shortbread – Baking With Tea.

    Pumpkin Spice Tea Shortbread - Baking With Tea.  Plated and ready to eat.
    Print Pin
    4.67 from 3 votes

    Pumpkin Spice Tea Shortbread

    This easy shortbread recipe is infused with Pumpkin Spice tea. Topped with a Pumpkin Spice and Casting Sugar, this tea cookie is perfect for any afternoon tea or function.
    Course Dessert
    Keyword Baking with Tea, Pumpkin Spice Tea, Shortbreads
    Prep Time 15 minutes
    Cook Time 15 minutes
    Total Time 30 minutes
    Servings 30 cookies

    Ingredients

    • 1 cup unsalted butter at room temperature
    • 2 tbsp Pumpkin Spice Loose Leaf Tea
    • ½ cup powdered sugar
    • 2 cups all purpose flour
    • ½ tsp salt
    • 1 tsp pumpkin pie spice
    • 1 tbsp casting sugar

    Instructions

    • Using a grinder, grind the Pumpkin Spice Tea to a rough powder. This tea is generally very rough in its loose leaf form and will not infuse well unless it is ground.
    • Using your mixer with paddle, blend the Pumpkin Spice tea powder with the butter. Allow to sit for 1-2 hours to ensure full flavor of the tea.
    • Once the butter has been infused with the tea, preheat the oven to 350° and prepare your baking sheet with either a silicon pad or parchment paper.
    • Cream the butter and tea mixture with the powdered sugar.
    • Add the flour and salt and blend until a soft dough is formed. This will take some time and will initially start out very crumbly. Continue to mix and it will turn into a soft dough.
    • Turn the dough out onto a lightly floured surface and roll out ¼ inch thick.
    • Cut out cookies using a 2 inch circular cookie cutter.
    • Mix the pumpkin pie spice and casting sugar. Place a large pinch of mixture of top of each cookie.
    • Bake on prepared cookie sheet for 15 minutes or until lightly brown.
    • Allow to cool on rack.

    Notes

    This recipe has been adapted from https://www.sugarandsoul.co/downton-abbey-earl-grey-cookies/
    These cookies freeze well.  
    The longer the cookies sit the stronger the flavor intensify, like steeping tea. 
     
  • Earl Grey Rooibos Shortbread - Baking with Tea
    Uncategorized

    Earl Grey Rooibos Shortbread – Baking With Tea

    Recently I have started to cook and bake with tea. This is the first of two shortbread recipes that use loose leaf teas. Part 1 of this is Earl Grey Rooibos Shortbread – Baking With Tea.

    In an earlier post, I shared my foray into cooking with tea in Masala Spice Tea Meatballs. Now I am baking and I think you will find it absolutely delicious.

    Earl Grey is one of the teas that I have been sampling. In Fall Tea Tastings, I highlighted Earl Grey Rooibos Tea. Not my first choice in tea but I have been trying different versions of Earl Grey to find one I like. I think I have found my favorite. Its in a cookie! A shortbread cookie and its simple and has only 5 ingredients. So let’s get baking…no steeping involved.

    Earl Grey Rooibos Loose Leaf Tea

    Ingredients

    • unsalted butter
    • Earl Grey Rooibos loose tea
    • powdered sugar
    • all purpose flour
    • salt

    These cookies have a glaze that is just powdered sugar and lemon juice.

    Preparing the tea and butter

    The first step is to infuse the tea with the butter. For this recipe, you don’t need to grind the leaves unless you have a large leaf. I didn’t and so decided to just combine the leaves. Earl Grey is a beautiful tea and I like seeing the speckles of bergamot in the dough. Once blended, you will want to have the butter and tea sit for 1 – 2 hours. The longer it sits, the more intense the flavor is. This is tea and it will continue to intensify as it sits – even in the baked cookie. And if you don’t have loose leaf tea, you can use tea from teabags. Just open the teabags and measure out what you need.

    Just put the tea and the butter in your mixer. Using the paddle, blend the tea and butter and then let it sit.

    Preparing the dough

    Once the infusing time has passed, you can get ready to prepare the dough. Combine the infused butter with powdered sugar and blend. Then add the flour and salt.

    You will initially think that something is wrong with the mixture. It will be very dry and crumbly. But continue to let the mixer work and the mixture will turn into a nice soft dough.

    Turn the the dough out on a slightly floured surface and roll out to 1/4 inch thickness. This is a nice dough to work with. I chose to cut the cookies into 1 1/2 inch squares which yields 36 cookies but you can easily use a cookie cutter. A 2 inch circle works well and will yield 30 cookies. If you are doing the squares, get out your ruler and pizza cutter.

    Baking the cookies

    Place the cookies on a prepared baking sheet. I like to use a silicon pad but you can also use parchment paper. Bake for 15 minutes in a preheated 350 degree oven or until they are lightly brown. For me, it took 20 minutes. The cookies will smell of Earl Grey as they bake…very fragrant.

    Earl Grey Rooibos cookies ready for the oven

    Remove the cookies and allow them cool completely before you glaze them.

    The glaze is extremely simple. Combine the powdered sugar and the lemon juice. Drizzle the glaze over the top of the cookies. Allow them to rest while the glaze sets.

    Earl Grey Rooibos Shortbread Cookies with Lemon Glaze

    Serving

    These cookies have the great flavor of Earl Grey in a nice shortbread cookie. The lemon glaze really compliments the cookie and makes them perfect for an afternoon tea. A plate of these sweet cookies paired with a nice cup of English Breakfast or Lady Londonderry tea will set your day right. Bring along a friend….you will enjoy the afternoon.

    Earl Grey Rooibos Shortbread Cookies - plated and ready for serving

    Welcome to Earl Grey Rooibos Shortbread…baking with tea. Give them a try – I know you will enjoy them. Now a favorite of mine – I finally have an Earl Grey favorite.

    Earl Grey Rooibos Shortbread Cookies - Baking with Tea
    Print Pin
    5 from 14 votes

    Earl Grey Rooibos Shortbread

    This easy shortbread recipe is infused with Earl Grey Rooibos tea. Topped with a light lemon glaze, this tea cookie is perfect for any afternoon tea or function.
    Course Dessert
    Keyword Baking with Tea, Earl Frey Rooibos Tea Shortbread Cookies, Earl Grey Rooibos Tea, Shortbreads
    Prep Time 15 minutes
    Cook Time 15 minutes
    Total Time 30 minutes
    Servings 36 cookies

    Ingredients

    • 1 cup unsalted butter at room temperature
    • 2 tbsp Earl Grey Rooibos Tea Leaves
    • ½ cup powdered sugar
    • 2 cups all purpose flour
    • ½ tsp salt

    Lemon Glaze

    • 1 cup powdered sugar
    • 1-2 tbsp lemon juice

    Instructions

    • Using your mixer with paddle, blend the Earl Grey tea leaves with the butter. Allow to sit for 1-2 hours to ensure full flavor of the tea. NOTE – You do not need to grind the Earl Grey Rooibos tea…it will blend well with the butter. If you are using a large leaf tea, run through grinder.
    • Once the butter has been infused with the tea, preheat the oven to 350° and prepare your baking sheet with either a silicon pad or parchment paper.
    • Cream the butter and tea mixture with the powdered sugar.
    • Add the flour and salt and blend until a soft dough is formed. This will take some time and will initially start out very crumbly. Continue to mix and it will turn into a soft dough.
    • Turn the dough out onto a lightly floured surface and roll out ¼ inch thick.
    • Cut out cookies in desired shape. If cut in 1½ squares, will yield 36 cookies.
    • Bake on prepared cookie sheet for 15 minutes or until lightly brown.
    • Allow to cool on rack.
    • Once cooled, prepare the glaze. Combine the powdered sugar and lemon juice until thin stream.
    • Glaze top of cookies. Allow to rest until glaze sets.

    Notes

    This recipe has been slightly adapted from https://www.sugarandsoul.co/downton-abbey-earl-grey-cookies/
    These cookies freeze well.  
    The longer the cookies sit the stronger the flavor intensify, like steeping tea. 
     

  • Uncategorized

    Cake Mix Coffee Cake – a family favorite

    Many years ago, I found a recipe in a Better Homes and Garden magazine insert. I used to get the monthly publication, looking forward to the home improvement ideas, the gardening tips, but mostly the recipes. Tucked inside was an insert with several recipes that were made from cake mixes (you can see that I still have the insert!). I modified this particular one a bit and it quickly became a hit with my family. It is my Cake Mix Coffee Cake – a family favorite and more familiar to my family as Mom’s Coffee Cake. Its simple, fast, and delicious. I have used this recipe for years, making several for my son and his friends. I usually have several in my freezer and enjoy gifting to folks. Now a grandmother, I am still making this recipe in the exact same way and giving it to my grandchildren….and their parents.

    This recipe comes together very easily as it starts with a cake mix. You will want to make sure and buy a pretty good cake mix. I have tried using the inexpensive, non-label ones and they just don’t get the same lift as the name brand ones do. Though the recipe will call for pudding in the mix, either way works just as well.

    Here’s how it comes together…..

    • One yellow cake mix
    • Flour
    • Oil
    • Water
    • Egg
    • Vanilla
    • Brown sugar
    • Oats
    • Cinnamon
    • Butter

    Preparing the Batter

    The first thing you will want to do is prepare the batter. You will need one yellow cake mix, flour, oil, water, vanilla and eggs.

    Dry ingredients for Cake Mix Coffee Cake

    Empty the contents of the cake mix into your mixer. Reserve one cup of the cake mix for use in the topping. Add one cup of flour to the mixer. Follow with the egg, water, oil and vanilla.

    Adding flour to the Cake Mix Coffee Cake

    Beat this for 2 minutes on medium speed. The batter will be thick – not resembling cake batter prepared in the normal way. You will be spreading this in your pan.

    Prepared cake batter for the Cake Mix Coffee Cake

    Prepare a 9 x 13 pan with cooking spray. Spread the batter in the pan. Set aside while you prepare the topping.

    NOTE: This cake can be made into two 8×8 pans if you desire.

    Batter spread in pan for the Cake Mix Coffee Cake

    Preparing the Topping

    The topping is a very crumbly version of a streusel topping. Using the reserved cake mix, add 2/3 cup of flour, brown sugar, cinnamon and 1 cup of oats. I use regular oats but you can also use quick cooking if you desire. You can also add 2/3 cup of chopped pecans – though I usually don’t. This is optional. It just became one ingredient I didn’t have on hand for as many times as I was making this coffee cake.

    Add the melted butter and mix with a fork. I will generally end up using my hands to make sure it is all combined well.

    Serving and Saving

    Once you have taken the cake out of the oven and you have the smell of a freshly baked coffee cake wafting through your kitchen, be prepared for pieces to be cut and shared. This doesn’t last long. Allow the cake to cool slightly but its delicious warm.

    Single serving Cake Mix Coffee Cake

    In serving, you would think that this is for breakfast and that’s certainly true in the United States. Coffee cakes have been around as early as the 17th century. Originating from Germany, these early cakes actually had coffee in them and were enjoyed in the afternoon, similar to having tea. A little Kaffee and Kuchen to get you through the afternoon. In the United States, we enjoy them mostly around breakfast, but in my home – any time of the day works!

    Try this very simple, quick and delicious Cake Mix Coffee Cake. Cut in single servings, along with fresh fruit or just by itself, you are sure to enjoy it. I have even served with a little whipped cream and fruit. But whether in the morning or at any time, make sure to have some coffee or a nice cup of tea with your slice. It will become a favorite of your family.

    Cake Mix Coffee Cake
    Cake Mix Coffee Cake
    Print Pin
    5 from 8 votes

    Cake Mix Coffee Cake

    This is Mom's Coffee Cake that uses a yellow cake mix as the base. This delicious coffee cake is easy to make and has an amazing streusel topping. This will become a favorite!
    Course Breakfast
    Cuisine American
    Keyword cake mix, cake mix coffee cake, coffee cake
    Prep Time 15 minutes
    Cook Time 30 minutes
    Total Time 45 minutes
    Servings 12 servings

    Ingredients

    • 1 package yellow cake mix Can be with or without pudding in the mix but should be a good name brand. Reserve 1 cup of mix for topping
    • cup all purpose flour
    • ¼ cup oil
    • cup water
    • 2 eggs
    • 1 tsp vanilla

    STREUSEL TOPPING

    • 1 cup packed brown sugar
    • cup all purpose flour
    • 1 cup reserved cake mix Previously saved
    • 1 cup uncooked oats Can use regular or quick cooking
    • ¼ cup butter melted
    • 2 tsp cinnamon
    • cup chopped pecans Optional ingredient.

    Instructions

    • Preheat your oven to 350°.
    • For the batter, combine the cake mix, flour, oil, water, eggs and vanilla in mixer. Beat for 2 minutes on medium speed.
    • Spread the batter in a prepared 9×13 pan.

    STREUSEL TOPPING

    • Combine reserved cake mix, flour, brown sugar, oats and cinnamon in bowl.
    • Blend in melted butter until crumbly.
    • Spread topping on batter.
    • Bake in 350° oven for 30 minutes or until tester comes out clean.

    Notes

    Once baked, this cake can be frozen for up to 3 months.  Thaw and warm before serving.
    If desired, this cake can be baked in two 8×8 pans as well.
     
  • Recipes,  Uncategorized

    Ham and Cheese Dill Scones

    A savory scone is a great change from the traditional sweet scone. This Ham and Cheese Dill Scones will be a great addition to your scone recipes. It offers a great platform for many toppings but is superb warm and by itself with a little butter. The star in these scones is dill. With a long history dating back to 3000 B.C., dill has played a role in many cultures from Rome to Greece. In modern times, for many culinary delights. If you haven’t tried savory scones, this is an easy one with a ton of flavor. Let’s go through the steps.

    Ham and Cheese Dill Scones - Fresh Dill

    Ingredients

    • All purpose flour
    • Sugar
    • Baking Soda
    • Baking Powder
    • Kosher Salt
    • Buttermilk
    • Eggs
    • Unsalted Butter
    • Diced Ham
    • Cheddar Cheese
    • Green Onion
    • Fresh Dill

    Prepping Ahead

    As with other scones that you add things to, I have these prepared and ready to add. I want the dough to come together quickly, keeping the butter chilled as much as possible. So prepping ahead is key.

    Shred the cheese and chop the ham and set aside. Use a smokey ham to an added depth of flavor. Chop your dill and green onion as well. Have ready to add to the dough.

    Ham and Cheese Dill Scones - Ham, Green Onions and Cheddar Cheese

    In a separate bowl, mix the buttermilk and 1 egg. Set aside.

    Ham and Cheese Dill Scones

    Putting the Dough Together

    In the bowl of your food processor, put the flour, sugar, baking soda, baking powder, and salt. Pulse to combine.

    Ham and Cheese Dill Scones - Dry ingredients

    Cube the butter and add to the food processor. Pulse until combined into small pea-sized pieces. Add the liquid ingredients of buttermilk and egg – pulse until lightly combined. Then add all the goodies of ham, cheese, onions and dill. Pulse until combined.

    Ham and Cheese Dill Scones

    Turn dough out onto lightly floured surface and lightly knead just enough to bring the dough together. Form into an 8 inch round.

    Ham and Cheese Dill Scones
    Dough Ready To Be Cut

    Cut the scones into 8 large scones or 12 smaller ones. I like these to be hearty and go for the large size. Place the scones on a prepared baking sheet that you have lined with a silicon mat or parchment paper.

    Take the second egg and create an egg wash. Add 1 tablespoon of water and beat into the egg. Brush the top of the scones.

    Baking, Storing and Serving

    Preheat your oven to 425 degrees. Bake the scones for 15 – 20 minutes or until a beautiful golden brown.

    These scones can be frozen baked and then reheated at 350 degrees. These can also be frozen unbaked and then baked as you would if freshly made.

    Ham and Cheese Dill Scone

    But these Ham and Cheese Dill Scones are best served fresh and warm from the oven. Paired with some butter, these scones are great with breakfast. Have a big basket ready for brunch and your guests will be satisfied and ready for more.

    Ham and Cheese Dill Scones
    Print Pin
    5 from 7 votes

    Ham and Cheese Dill Scones

    A savory scone with ham and cheese and dill to enhance the flavor. This recipe yields a hearty scone perfect for a breakfast or afternoon tea.
    Course Scones
    Keyword afternoon tea scones, dill, ham and cheese
    Prep Time 15 minutes
    Cook Time 20 minutes
    10 minutes
    Total Time 45 minutes

    Ingredients

    • 2 cups all purpose flour
    • 1 tbsp sugar
    • ½ tsp baking soda
    • tsp baking powder
    • ½ tsp Kosher salt
    • ½ cup buttermilk
    • 2 eggs 1 egg will be used for egg wash
    • 8 tbsp unsalted butter, chilled
    • ¾ – 1 cup diced ham
    • ¾ cup shredded cheddar cheese
    • 2 tbsp chopped green onion
    • 1 – 2 tbsp fresh dill, chopped Depending on how much dill flavor you want.

    Instructions

    • Preheat oven to 425°. Prepare baking sheet with parchment paper or silicon baking sheet.
    • Place flour, sugar, baking soda, baking powder, and salt in food processor. Pulse to combine.
    • In separate bowl, mix buttermilk and 1 egg. Set aside.
    • Cut the chilled butter into cubes and place in the food processor. Pulse until butter is combined as small pea size pieces.
    • Add buttermilk and egg mixture. Pulse until begins to form dough ball.
    • Add chopped ham, shredded cheese, and chopped dill. Pulse to combine but do not over mix.
    • Turn dough out onto lightly floured surface. Knead 1-2 times to further combine and shape into an 8 inch round. Cut into triangles. This recipe will yield 8 large scones or 12 smaller scones.
    • Take second egg, beat slightly and use as an egg wash on the scones.
    • Place the scones on the prepared baking sheet. Bake for 15-20 minutes.
    • Remove from over when golden brown.
    • Cool on rack. °

    Notes

    These scones are best when served warm and with fresh butter.
    Though this recipe uses a food processor, these scones can be made by hand.
    Scones may be frozen unbaked – thaw and bake in 425 degree oven as above, 
    Scones may also be frozen baked – then thaw and place in 350 degree oven until warm. 

  • Memories,  Uncategorized

    What fills your cup?

    From the title of this post, you might think that I am asking whether you are drinking tea or coffee? What are you steeping? That would be my topic….right? Actually, I am taking a different road and asking…what fills your cup with joy? Sometimes that gleeful feeling or just contentment, joy comes in many forms and may be unique to you. Today, a moment of good reflection that has you ask yourself the question – what fills your cup?

    I like to take time to reflect on what brings me joy and contentment. It helps me to stay focused on priorities and what really matters. In the bible, we are instructed to remember those times when we have been delivered or protected, when we are joyful and content. So I am taking a moment to share with you, what fills my cup in hopes that you might be able to find the same moments. Come along on a short journey that I hope gives you some smiles.

    Here are some things that bring me joy.

    My faith…ultimately centering

    Some time in the morning, to set the stage for the day, to inspire – to encourage – to readjust is critical to me. And doing this through study and time in the bible is key. When I have stepped away or don’t make time for whatever reason, I always find myself running back to this foundation.

    What Fills Your Cup? Morning devotional with tea
    My Familymy sisters

    Family brings me joy. My children, now grown and with families, my sisters who have become my closest friends. Now admittedly, growing up we were not always close, but now – we are joined. We all share a love of afternoon tea and vintage china. Even in a virtual moment, we are crazy together and yet ground each other as we go through life’s journeys. We have each other’s backs….this brings me joy.

    My Grandchildren…and their feet

    Grandchildren fill my cup. I will frequently turn to them, cup my hands in a heart and ask them “What’s filling my cup?” Then pretend to explode and over fill my cup as I point to them. So many things come to mind but one in particular are their little feet. In shoes, in slippers, or barefoot, littles feet bring me joy.

    Banging loudly on my piano, I listen while the little hands gleefully pound out a tune only to see little feet dangling at the bench. I remember that I started the same way in my grandmother’s house. Along with little bump-toe sneakers, a loud concert make me smile.

    What Fills Your Cup? Little Feet in Bumptoe Tenniies at the piano.

    Or just slippers….little chubby feet squeezed into slippers and just enjoying some breakfast. These little feet remind me of old man slippers and I chuckle every time I see this.

    What Fills Your Cup? Little slippered feet at the breakfast table

    Those moments when girls get to be girls, even when they are little, painting toes those favorite colors (of course with glitter) is a special moment. If you have done that before, you know the challenge of little toes…but precious moments of feeling like a big girl….”can you blow on them to make them dry quickly?”

    What Fills Your Cup? Little painted toenails

    What little girl doesn’t enjoy wearing dress-up shoes, even if on the wrong feet. You can hear the scuffing through the house, unbalanced and wobbling as they make their way around probably doing the morning shopping.

    My Afternoon Teas…..let me serve you

    One of my favorite things is to serve tea. Whether breakfast time or afternoon tea, in a group or just together, I love to create the experience for my guests. In the planning, the preparation and the serving, it delights me to see people refreshed. It can be simple or lavish, knowing that you feel pampered or special just fills my cup.

    What Fills Your Cup? Afternoon Tea table for Friends
    My Home…my sanctuary

    I have moved several times in my life and in each house, I find a point of sanctuary, where I can sit and reflect. It is a place that I can have that quiet moment to think, pray, or just pause. With a cup of tea and my feet up….I take a deep breath and I find joy and contentment, a sanctuary for not only myself but for others as well.

    What Fills Your Cup? Feet up and enjoying a moment with tea
    My Stepping Stones….

    Le’ts break this into some pragmatic steps that you might be able to apply to your life. I don’t claim to be an expert – but a sojourner who has found a path. Add to that journey, miles and years and you begin to look back and learn, look forward and continue. Here are some common sense steps that I try to do on a daily basis.

    • Every day….begin to set the stage with a heart of gratitude. When I wake in the morning, I will literally say “Good morning Lord” and “thank you for the day.”
    • A morning time of reflection. I start with spending time alone and in my bible. It focuses me and keeps me level.
    • List out my blessings. Deliberately list out the good – the blessings, the challenging – lessons learned and ….but always end on the blessings. Especially at the end of the day, while I lay in bed and will go through my list..
    • Compartmentalize. During a difficult time in life, a good friend taught me how to envision a box to put those things that were hard in my life. I would deal with them and put them in the box. Then up onto a top shelf went the box, put away. If I am unnecessarily dwelling on things, I learn from it and then toss it into my mental box and put it on my high shelf.
    • Surround myself with positivity. Seems simple and almost offensive at times when all you hear and see is the difficult times in the world, but I know that aligning myself with positive people, identifying those things that work well for me makes me more joyful and ready to help others along the way. Identify those points of negativity and reframe it.
    • Plan my day. I admittedly am a list person even for the routine daily stuff, so planning for me is helpful. As much as possible, plan the day. Idle time is not good for the soul.
    • Don’t take myself too seriously – I think that life in all its seriousness provides us times of humor and for me, that frequently involves laughing at ME. I love to laugh at myself, even making sure that my friends and family know what silly or stupid thing I may have done, wishing them a good belly laugh even at my own expense.
    • There is more than just me in this world. The world is big and there is pain and suffering. Its helpful for me to keep my place in it all in perspective….I guess you might say that you strive for humility. Take care of myself but realize, its not all about me.
    What Fills Your Cup? Pooh and Tigger supporting one another

    Now on to making a cup of tea and readying an afternoon tea, I thank you for coming along….for taking a moment to hopefully be inspired to ask yourself….“What fills my cup?”