Looking for a healthy cream soup? With sauteed chicken and thickened with avocado, this is exactly the soup for you. I developed this recipe to fill my cravings for a thick and creamy soup but also to meet my need for healthy fats. I also had many vegetables and quickly ripening avocados that I needed to use up. Cream of broccoli and Spinach soup is the perfect answer.
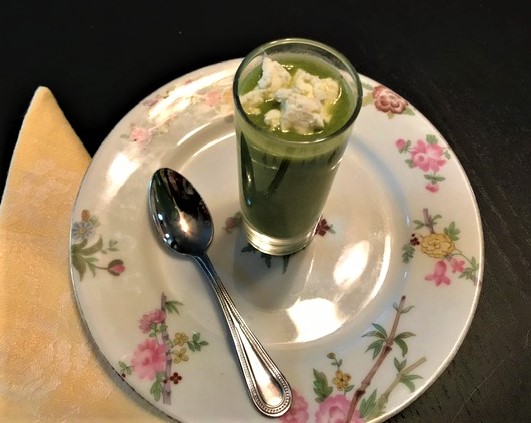
This soup can be served as an entree for your meal, add a crusty baguette and it will warm you and fill you up. You can also serve this as an appetizer or part of the savory course for an afternoon tea. In a shooter style glass, this cream of broccoli and spinach soup is a flavorful and surprising addition.
This recipe is very versatile and easy to prepare, so let’s go through the steps. Once you get the basic soup down, be creative and use up those vegetables and change up the toppings. There’s no limit.
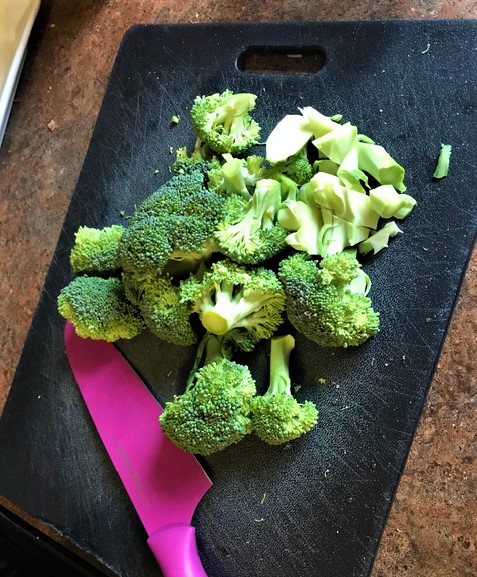
Take 2 cups of fresh spinach and 1 large bunch of fresh broccoli. Chop up the broccoli into small pieces. You will be simmering this to a soft texture that will allow you to puree it.

Place the spinach and broccoli in a large pot. Add 1 – 1 1/2 quarts of chicken broth. I like to use the unsalted version. Add 1 tsp of salt to the mixture. Cover your pan and turn on the heat bringing the mixture to a low simmer. You will want both the spinach and the broccoli to be well cooked.
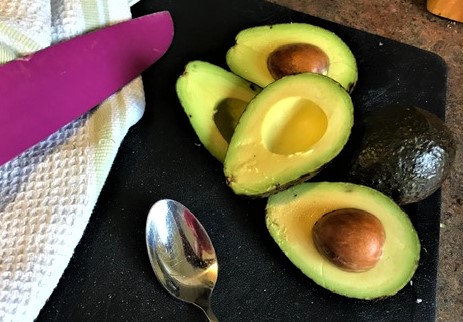
While the spinach and broccoli are cooking, prepare the avocados. Seed and cut into small pieces. Remember, the avocado will be used for thickening the soup. You won’t taste the avocado, its natural fattiness will thicken without flavoring the soup. You can use 3 small avocados or 2 large ones. And use up those ripened ones – they will be easier to blend. Once prepared, set them aside.
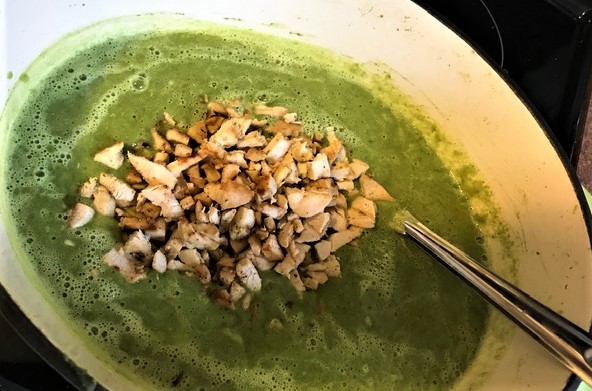
To prepare the chicken, cut it into small pieces. Using the 1 tbsp of olive oil, brown and crisp up the chicken. I like to use chicken that I already have cooked. You can use rotisserie chicken or even cook up some fresh chicken. Whatever you have available. Once done, set aside.

With the vegetables done, put in the avocado and grab your immersion blender. Another one of my favorite kitchen tools, then I use my immersion blender for soups, smashed vegetables, gravies, sauces and even smoothies, just to name a few items. Blend the soup until its creamy. You can also use a blender but you may need to do this in batches and remember that the soup is hot – don’t over fill your blender with this hot liquid.
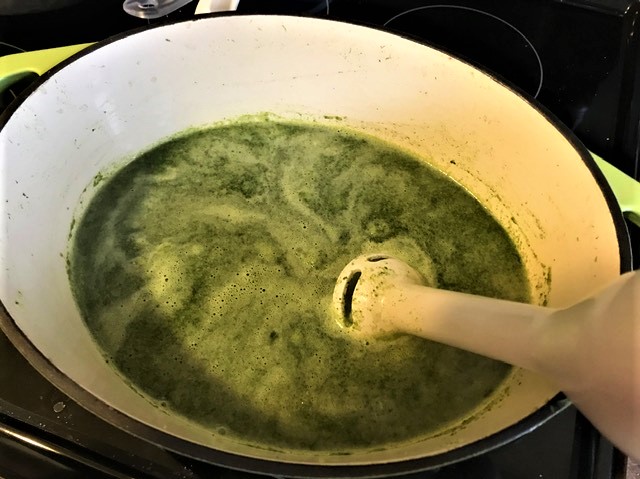
Immersion blending the soup 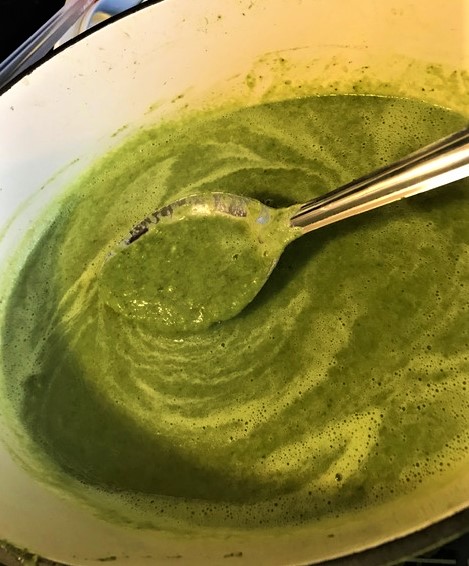
Blended soup thickened
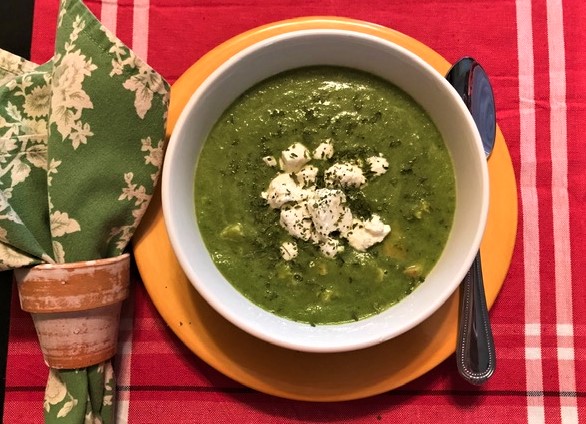
Once the soup is blended, add the chicken and gently stir. Add the ground pepper. Taste for seasonings but I rarely have to add anything. Ladle into your serving bowls and top with fresh parsley and goat cheese. You can serve the goat cheese as a medallion or crumbled. It will melt into this amazing bright taste and pairs very well with this rich thick soup. And yes, its thickened with avocados.
You can substitute the parsley for fresh cilantro. Top with a few slices of radishes and you have another variation to this delightful soup. Change out the chicken for sausage and you have yet another delicious option. On a chilly day when the wind is blowing and you are snuggled up inside your home, this soup brings a delightful and healthy version of a creamed soup. And its thickened with avocado – have a second bowl!

Products used in this recipe –
This post contains affiliate links and we may earn compensation when you click on the links at no additional cost to you. Look at the products and enjoy!
Spinach and Broccoli Cream Soup
Ingredients
- 2 cups cooked chicken Can use precooked or rotisserie chicken
- 1 tbsp olive oil
- 2 cups fresh spinach
- 1 bunch fresh broccoli, cut into small pieces
- 1 ½ quarts chicken broth
- 3 Small ripe avocados Can use 2 large ones
- 1 tsp salt
- 1 tsp ground pepper
- 8 tbsp goat cheese
- 1 tbsp fresh parsley, chopped
Instructions
- Chop fresh broccoli into small pieces – so to speed up the cooking process.
- Place fresh broccoli, fresh spinach, and chicken broth in large cooking pot. Add salt. Turn on to low simmer in order to cook the vegetables.
- Cut chicken up in small pieces. Put olive oil in frying pan. Brown chicken pieces. Set aside.
- Cut the avocados up into small pieces. These are the thickener for the soup – so they need to be reasonable small pieces.
- Add the avocados to the cooked vegetables. Using an immersion blender, puree soup. You can use a blender as well if you like.
- Once completed smooth, add chicken to soup. Stir to mix.
- Serve hot. Top with 1 tbsp of goat cheese, either in a medallion or crumbled.