• Cups, Cozies and China,  Enjoying Together,  Memories

    The Ceremony of Afternoon Tea

    I do love to enjoy afternoon tea but have you ever wondered about the ceremony of afternoon tea? Have you thought about how it got started and how does one do this thing called Afternoon Tea? There are many resources out there to tell you about the history and the etiquette about having tea. So let’s pour ourselves a cup and walk through these tidbits of knowledge surrounding the ceremony of afternoon tea,

    History of English Afternoon Tea

    Tea has been around for centuries. In the 1660’s, King Charles and his wife from Portugal were introduced to tea. The queen was so delighted with it, she brought it back to the English court and England was exposed to tea.

    Anna Russell, Duchess of Bedford - Wikipedia - and the ceremony of afternoon tea

    In 1840, the Duchess of Bedford found herself needing a little something to bridge the hunger from her early meal to the evening meal as she was experiencing that “sinking feeling”. The evening meal was taken anywhere from 7 – 8PM, and so she requested some tea and a little sandwich of bread and butter around 4 – 5 PM. This expanded to include some of her acquaintances as well as did the menu. This soon became a practice with the queen and afternoon tea was born! The sources that I read say that it has fallen from tradition of a daily practice and is now reserved for more special occasions.

    What’s In A Name

    First, let’s clear up some of the confusion around the names that afternoon tea has taken on. There are several. Afternoon tea, low tea, high tea, cream tea, and others. So here’s the common ones and how they should be applied when speaking about taking tea.

    • Afternoon Tea / Low Tea– Many people think “High Tea” is afternoon tea. Its synonym is really Low Tea. Afternoon tea is the whole thing we think about when we think about the ceremony of afternoon tea. The lace, the fine china, the small sandwiches. Afternoon Tea was originally taken on low tables with guests sitting in low comfortable chairs, which gave it the name “Low Tea”. So no more “High Tea” talk when speaking about Afternoon Tea.
    • High TeaHigh Tea was actually addressing the time when the servants or help was able to take their tea. The menu was much more substantial and was sometimes taken at high tables, thus giving it the name “High Tea”. Menu selections might include meat pies, fish dishes, casseroles and baked goods. This was a tea designated to the working class and not considered a social event, as was Afternoon Tea.
    What It Was Like To Attend Afternoon Tea In The Victorian Era

    There are several variations on this. We have talked about Afternoon Tea and High Tea, now let’s explore some of the other opportunities.

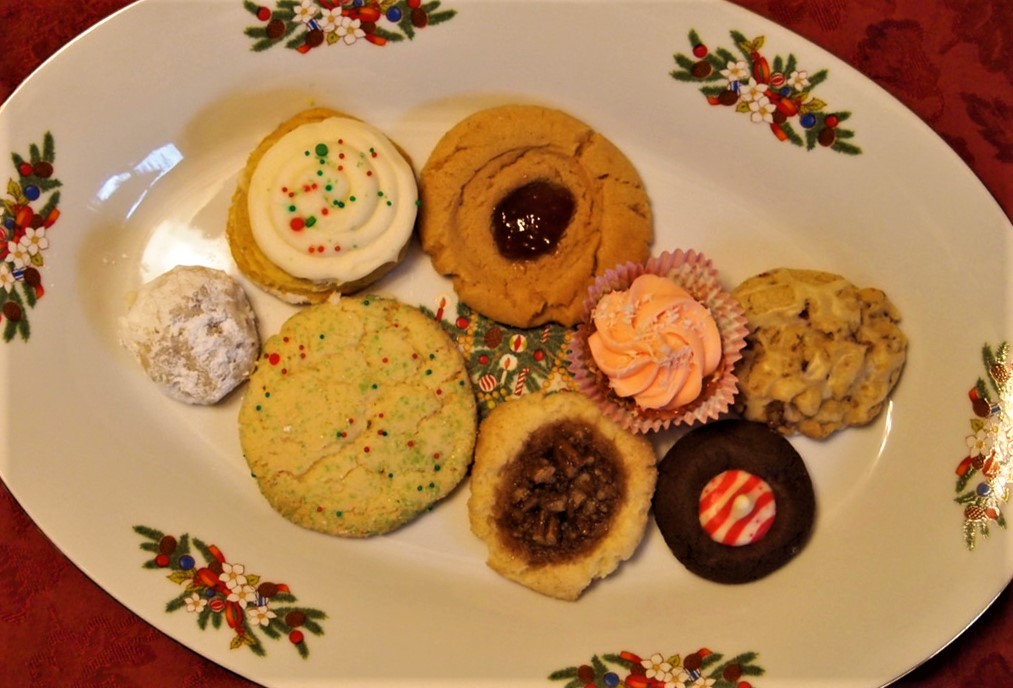
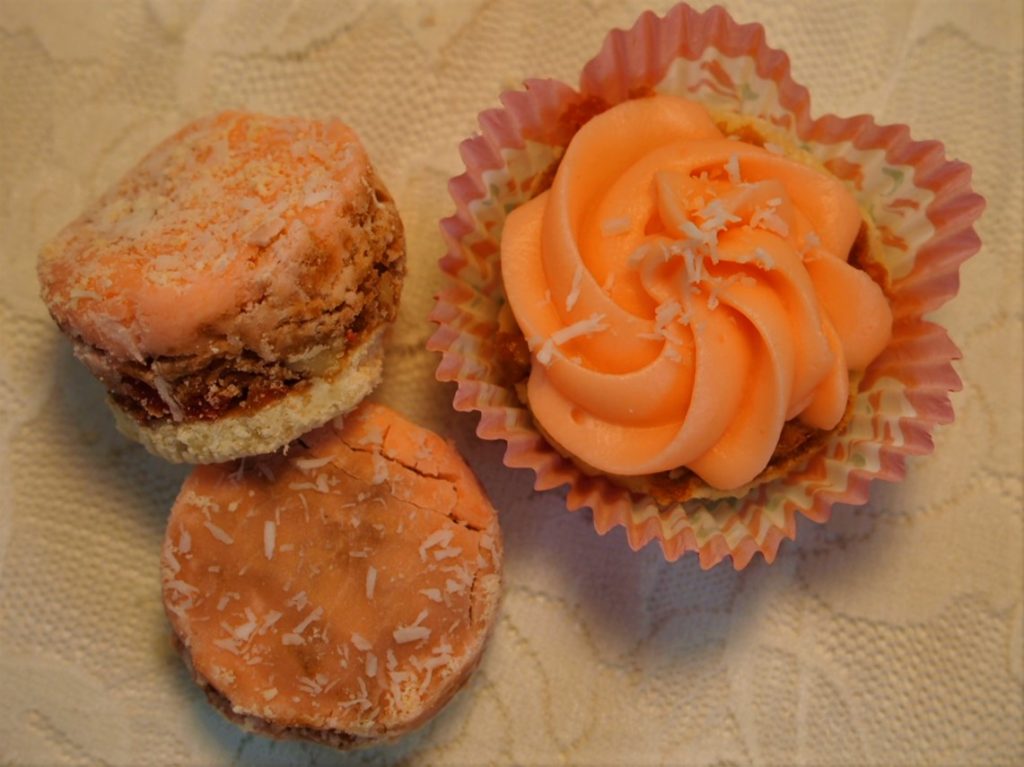
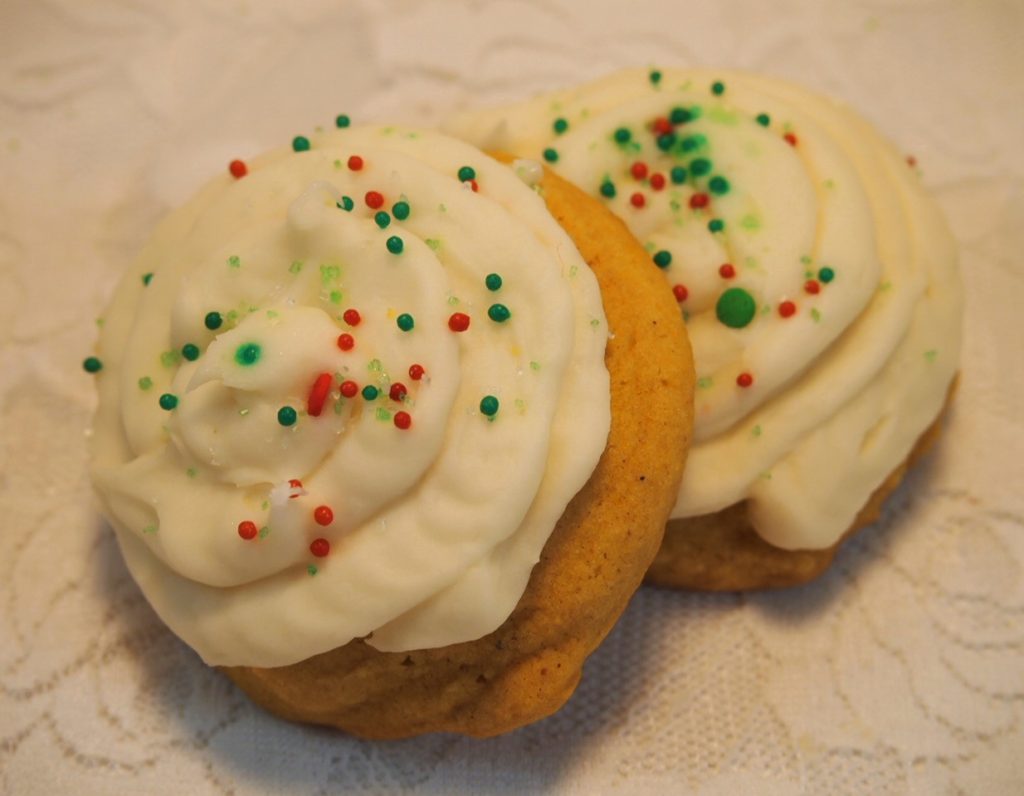
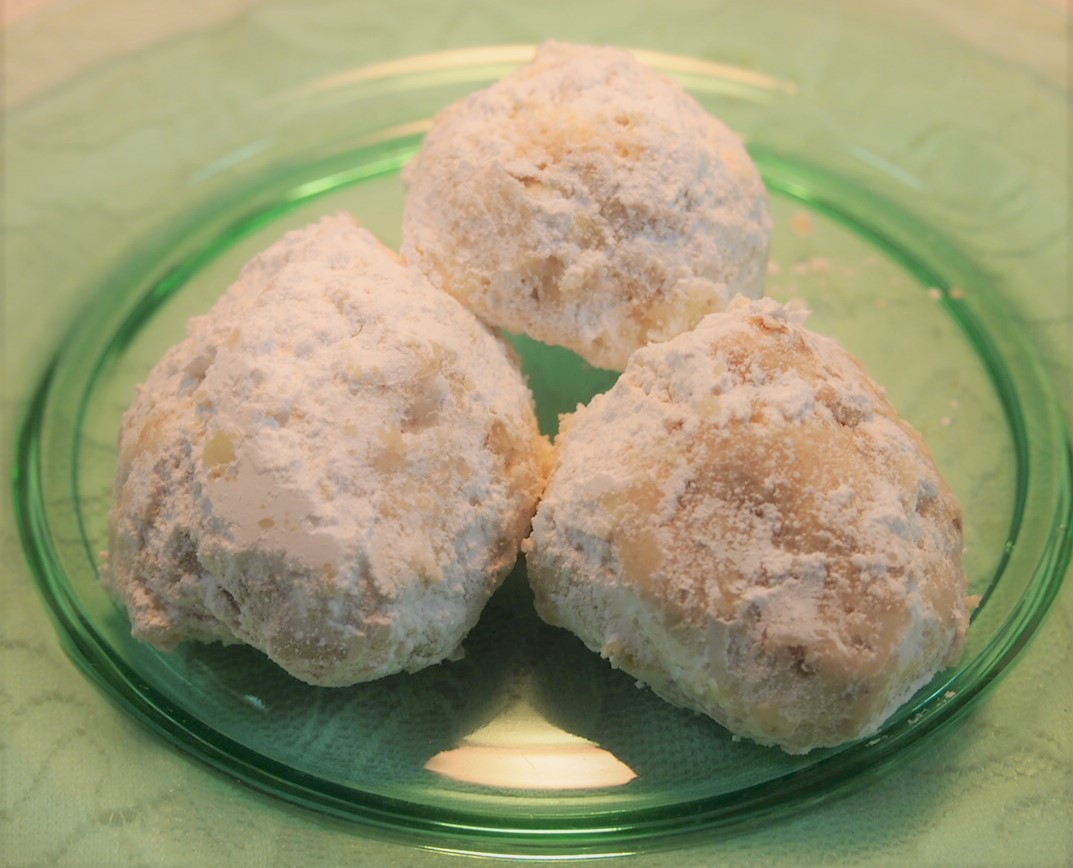
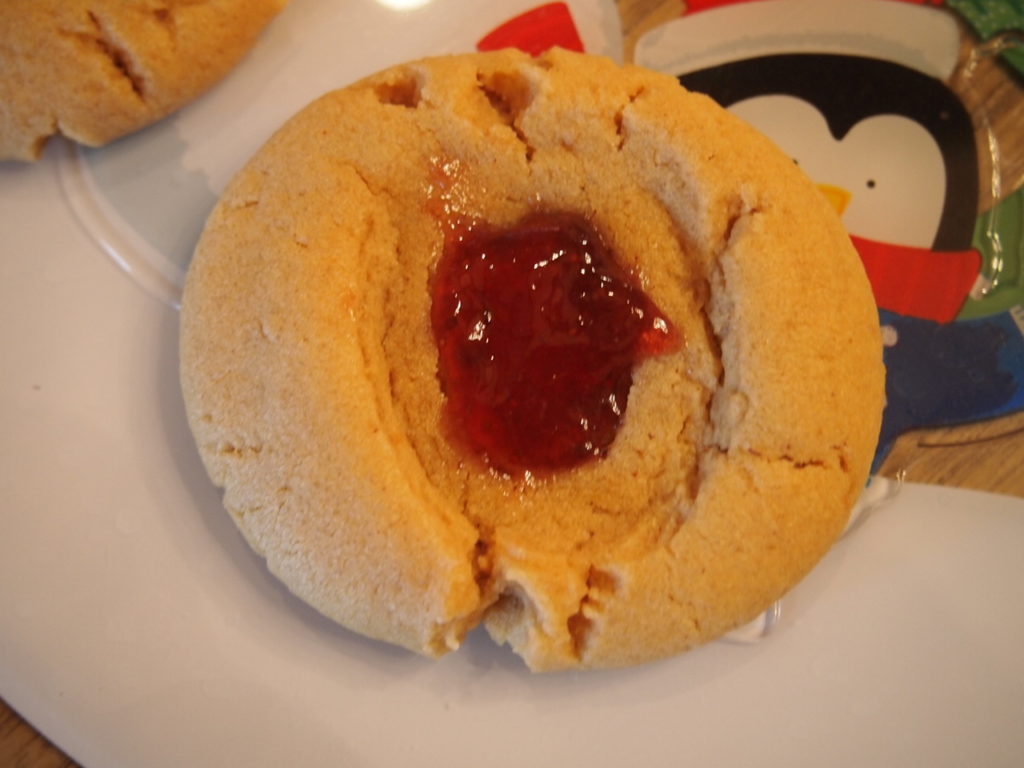
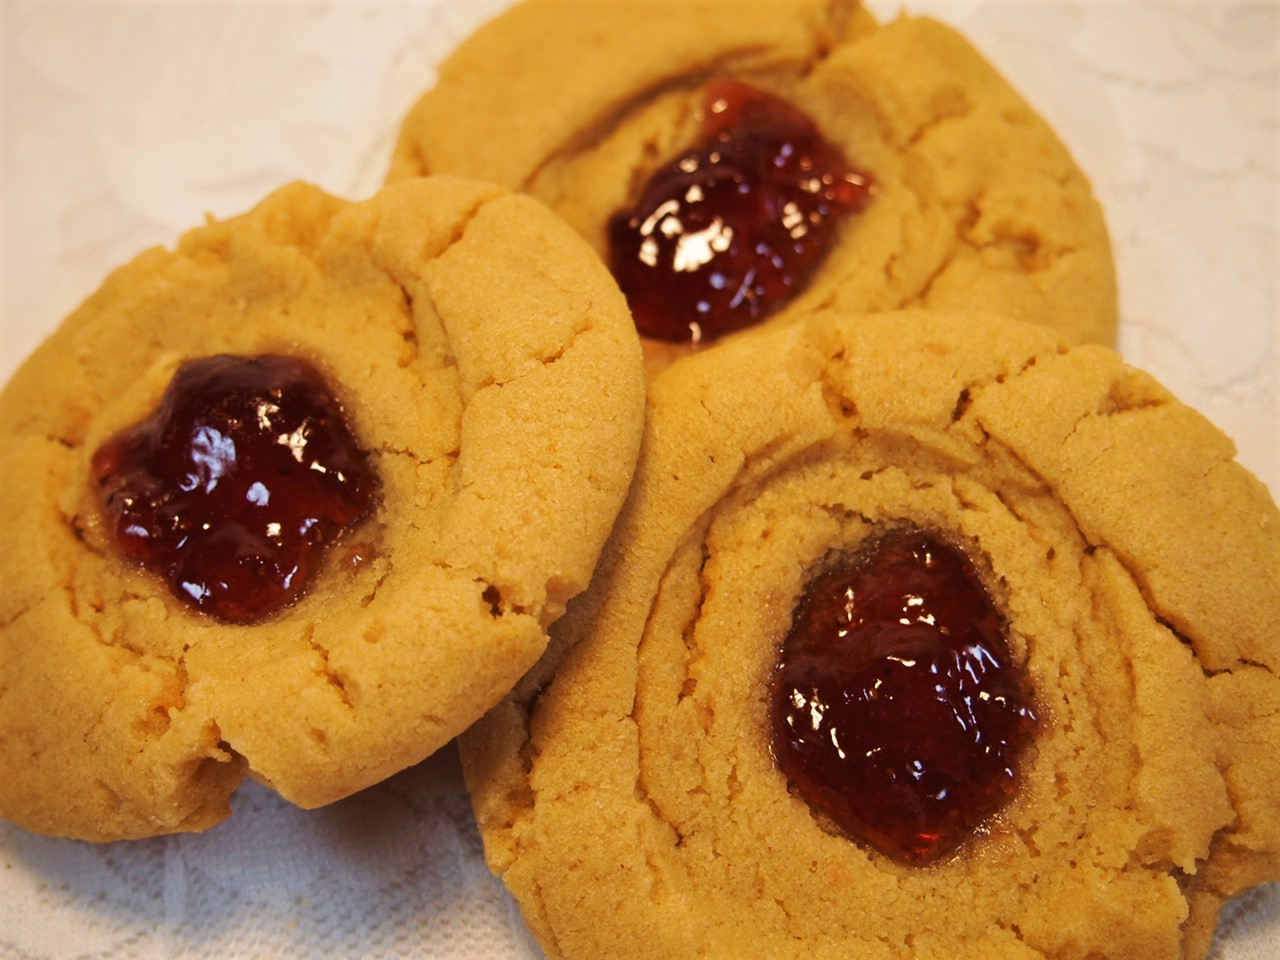
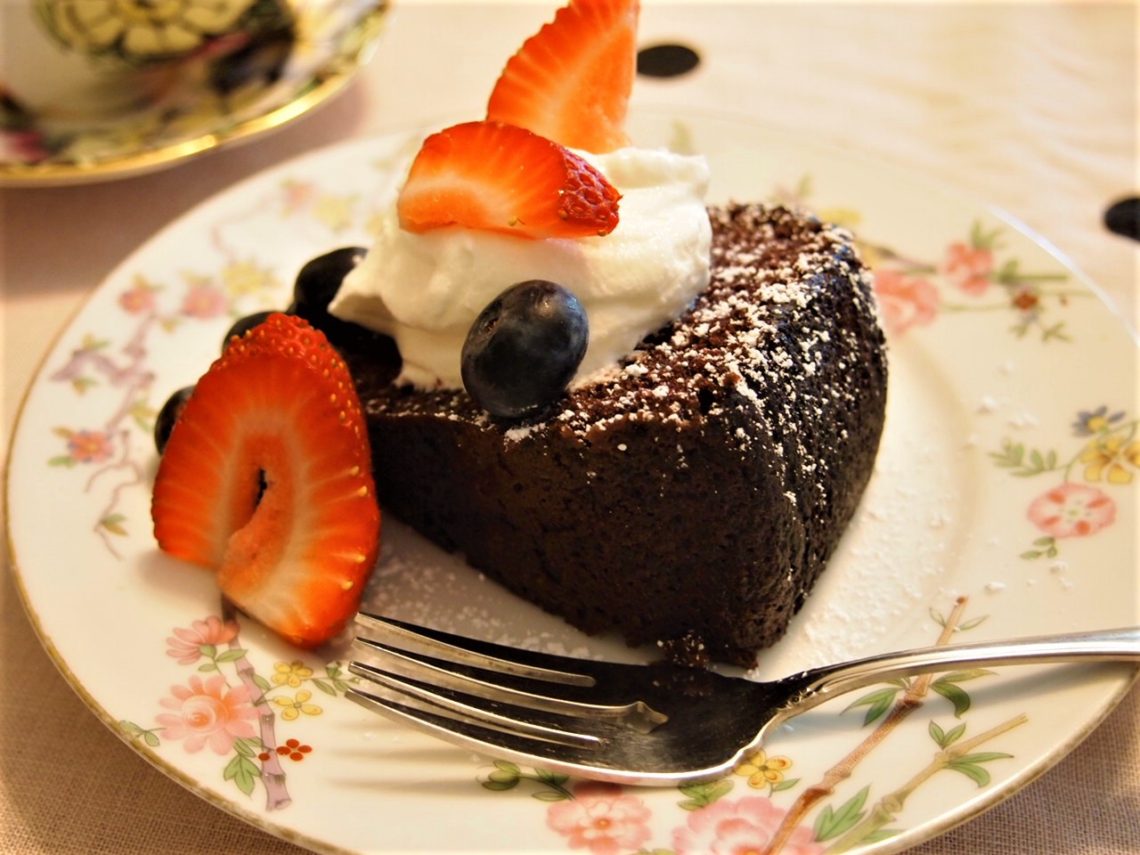
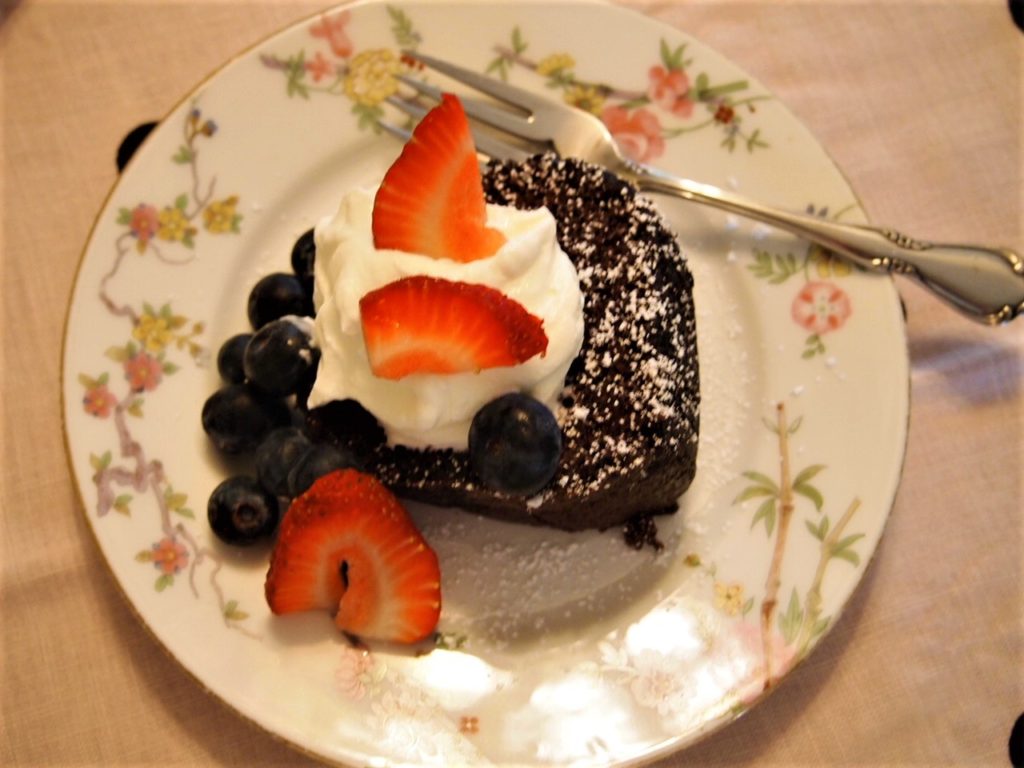
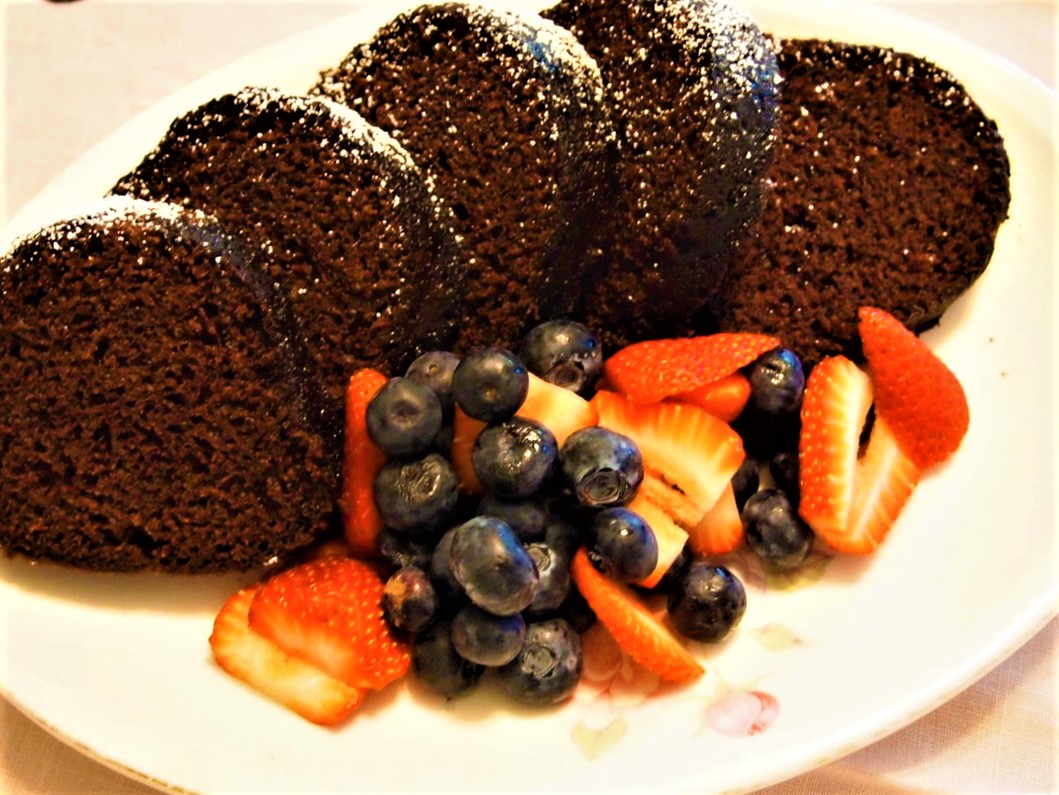
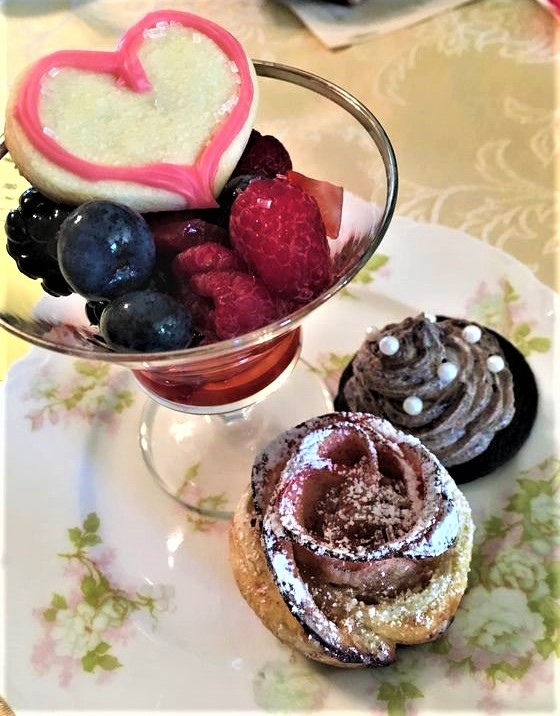
    • Cream Tea – A Cream Tea refers to tea, scones and cream. Though it is the simplest of teas, this does not take away from its deliciousness.
    • Strawberry Tea – Add fresh strawberries to your Cream Tea, and you now have a Strawberry Tea. My sister holds an annual Strawberry Tea in the spring when these delectable berries come into season.
    • Light Tea – Add more sweets to your Cream Tea and you now have a Light Tea.
    • Full Tea – Add some savories to your Light Tea, and you now have a Full Tea.
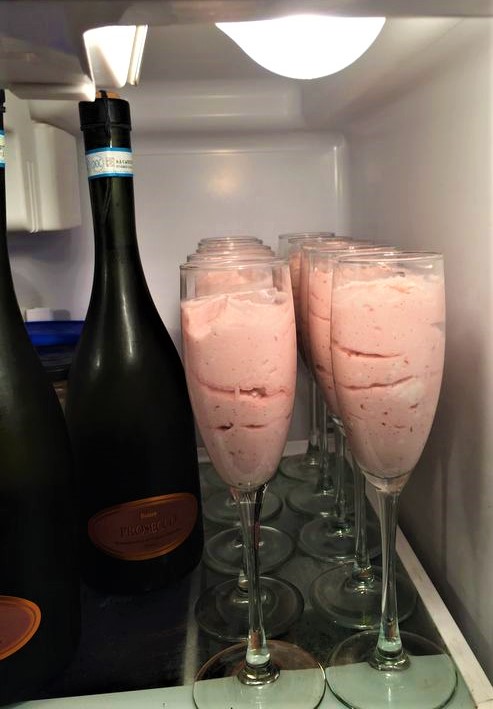
    • Royal Tea – And for some more fun, add some champagne and your tea now becomes a Royal Tea. This is especially fun for the holidays or for special teas like a Bridal Tea.

    Though these are the major types of teas, needless to say there are many variations that are not listed here. And in any case, they are all fun!

    Setting The Table

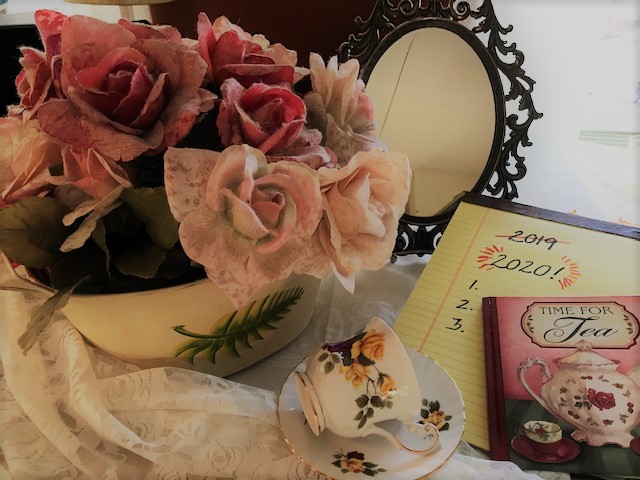
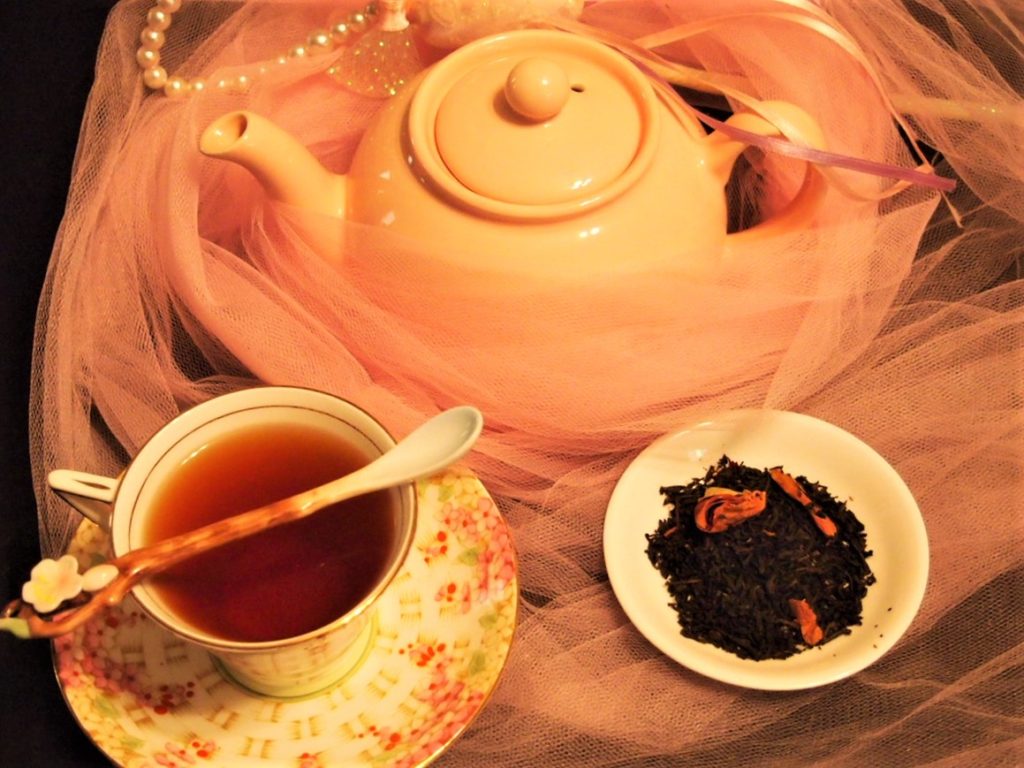
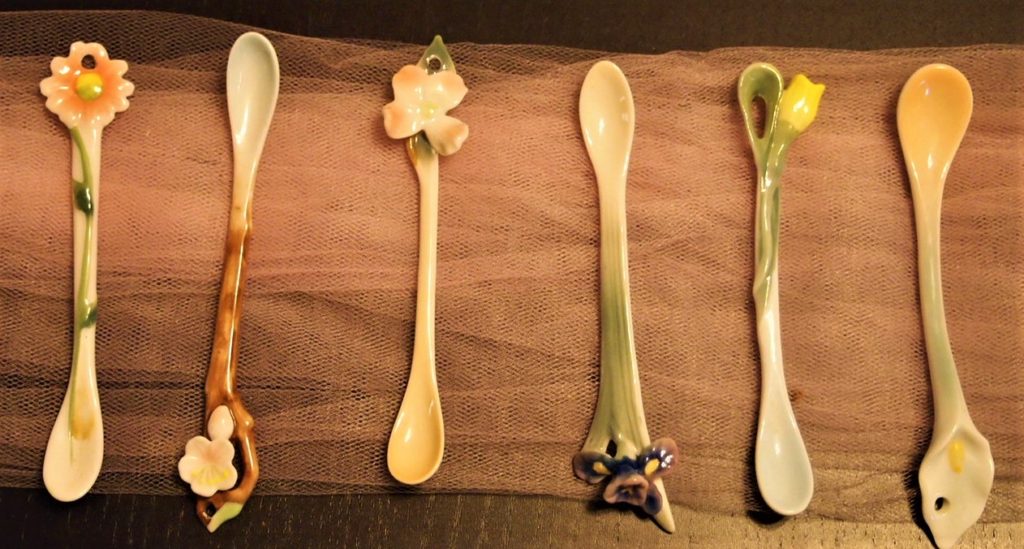
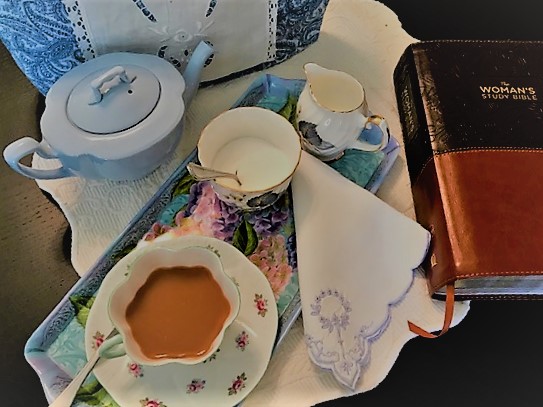
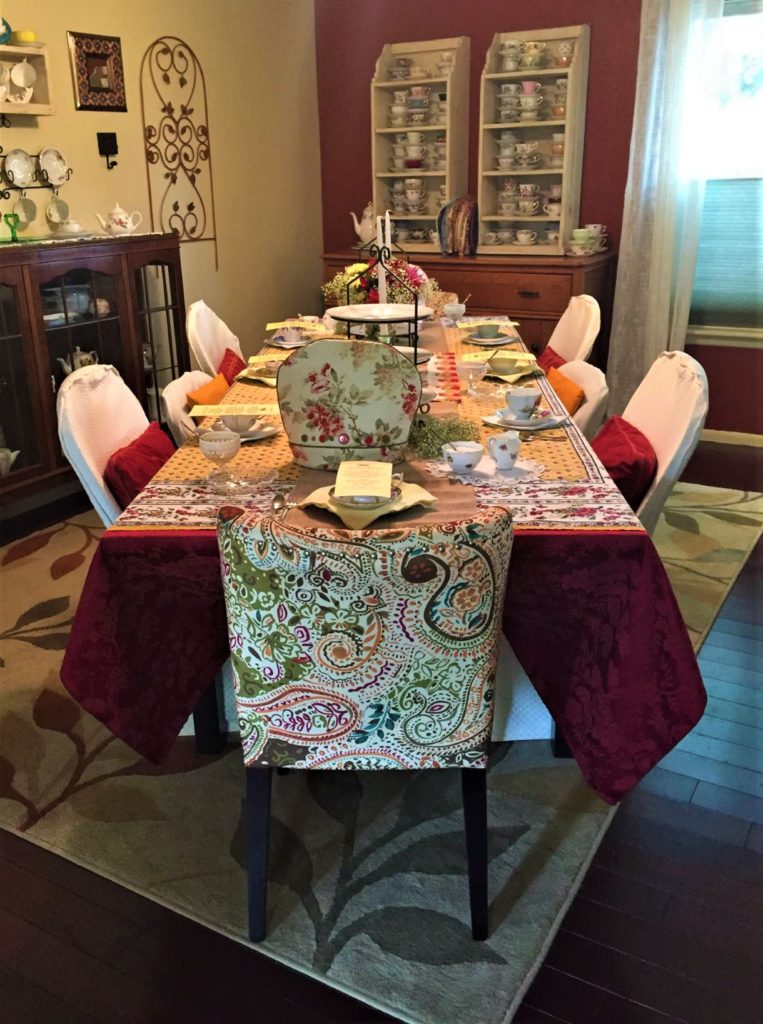
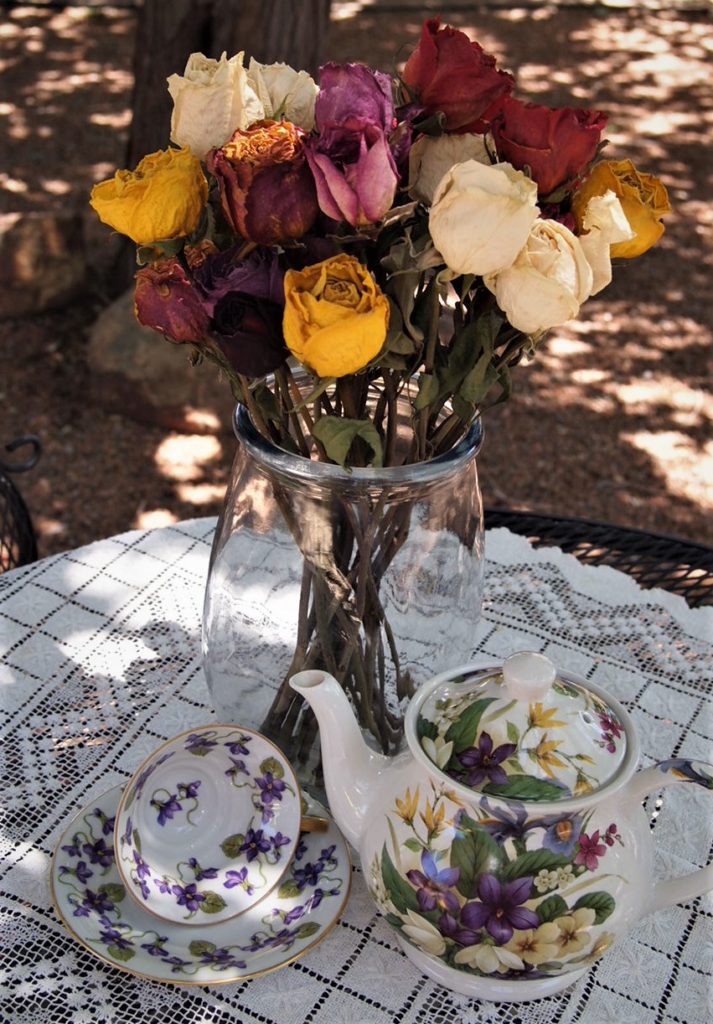
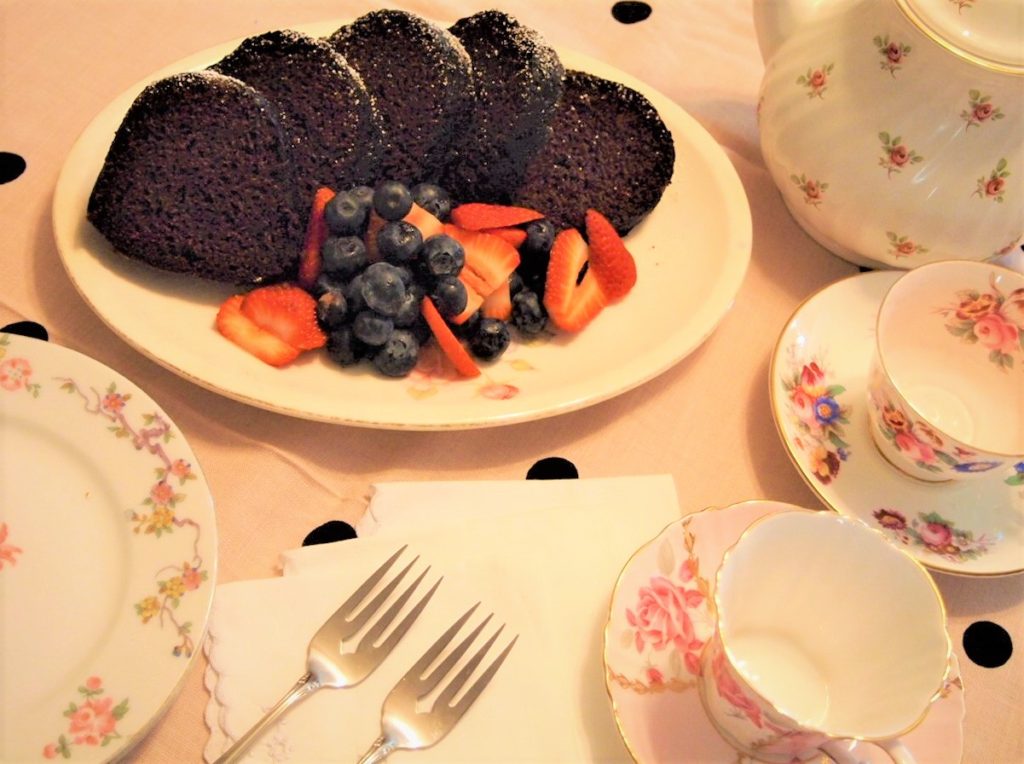
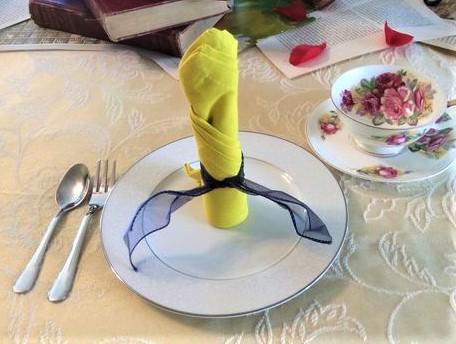
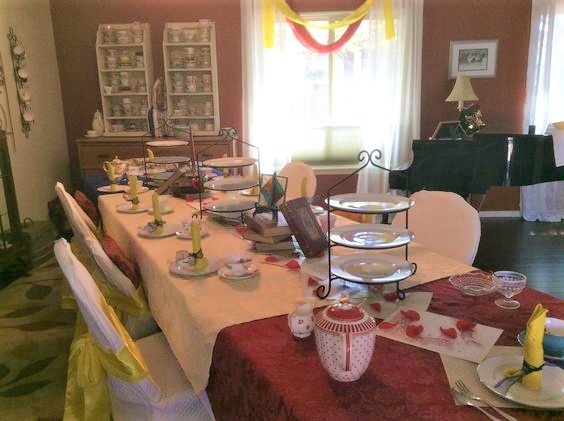
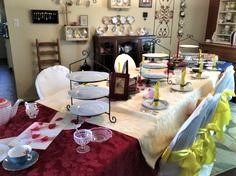
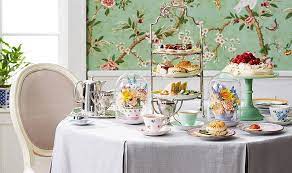
    Let’s talk a bit about the table setting for an afternoon tea. Your guests would be comfortably seated next to one another with each place setting having a small dessert or luncheon plate, a teacup and saucer to the right, utensils, and a small dainty napkin to the left. The utensils would consist of a small spoon placed on the teacup saucer, small knife on the right and small fork to the left. The fork is intended for use with the sweet course and used last. The napkin is folded and placed on the left of the fork. The food is intended to be served and eaten with the fingers. The teacup is placed on the right as the tea is always served from the right. The handle of the cup should be placed at 3:00 station. Of course, you would have your teapot, creamer (or milk jug if you are British) and sugar bowl available on the table. Lemon slices if your guests prefer them.

    Table setting for the ceremony of afternoon tea

    How to “Take Tea”

    Here are just a few pointers on how to “Take Tea” when you are enjoying the ceremony of afternoon tea.

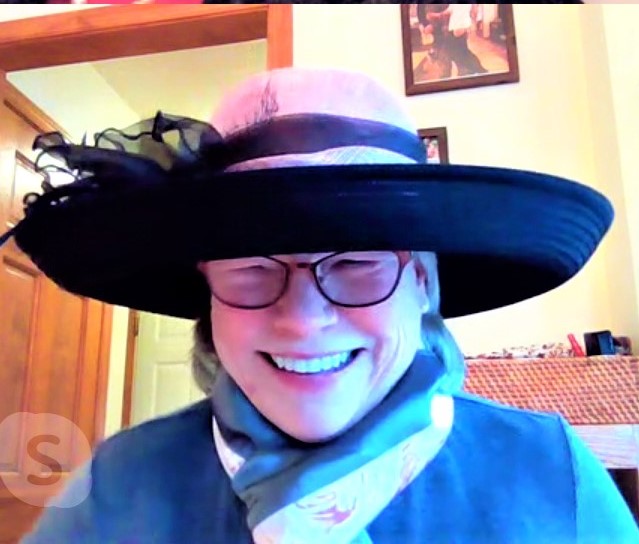
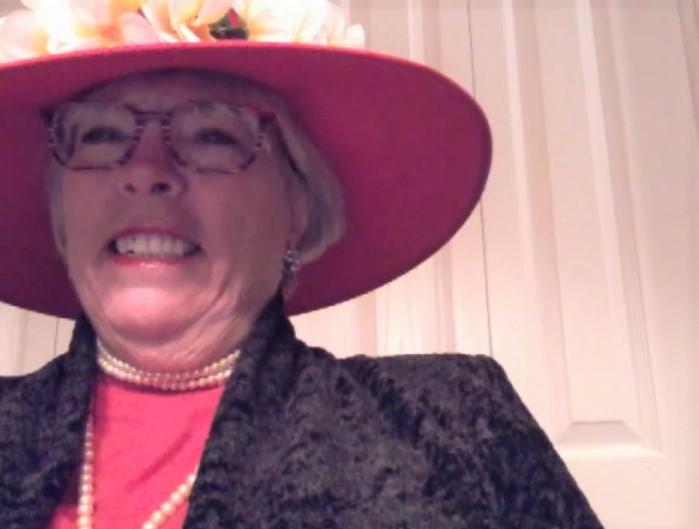
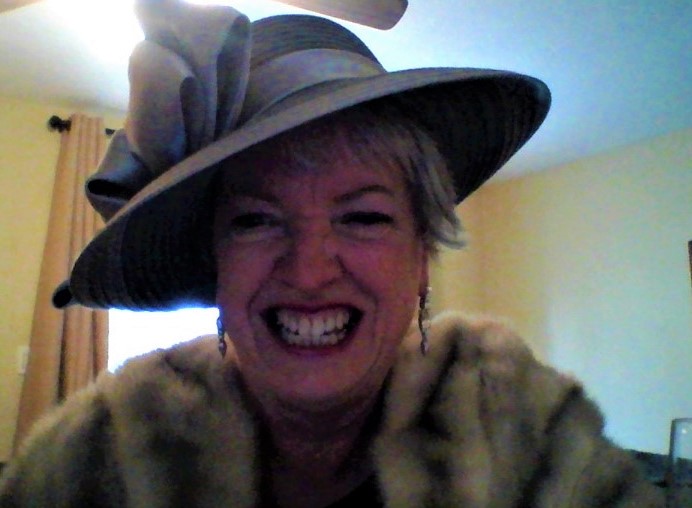
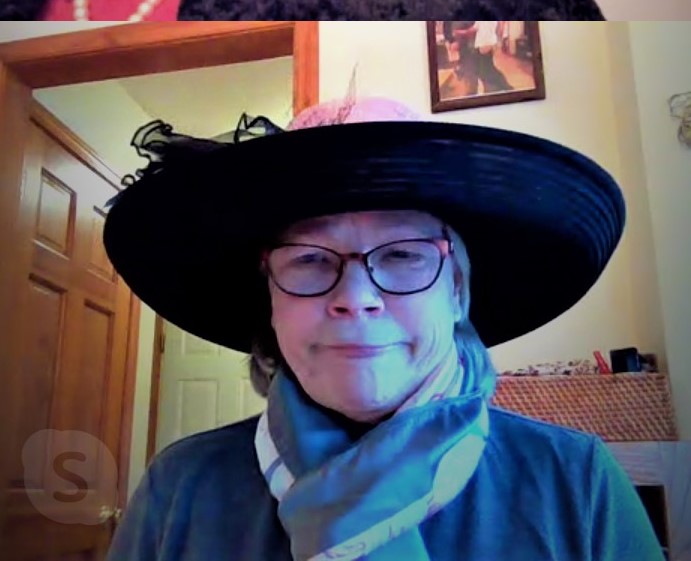
    • Dress should be casual and comfortable but not sloppy. Hats are fun but not a requirement. Your hostess may give you some guidance depending on the occasion for the tea.
    • If you are being served tea, the first cup of tea is poured by the server. They will come to the right of you, lift your cup and saucer and will pour your first cup of tea. If you are the hostess and do not have a server, then you pour the first cup for your guest. Once poured, placed the teapot with the spout facing left to allow for easy access for that next delicious cup.
    • No pinkies up please! Yes, that’s correct – no pinkies up when drinking your tea. This practice was appropriate many years ago when the first cups did not have a handle. The pinky was used to stabilize a hot cup but now is considered inappropriate for taking tea. No pinkies up.
    • No clinking of your spoon against the cup. Your tea should be stirred in a 6:00 to 12:00 fashion, gently without the “clink.”
    • Are you a Tiffer (tea in first) or a Miffer (milk in first)? There is no clear right or wrong here but clearly strong opinions. I prefer seeing the strength of my tea first – so I am very much a Tiffer but you can choose what best works for you.
    • The teacup always stays on the saucer, unless you are taking a sip. If you are sitting away from the table, place your teacup and saucer in your lap.
    • Sip your tea, smell the fragrance of the tea. No slurping though.
    • Hold your teacup by the handle, using you forefinger and thumb against the handle. Do not cup your hands around the teacup and don’t put your fingers through the loop of the handle.
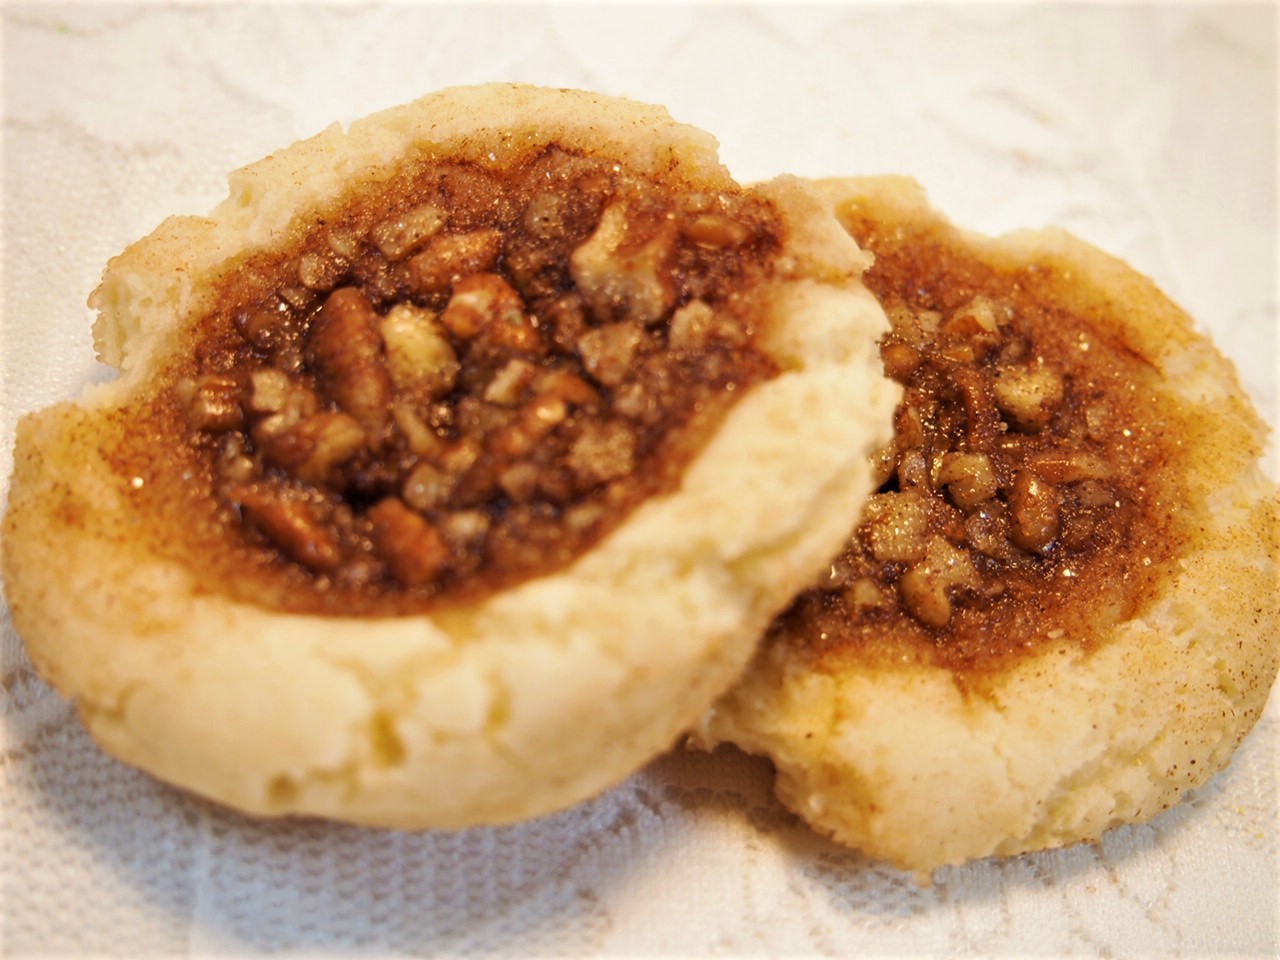
    • When taking your scone, do not cut it in half with your knife but break it in half. Another quandary, do you put the cream on first or the jam / curd on first? I know, these are earth shaking concerns, yet once again there is no clear direction but absolutely strong opinions. Early on the queen preferred jam first, thus it was declared jam first the appropriate steps but this started a huge controversy. If you are served Devonshire Cream, then it is felt (by those that live in Devonshire England) that this goes on first. Whereas, the Cornish prefer to have the jam or curd on first, followed by the cream. In any case, its all delicious however the toppings are placed.

    What the Ceremony offers

    Afternoon Tea has always been a ceremony for me. As a young girl I remember having my own little teacup and taking tea with my grandmother, a little milk and sugar perhaps. Fond memories of that specialness evoked by those times. As I got older and started attending tea rooms, I was impressed at the tea ceremony. It gave me a sense of order and calm if even just for that moment. Now when I serve tea, even if alone for myself, I find respite in the teacup and cherish the calm that it can bring. When serving afternoon tea to a friend or several guests, I am always delighted to see how this ceremony brings enjoyment. Inherently and frequently unaware, you can hear the sigh come as that first cup is poured.

    The Ceremony of Afternoon tea

    Afternoon tea offers a respite in a time of chaos, whether alone for those days that are long and tiring or in celebration of coming together in community. It doesn’t have to be difficult, it doesn’t have to be encumbered by protocol – though I find it fun to understand the history, it doesn’t have to be expensive or complex…..it is the act of sharing that moment, maybe serving a friend…..reaching out and taking a deep breath.

    “There are few hours in life more agreeable than the hour dedicated to the ceremony known as afternoon tea.” Henry James.

  • Enjoying Together,  Memories

    My Journey To Set Up Shop

    Do you have a passion? Want to share that passion with others? And have you considered how to do that and make it worth all your effort? Well that’s where I was at a few years back….this is my journey to set up shop. I will share the steps I took and though they reflect my particular niche, they easily apply to anyone stepping into this realm.

    My passion is tea….specifically afternoon tea and all the things that are about tea. I love to help women experience the respite that comes with afternoon tea and make it something they can enjoy ongoingly. So I decided that I would start an afternoon tea blog.

    My Journey To Set Up Shop - Teas The Season Logo

    Starting My Blog

    I didn’t have any idea how to go about this and didn’t have a clue what I was getting into. So like many of my fellow bloggers, I took the first step of researching how to begin a blog. I also knew that my goal was to be somewhat budget friendly. I was hesitant to invest heavily in this whole approach if there was not some sort of income.

    I initially tried to set up my blog on my own but quickly realized it was way beyond my “wheel house” and needed expert advice. In my search, I came across Pete and Heather Reese, founders and owners of “Its A Lovely Life

    My Journey To Set Up Shop - Its A Lovely Life Logo

    They offered a free 5 day email course and I was hooked. I have since then invested in 2 additional classes and they have been critical to my blogging journey. Through this process, I purchased a website and engaged a business relationship with Blue Host. This helped to supplement my technical needs and gave me access to a huge support resource, both in community and through the business partnerships. These courses walked me through all the steps I would need to setup my blog – domain purchase, name and logo development, income strategies and much more. And for the first 2 years, I blogged about my love of teas and all things tea, recipes and how-to’s.

    Next Steps….My Online Shop

    As most of us starting this journey, we want to have some kind of income stream. So I examined what other options I might have……..affiliate relationships, YouTube teaching, writing etc. This is a slow process and I was wanting to see some tangible results. I began to investigate establishing an online store for vintage china and tea accessories. I researched the market, determined inventory, product lines and integrating into my current website, Teas The Season. For some reason, with my own skill and assistance from some technical support I was not able to place my shop on my blog website. Many bloggers do this – so don’t let my approach be a deterrent. I made the decision to purchase a separate domain and developed The Steeping Teapot, my online store. A partner to Teas The Season, The Steeping Teapot takes the vision of Teas The Season and puts the product in my readers’ hands.

    My Journey To Set Up Shop - The Steeping Teapot Logo

    Another huge learning curve, I setup The Steeping Teapot using Woocommerce. Using the free version again, I setup product categories, prices, shipping, and other pieces critical to having an online business. I launched the online version of my business in November 2020. The growth has been slow as expected but I launched!

    My In-Person Opportunities

    The next step in this adventure has been the opportunity to have an in-person presence. This has taken the shape in two main ways – product shows and the latest, an actual in-person shop.

    Product Shows

    I was able to participate in a Christmas Gala in 2020. The gala had close to one thousand attendees and allowed me to sell all the products I had online as well as share information from my blog. It was a lot of work and honestly, can’t say that I would want to do that all the time but it was a huge success.

    My Journey To Set up Shop - Winter Wonderland Gala

    The majority of these attendees were women, which is my target audience and so I was blessed not only by the movement of product, but also by realizing the passion I have to help women use tea as a point of enjoyment. Was it fun? Well, yes. Accompanied by my daughter-in-law, the event was a coordinated effort but a huge amount of work and a great payout on several fronts. Will I do it again? Already signed up for a smaller version this spring so I guess that is yes.

    My In-Person Shop

    So the last step in this evolution has been the decision to setup an in-person shop in a local boutique. The owner of this boutique has a passion for women in small business and operates a high-end mercantile, a sister operation to her French Country boutique, The Grey Heron. The TGH Mercantile is home to local artisans with a passion for their niche. Each owner displays their unique products for sale within this community of artists and artisans.

    The Steeping Teapot now has a presence giving my patrons their real teatime experience. A believer in providence, I have been blessed to open the shop in January 2021 and its been an exciting journey for sure. I have “hung out my shingle” allowing The Steeping Teapot to have an in-person storefront!

    My Journey To Setup Shop - The Steeping Teapot Shop Sign

    Lessons Along The Way

    There are so many other pieces of information and lessons learned that I would like to impart, but here are the main key points that I would share with anyone wanting to start this journey, things to do and things to consider:

    1. Plan, plan, plan…
      • Write out your vision, goals, and then steps to achieve.
      • Keep your vision and goals visible
      • Include things like time, budget, anything you can think of.
      • Be ready to do this on an ongoing basis.
    2. Find your niche…..
      • Know your passion and explore the niche
      • Ask for input and help
      • Sometimes a little harder than you think…you may know your passion, but finding the groups might be harder.
    3. Find support…..
      • So important. And I must admit, I didn’t use the support early enough.
      • Find your experts….find a mentor if you are able to.
      • Use your online community. A great resource for feedback and encouragement.
    4. Understand the investment….financial, time, emotional
    5. Give yourself grace
      • Don’t expect perfection
      • Be willing to hear feedback and change as needed.
      • Have expectations but don’t be unrealistic.
      • Know that this will take time
    6. Be brave to try new things, be a risk taker within reason…..
    7. Evaluate your success along the way but also your challenges….and changes…and failures.
    8. And have fun along the journey!

    Through the milestones and the implementations, this has been my journey to set up shop. I am still learning….there is so much to learn. I am still changing and adjusting….I think that will be always. And I am enjoying the ride. So if you are on this road, I hope that you are encouraged. If you have already been here – I hope you know that you have helped to pave the way for those of us following the path.

    My Journey To Setup Shop - Planning wall
    Vision and Planning Wall

  • Memories,  Recipes

    Christmas Cookie Exchange 2020 – Recipes To Enjoy!

    Welcome to Part 2 of Christmas Cookie Exchange 2020 -Recipes To Enjoy! This week I will be sharing the amazing recipes from this year’s cookie exchange. Part 1 highlighted the displays in Christmas Cookie Exchange – Yes Please ! 2020. Now Part 2 and the recipes for each cookie. Enjoy! Here for you to enjoy,

    Christmas Cookie Exchange 2020 - Recipes to Enjoy

    BAKLAVA THUMBPRINT COOKIES

    The Baklava Thumbprint cookies are a flavorful version of its namesake. It was a

    Print Pin
    5 from 8 votes

    Baklava Thumbprint Cookies

    The topping on my sister-in-law's peach cobbler was so delicious that I asked for the recipe. Then decided to use that to top a cookie I developed with the flavors of baklava. My adult son tried one and immediately ate two more – which is unusual for him! It's a good recipe to mix up the night before and bake fresh the next day for company.- Sharon Eshelman, Harrington, Delaware;
    Course Cookies
    Keyword Baklava, Baklava cookies, Christmas Baklava Cookies
    Prep Time 30 minutes
    Cook Time 15 minutes
    Total Time 45 minutes
    Servings 2 dozen
    Author Sharon Eshlenman

    Ingredients

    • 1 cup sugar
    • ½ cup butter, softened
    • 2 large eggs, room temperature
    • 1 tsp almond extract
    • 1 tsp vanilla extract
    • cup all purpose flour
    • 1 tsp baking powder
    • ½ tsp salt

    TOPPING

    • 3 tbsp sugar
    • 2 tsp ground cinnamon
    • ½ cup honey
    • ¾ cup chopped walnuts

    Instructions

    • In a large bowl, cream sugar and butter until blended. Beat in eggs, on at a time, and extracts. In another bowl, whisk flour, baking powder and salt, gradually beat into creamed mixture. Wrap dough in plastic refrigerate until firm enough to form into balls, about 30 minutes.
    • Preheat oven to 375°. For topping, combine sugar and cinnamon, set aside. Shape dough into 1 inch balls, refrigerate again if dough becomes too warm. Place 2 – 2½ inches apart on parchment lined baking sheets. Bake 8 minutes. Press a deep indentation in center of each cookie with the back of a rounded teaspoon. Fill each with honey and walnuts, sprinkle with cinnamon sugar. Return to oven and bake until edges begin to brown, 7-9 minutes longer. Cool on pans 1 minute. remove to wire racks to cool. Store in an airtight container.

    MARASCHINO CHERRY AND COCONUT SHORTBREAD COOKIE BARS

    These little cookies were presented in two cookies, one small round cookie and then with a topping of frosting. These cookies are a delicate treat that would be perfect for a Christmas tea.

    Print Pin
    5 from 8 votes

    Maraschino Cherry and Coconut Shortbread Cookie Bars

    Course Cookies
    Keyword Cherry Shortbreads, Maraschino Cherry and Coconut Shortbreads, Shortbreads
    Servings 16 4×4 squares

    Ingredients

    CRUST

    • 1 cup all purpose flour
    • 6 tbsp butter
    • 3 tbsp sugar

    FILLING

    • 1 egg, slightly beaten
    • ½ cup brown sugar firmly packed
    • 3 tbsp flour
    • ¾ tsp baking powder
    • ¼ tsp salt
    • ¼ tsp vanilla
    • 12 maraschino cherries, chopped and drained (reserve juice)
    • cup chopped walnuts or pecans (optional). If you don't like nuts, swap for additional cherries

    FROSTING

    • 2 tbsp butter, softened
    • 2 cups powdered sugar
    • 3-4 tbsp reserved cherry juice
    • ½ tsp salt
    • 4 tbsp coconut Add more if you like

    Instructions

    • Heat oven to 350°
    • In large bowl, combine first 3 ingredients, blend until crumbly. Press mixture into ungreased 8×8 pan. Bake at 350°for 15 minutes or until lightly browned.
    • Meanwhile, in small bowl, by hand, combine all filling ingredients and mix well. Pour over crust (okay if curst is arm). Bake at 350° for 20 – 25 minutes or until a toothpick inserted in center comes out clean. The filling will puff up a bit, then settle into a lacy look as before. Cool completely.
    • In medium bowl, combine all frosting ingredients except the coconut. Beat until light and fluffy. Spread frosting over cooled bars. Sprinkle with coconut. Cut into 16 squares (four by four).

    Notes

    These can be made into small individual round cookies as well.

    MELT IN YOUR MOUTH PUMPKIN COOKIES

    If you want to have a moist, cake-like bite of deliciousness, you will have to try these cookies. They were fantastic topped with a cream cheese frosting and of course, Christmas sprinkles!

    Christmas Cookie Exchange 2020 - Recipes to Enjoy.  Melt in your mouth pumpkin cookies.
    OLYMPUS DIGITAL CAMERA
    Print Pin
    5 from 8 votes

    Melt In Your Mouth Pumpkin Cookies

    These Melt In Your Mouth Pumpkin Cookies have a mild pumpkin flavor and are topped with a decadent cream cheese frosting.
    Keyword Cream Cheese Frosting, Pumpkin Cookies
    Prep Time 10 minutes
    Cook Time 15 minutes
    Total Time 25 minutes
    Servings 48 cookies
    Author Christy Denney

    Ingredients

    • 2 cups butter, softened
    • 2 cups granulated sugar
    • 2 tsp baking powder
    • 2 tsp baking soda
    • 1 tsp salt
    • 1 tsp ground cinnamon
    • 1 tsp ground nutmeg
    • 2 eggs
    • 2 tsp vanilla
    • 1 15 ounce can pumpkin
    • 4 cups all purpose flour

    Cream Cheese Frosting

    • ½ cup butter, slightly softened
    • 1 8 ounce package cream cheese, softened
    • 1 lb powdered sugar About 3 ¾cups
    • 1 tsp vanilla
    • ground cinnamon sprinkled on top, optional

    Instructions

    • Preheat oven to 350° F. In a large bowl, beat 2 cups butter with an electric mixer on medium speed until light and fluffy. Add granulated sugar, baking powder, baking soda, salt, cinnamon and nutmeg. Beat until combined, scraping bowl occasionally. Add eggs and 2 tsp of vanilla, beat until combined. Beat in pumpkin. Add the flour slowly until combined. Dough will be very wet.
    • Drop bu dough by the tbsp onto parchment lined sheets. Bake in the preheated over for 10-12 minutes or until tops are set. Transfer cookies to a wire rack to cool.

    Frosting

    • Beat all of the ingredients until soft and whipped.
    • Frost cooked cookies and sprinkle with cinnamon.

    SNOWBALL COOKIES

    Classic but always a treat, these snowball cookies are the quintessential Christmas cookie. It was a great treat.

    Print Pin
    5 from 8 votes

    Snowball Cookies

    Snowball cookies are a favorite Christmas cookie recipe, but these pecan-filled cookies are scrumptious all year round
    Course Cookies
    Keyword Mexican Wedding Cakes, Russian Tea Cakes, Russian Tea Cakes, Snowball cookies
    Prep Time 30 minutes
    Cook Time 18 minutes
    Cooling time 5 minutes
    Total Time 53 minutes
    Servings 48 cookies

    Ingredients

    • 1 cup butter, softened
    • ¼ cup sugar
    • 1 tsp vanilla extract
    • 2 cups all purpose flour
    • 2 cups finely chopped pecans
    • Powdered sugar

    Instructions

    • Preheat oven to 325°
    • Cream butter and sugar in medium bowl until creamy. Add vanilla,; beat until well mixed.
    • Add flour and pecans; beat at low speed, scraping bowl occasionally, until well mixed.
    • Shape dough into 1 inch balls. Place 1 inch apart onto ungreased cookie sheets. Bake 16-19 minutes or until very lightly browned. Cool 5 minutes; roll in powdered sugar while still warm and again when cool.

    Notes

    Tip #1 – Pecans can be purchased as halves or pieces.  Finely chop by hand or pulse a few times in a food processor to save time.
    Tip #2 – These cookies have many names depending on where you live!  Russian Tea Cakes, Mexican Wedding Cake and snowball are all similar cookies with just slight variations. 

    PEANUT BUTTER AND JELLY THUMBPRINT COOKIES

    If you like peanut butter and jelly sandwiches, this cookie pushes the limit by putting these tastes into a delicious chewy cookie. A keeper for sure.

    Print Pin
    5 from 8 votes

    Peanut Butter and Jelly Thumbprint cookies

    Course Cookies
    Keyword Peanut butter and jelly cookies, thumbprint cookies
    Prep Time 25 minutes
    Cook Time 15 minutes
    Total Time 40 minutes
    Servings 40 cookies
    Author KATIE LEE BIEGEL

    Ingredients

    • Nonstick cooking spray
    • 1 cup unsalted roasted peanuts
    • 1 cup Old Fashioned rolled oats
    • 1 cup all purpose flour
    • ¼ tsp fine salt
    • 1 stick unsalted butter, room temperature
    • ¾ cup sugar
    • 1 large egg
    • 1 tsp vanilla extract
    • ¾ cup favorite jam or jelly

    Instructions

    • Preheat the oven to 350 degrees F. Line two baking sheets with parchment paper and spray with nonstick cooking spray. 
    • Pulse the peanuts in a food processor until they are a fine meal. Add the oats, flour and salt and process until blended. Transfer to a bowl. In the food processor, combine the butter and sugar and process until light and fluffy. With the motor running, add the egg and vanilla. Process until smooth. Add half of the dry ingredients back into the processor and pulse to combine. Add the remaining half and pulse again until combined.
    • Drop the cookie dough by the tablespoonful (I use an ice cream scoop) onto the prepared baking sheets, leaving about 1 1/2 inches between the cookies. Use your thumb to make a thumb print in each cookie. 
    • Bake until the bottoms of the cookies are lightly golden brown, 12 to 15 minutes. Cool on a wire rack. 
    • Stir the jelly in a small bowl to loosen it up and fill each thumbprint with about 1 teaspoon.

    CHOCOLATE PEPPERMINT BLOSSOMS

    These little blossoms present with a rick chocolate cookie and then you bit into that refreshing peppermint kiss. The best of both tastes in a Christmas cookie.

    Christmas Cookie Exchange 2020 - Recipes to Enjoy.  Chocolate Peppermint Blossoms
    Print Pin
    5 from 8 votes

    Chocolate Peppermint Blossoms

    Chocolate Peppermint Blossoms are a soft, chewy chocolate cookie topped with white peppermint candy kisses.
    Course Cookies
    Keyword Christmas, cookies, Dessert, Holiday Recipe
    Prep Time 15 minutes
    Cook Time 8 minutes
    Total Time 23 minutes
    Author Jessica Smith via inquiring Chef

    Ingredients

    • 48 Hershey's Kisses (preferably Candy Cane Flavored, but any type will work)
    • cups all purpose flour
    • cup unsweetened cocoa powder (see note)
    • 1 tsp baking soda
    • ½ tsp salt
    • ½ cup unsalted butter softened
    • ¾ cup granulated sugar
    • ¾ cup light brown sugar
    • 1 tsp pure vanilla extract
    • 2 eggs
    • 1 tbsp milk

    Instructions

    • Remove Hershey's kisses from wrappers. Do this a few day ahead and those them at room temperature or unwrap them weeks ahead and freeze them for up to 6 months. (This is a great job for kids).
    • Heat oven to 350° F
    • Spray a sheet pan with nonstick cooking spray (or use parchment paper or a Silpat Baking Mat).
    • In a medium mixing bowl, whisk together flour, cocoa powder, baking soda, and salt. Set aside.
    • Using a standing mixer or hand mixer, beat butter until smooth. Add both sugars and beat on high until light and fluffy.
    • Add vanilla extract, eggs and milk and mix on high until smooth.
    • Add dry ingredients and mix on low until combined.
    • Roll dough into 1 inch balls (be sure to keep these small so that you have a good ratio of cookie to Hershey's Kiss in he finished cookie).
    • Place cookies on prepared sheet pan, leaving a couple inches between each.
    • Bake until cookies are just barely set (they will still look very soft), 9-10 minutes.
    • As soon as cookies come out of the oven, gently press a Hershey's Kiss into the top of each cookie.
    • Let cool on sheet pan for a couple minutes before transferring them to a sire rack to cool completely.

    Notes

    I have been loving Hershey’s Special Dark Cocoa.  it has a darker color and richer flavor than regular unsweetened cocoa powder.  Any unsweetened cocoa powder will work, but this one has a leg up than other in my opinion.
     
    These freeze well. Unwrap the Hershey’s Kisses and form the cookie dough balls.  Freeze them in separate plastic zip-top bags.  Bake straight from the freezer, according to directions above, but bake for 1-2 minutes longer. 

    Equipment

    THREE WISEMEN TREASURES

    Delicious cookies with a mild spicy taste to them. Hold on – you can taste the ginger and the curry but it all works together for a unique but delicious cookie.

    Print Pin
    5 from 8 votes

    Three Wisemen Treasures

    Jane Mathews of Franksville won the Fruit 'n' Nut Category and Best of Show for these delicious, flavorful cookies.
    Course Cookies
    Keyword Cardamom, curry powder, ginger, Three Wisemen Treasures
    Author Jane Mathews

    Ingredients

    • ½ cup butter, room temperature
    • ½ cup margarine, room temperature
    • 1 cup packed brown sugar
    • 1 cup granulated sugar
    • 2 eggs
    • 2 tsp vanilla extract
    • 3 cups flour
    • 1 tsp baking powder
    • ½ tsp baking soda
    • ½ tsp salt
    • 2 tsp sweet curry powder
    • ½ tsp ground cardamom
    • ¾ cup chopped toasted pecans
    • ¾ cup chopped dates
    • cup crystallized ginger

    GLAZE

    • 2 cups sifted powdered sugar
    • tsp ground cardamom
    • 1-5 tbsp milk (as needed for glaze consistency)
    • 2-3 tbsp Finely chopped pecans and dates for decorations

    Instructions

    • PREPARATION
    • Preheat oven to 325°
    • In a large bowl, cream butter, margarine and sugars. Add eggs and vanilla and beat until mixed.
    • Sift dry ingredients into a separate bowl and add to creamed mixture one-third at a time. Stir in pecans, ginger and dates.
    • Using 1 inch scoop, drop dough 2 inches apart onto parchment-lined baking sheet. Bake in preheated over for 13 minutes, until golden. Cook on racks.

    GLAZE

    • When cool mix together powdered sugar, cardamom and milk and drizzle glace onto cookies. Top with chopped dates and pecans.

    CHRISTMAS COOKIE PINWHEEL

    Christmas Cookie Exchange 2020 - Recipes to Enjoy.  Christmas Pinwheels gone bad.
    Christmas Pinwheel Cookies….kind of!

    These are delicious Christmas sugar cookies with a great chew…but don’t really resemble Christmas Cookie Pinwheels. So here’s the story – mother and daughter prepared this cookie according to the recipe and they didn’t turn out. Creatively, they used the dough and came up with cookies of the individual colors….but not in a pinwheel. A great story and they score well!

    Print Pin
    5 from 8 votes

    CHRISTMAS COOKIE PINWHEELS

    Christmas Cookie Pinwheels are a festive holiday treat that'll be the star of your Christmas cookie plate!
    Course Cookies
    Keyword cookie pinwheels
    Prep Time 2 hours 45 minutes
    Cook Time 15 minutes
    Total Time 3 hours
    Servings 16 cookies

    Ingredients

    • 2 cups all-purpose flour plus more for dusting
    • ½ tsp baking powder
    • ¼ tsp salt
    • 12 tbsp unsalted butter at room temperature
    • ¾ cup sugar
    • 1 egg
    • 1 tsp red food coloring to your liking
    • ½-1 tsp green food coloring to your color liking

    Instructions

    • In a medium mixing bowl, mix together the flour, baking powder, and salt, Set aside.
    • In a large mixing bowl, beat together the butter and sugar for 1-2 minutes, or until pale and fluffy. Add the egg and vanilla to the butter mixture and beat until combined, scraping the sides of the bowl as needed.
    • Add the dry ingredients to the wet ingredients in two additions, mixing until just combined after each addition. Scrape the sides od the bowl as needed.
    • Divide the dough into 3 equal pieces and roll each piece into a ball. (You can eyeball it or use a kitchen scale to measure the pieces.)
    • Place one piece of dough back in the bowl and add the red food coloring. Beat with your mixer until the color is completely incorporated. (Be sure to use a bowl that won't stain.) Clean you mixer paddle or hand mixer blades.
    • Place one piece of dough back in the bowl and add the green food coloring. Beat with your mixer until the color is completely incorporated. Leave the third piece of dough as is.
    • Press each piece of dough into a flat square and wrap in plastic wrap. Refrigerate the dough for 1 hour or until firm.
    • Remove the dough squares from the fridge. Place the red dough between 2 sheets of parchment paper or waxed paper. Use a rolling pin to roll out the dough to a 10-inch square. Leave dough between parchment.
    • Repeat with the other 2 pieces of dough. Refrigerate cookie dough for 30 mins.
    • Remove dough from fridge, and take the top layer of parchment off each sheet of cookie dough. Place the red dough down on a counter. Top with the white dough, non-parchment sides touching. Be sure to try and line up the edges of the dough as much as possible.
    • Remove the parchment from the white dough. Top the white with the green, non-parchment sides touching, being sure to line up the edges. Remove parchment from green dough. Use a pizza cutter to trim the left and right edges of the cookie dough into straight lines.
    • Very carefully, starting with one of the straightened sides, roll the dough into a long shape until you reach the other trimmed dough edge. Use the parchment paper to lift the dough to get it started. Once the dough log is complete, gently pinch the seam closed along with any breaks on the outer red layer.
    • Wrap the dough log in plastic wrap and refrigerate for 1 hour or until firm.
    • Preheat your oven to 350 degrees F. Line a baking sheet with a silicone mat or parchment paper.
    • Use a sharp knife to cut the dough log into 1/4-inch thick slices. (Discard the ends since they don't make a nice pinwheel design.) Place the cookies 2 inches apart on your prepared baking sheets and bake for 12 to 15 minutes, or until the cookies are set.
    • Carefully remove from the oven and let cool for 5 minutes on the baking sheet before transferring to a wire rack to cool completely. Serve immediately or store in an airtight container until ready to serve.

    Notes

    I wanted very vibrant colors so I used a lot of food coloring. You can start with 1/4 teaspoon for each color and add 1/4 teaspoon more at a time until your desired color is obtained.  If you are using gel food coloring, you will not need nearly as much. Start with a few drops, mix, and then add more color as needed.
     
    This recipe taken from https://www.yellowblissroad.com/christmas-cookie-pinwheels/

    I just want to bake cookies and watch Christmas movies all day

    Pinterest
    Christmas Cookie Exchange 2020 - Recipes to Enjoy
  • Memories

    Christmas Cookie Exchange – Yes Please! 2020

    The Christmas season is upon us once again and with it comes all the delights of the season. And that means cookie exchanges. Tts the second annual Christmas Cookie Exchange – Yes Please! 2020 and I wanted to share all the delights. In 2019, I posted Christmas Cookie Exchange – Yes Please! This was followed by Cookies on Plates – Plates for the Cookies which posted all the recipes from the cookie exchange and highlighted some beautiful Christmas plates. I will be sharing the same approach this year – the cookie exchange Part 1 highlighting the organization and the exchange. This will be followed by Part 2 where I will post for all the recipes.

    Last year was amazing and this year didn’t disappoint….in fact I think that it exceeded last year’s deliciousness and delights. So in the spirit of sharing the How-To’s, let’s revisit some of the important elements of throwing a successful cookie exchange.

    Christmas Cookie Exchange - Yes Please 2020

    Steps for a successful Cookie Exchange

    • Determine what you want to do. Answer these questions:
      • The usual questions of who, what, where, when….
      • Who – how many guests and who
      • What – how many cookie types, how many dozens, how to be packaged, how to be presented. Also if you are going to be voting and will it be anonymous? Will you have prizes?
      • Where – location of the cookie exchange. Consider size and number of guests along with what you want to achieve – just exchange of cookies or a holiday experience, with conversation. Are you providing lunch or just beverages.
      • When – dates and time. Date – closeness to the holiday, considering schedule and availability. Consider the time of day – will impact whether to serve lunch or not. Also the length of time – enough time to enjoy but not to overstay. This will depend on your group of guests.
    • Develop contact list and dates for contact.
      • Initial contact to identify interest
      • Followup confirmation via email with “More to come” information, thanking the attendees for participating
      • Email details about exchange – how many cookies needed, how to package. Ask for recipe document so it can be shared.
      • Email reminder of exchange, location, etc. Include a map.
      • Day of send out text reminder with map to location
    • Setup for Exchange
      • Table setup for exchange packages
      • Table setup for voting, with name of cookie.
      • Table setup for guest to sit
      • Provide beverage station.
    • When Guests Arrive
      • Greet guests and go through instructions for the day
      • Facilitate voting and award, as well as any other activities that you have planned

    Some extras that made this Christmas Cookie Exchange special

    • These ladies stayed in contact to keep us all on schedule. A couple emails reminders and then a sweet gift of a hand crafted card reminding us of the event.
    • A light lunch as provided along with beverages, including water.
    • The house was beautifully decorated for the season.
    • The hostesses had a gift bag of goodies for everyone that attended. Homemade treats inside that were amazing! Churro Chex Mix and Cinnamon Almonds.
    • Fun activities at the table….Christmas Trivia cards.
    • Time sensitive….it was very clear what the timeframe was so it wasn’t your whole day. In this busy season, that was a great thing for the planners to think about.

    Amazing Cookie Displays

    Christmas Cookie Exchange - Yes Please! 2020 Cookie display
    Display with smoking chimney
    Christmas Cookie Exchange - Yes please 2020.  Wisemen
    The Three Wisemen and cookies

    Cookies packaged and ready for sharing

    Each of us made five dozen cookies and then divided them into 6 cookie packages. You were also to plate 6 of your cookies on a plate to share for “hidden” voting. Each given a number, we all dutifully placed out cookies at our number. Two of the displays were amazing and their cookie boxes were coordinated for their gifting. But each person had a great cookie presentation. What a treat.

    A treat for the tasting…..

    A special treat for us was prepared by the lead hostess…..a hot cocoa bomb. If you haven’t heard of these delightful wonders of decadence, well be prepared. They are a hollow chocolate sphere that when bathed in hot milk, gently explode revealing hidden treasures….marshmallows, cocoa, and other treats.

    Four kinds were available for us to enjoy….white chocolate, milk chocolate, dark chocolate, and chocolate with salted caramel. Oh my goodness is all we could say.

    Christmas Cookie Exchange - Yes please 2020.  Hot Cocoa Bombs
    Hot Cocoa Bombs!

    And if you were too full of cookies to enjoy the bomb, you could take your’s home to enjoy in your pajamas and by the fire (which is what I exactly did!).

    Watching how it works!
    Christmas Cookie Exchange - Yes Please 2020  Cocoa Bomb
    Taking mine home!

    Another year and a Cookie Exchange – Yes Please 2020! This was a great time with fun conversation and delicious treats from talented women! And blessed to be surrounded and uplifted for the season. And the hot cocoa bomb was definitely……the bomb!

    And now a preview of the amazing recipes that will be coming soon……yum!

    Christmas Cookie Exchange - Yes Please 2020   Plated Cookies
  • An Abundance of Herbs
    Memories,  Recipes

    An Abundance of Herbs

    As the season changes and we find ourselves coming into autumn, it means that the temperatures will dip and for those who grow things, the frost will come and end that season. I am blessed with such a neighbor who gifted me with her abundance of herbs. She reached out to me as our weather changed to ask if I would like to have some of her herbs. I gave her an outstanding and instant “YES”. Hanging on the back of my fence were 8 bags, each containing a little herbal treasure. So here is a walk through her herbal garden from the view of my fence and what I did with this abundance.

    An Abundance of Herbs - Gifted herbs in bags hanging from fence

    I will review the herb, some of its traits, how I preserved them, and what might be some uses and recipes. Many of these herbs are not only delicious but also have medicinal uses. In this post, I will be focusing on the culinary uses of these herbs.

    Pile of fresh basil.

    What I was gifted

    8 herbs in all. Some in huge bunches and some in tender samples, but all something I wanted to use and preserve somehow.

    • Basil
    • Oregano
    • Rosemary
    • Chives
    • Marjoram
    • Thyme
    • Lemon Balm
    • Mint

    Basil

    Fresh Basil Leaves

    This was the most abundant herb I was gifted. And knowing how quickly this herb can go bad, I knew I wanted to preserve it for future use.

    PRESERVING: I removed the basil from the stems and laid them out on a baking sheet and froze them. Once frozen, I stacked the leaves and placed them in a freezer bag. Of course you can dry as well.

    USES: My plan is to make pesto – which will also go back into my freezer. But taking a little turn on the traditional pesto, I am going to use pecans instead of pine nuts. Here’s the recipe I will be trying – Pecan Pesto https://kicking-carbs.com/keto-pesto/

    Oregano

    Fresh oregano

    The warm, balsamic and aromatic flavor of oregano makes it the perfect addition to Mediterranean and Mexican cuisines. This popular herb whose name means “mountain joy” is available throughout the year.

    PRESERVING: Fresh oregano should be stored in the refrigerator wrapped in a slightly damp paper towel. It may also be frozen, either whole or chopped, in airtight containers. You can freeze the oregano in ice cube trays covered with either water or stock that can be added when preparing soups or stews. I chose to dry mine.

    USES: Oregano is perfect for homemade pesto, grilled seafood, and roasted chicken. Pesto? Who knew and I am intrigued.

    Here’s a recipe for using fresh oregano with fish. It looks amazing. https://bonaippetit.com/pan-fried-cod-with-oregano-and-parsley-dressing/

    Rosemary

    Fresh Rosemary

    Rosemary is one of my favorite herbs. It is hearty and has a very characteristic aroma and is possibly one of the most powerfully aromatic herbs in my kitchen. Its classic taste has a very pronounced lemon-pine flavor, yet it is also woodsy and peppery at the same time. The taste is piney, but also bitter and somewhat astringent.

    PRESERVING: Its easy to dry rosemary by hanging it in bunches or in a dehydrator. Then stripping it off the stems and storing in an air-tight container. But I think my favorite way is to strip the needles off the stems, place them in an ice cube tray, cover with olive oil and freeze. I always have rosemary in my freezer in this manner.

    Rosemary ready to be frozen in olive oil

    USES: A common staple in Italian cooking, rosemary is also used in many other dishes. Fresh or dried leaves pair beautifully with root vegetables, pasta, sauces, fresh cheeses, breads, poultry, pork and lamb. Whole rosemary can be used to infuse oil, sauces and even syrups.

    Here is one of my favorite Rosemary recipes, which includes instructions on how to store Rosemary in olive oil in the freezer. https://teastheseason3.com/kristens-grilled-chicken-marinade/

    Kristen's Grilled Chicken Marinade - plate of freshly grilled chicken

    Chives

    Fresh Chives

    Chives are related to onions, leeks, and garlic. They have a delicate onion flavor that is complemented by hints of garlic.

    PRESERVING: Fresh chives are the best to use in cooking. However I dried the chives using a dehydrator since I had an abundance. Once dry, chop up, store in an air-tight container.

    USES: Chives are popular in French cuisine and used in French omelets and cheese soufflés. In the U.S., chives are known to pair well with seafood and are a popular garnish for many recipes, adding that “pop” of color. Also used in dips and in some baking.

    A great recipe for Cheese and Chive Sourdough Biscuit. https://leelalicious.com/cheese-and-chive-sourdough-biscuits/

    Marjoram

    Fresh Marjoram

    Marjoram is a strong herb and used for recipes with hearty meats and stews. Closely related to oregano but milder in flavor, marjoram tastes similar to thyme with a sweeter and stronger scent.

    PRESERVING: Like most of these herbs, you can use fresh, freeze, or dry your marjoram. I dried the sample that I had.

    USES:  It is traditionally partnered with meat, particularly lamb, veal, beef, pork and chicken but goes just as well with vegetables or seafood.

    Here’s a simple recipe using your slow cooker and is a rich hearty roast using marjoram. https://barefeetinthekitchen.com/italian-red-wine-roast-beef/

    Thyme

    Fresh Thyme

    Thyme is one of my favorite herbs. I love the characteristic taste that it brings to a dish. Thyme is part of the mint family and has flavors of clove and mint.

    PRESERVING: If I am not using fresh thyme, I will dry thyme in bundles or in a dehydrator. Then take off the stem and place in an air tight container.

    USES: Thyme is a very pungent herb and needs to be used appropriately. The leaves and flowering tops are used to add flavor to foods such as meat and poultry, herb butter, sauces, soups, salads, tomatoes, pasta, egg dishes, cheeses, stuffings, fish and clam chowder. Fresh or dried, the leaves and flowers are usually added to other herbs and spices. Thyme is typically an ingredient in Italian seasoning herb blends and in herb and spice mixtures, like poultry seasoning.

    One of my earlier posts, Cheesy Thyme and Ham Potato Gratin Stacks, a delicious recipe that highlights fresh Thyme. https://teastheseason3.com/cheesy-thyme-and-ham-potato-gratin-stacks/

    Cheesy Thyme and Ham Potato Gratin Stacks

    Lemon Balm

    Fresh Lemon Balm

    I wasn’t very familiar with this herb, so learning about lemon balm was fun. Lemon balm is a very aromatic member of the mint family and has a bright, citrusy taste that brings together the acidity of lemon with subtle hints of mint.

    PRESERVING: Methods for preserving lemon balm are similar to the other herbs we have talked about. I dried the lemon balm I was gifted.

    USES: Lemon balm is used as a flavoring in ice cream and herbal teas. It can be paired with fruit dishes or candies as well. Lemon balm can be used in fish dishes and is the main ingredient in…yes, Lemon Balm pesto!

    To be consistent with the Teas The Season mission, I have included a recipe for making Lemon Balm Tea! This can be served both hot and cold. https://geturbanleaf.com/lemon-balm-tea-recipe/

    Mint

    Fresh Mint

    This very well know herb. Mint has that characteristic minty cooling flavor. Chewing on a sprig after dinner can freshen your breath and help with digestion. This is an extremely versatile herb that is fun to have on hand and experiment with.

    PRESERVING: You can dry or freeze fresh mint leaves. I froze the mint I had. Remove it from the stem, chop up the leaves, place them in an ice cube tray and cover with water.

    Freezing fresh mint

    USES: There are many things that you can do with mint….mint sugar, mint syrup, mint ice tea, Mint Julep….just to name a few. In salads, pastas, rices, meats, drinks, sauces and baked goods. You can find mint recipes for just about anything.

    This was caught my eye. Chocolate and mint go so well together but this recipe uses fresh mint. https://www.dessertfortwo.com/mint-chocolate-chip-cookies/


    Thank you for joining this walk through my abundance of herbs. There are so many different herbs and huge variations on how they can be used. I do not claim to be an expert and only touched the surface of these amazing little gifts. I hope that this encouraged you to give fresh herbs a try.

    And I know that a good neighbor is all you need to begin to have some fun with herbs.

  • Enjoying Together,  Memories,  Recipes

    A Midsummer Night’s Tea

    Do you know the story? Shakespeare’s A Midsummer Night’s Dream. Here is a tale of four young lovers who run away to the forest only to have the mischievous fairy Puck make both of the boys fall in love with the same girl. The four run through the forest pursuing each other while Puck helps his fairy master play a trick on the fairy queen. In the end, Puck reverses the magic, and the two couples reconcile and marry.

    How does this fit into a tea? A Midsummer Night’s Tea perhaps? Its summer and seemed befitting.

    I was gifting an evening tea to a group of ladies and I thought this would be a fun theme tea for them to experience. The decor and menu would reflect the play and being outside would be an added bonus that would add to the atmosphere of fairies and dreams.

    As the guests approached they were teased into the forest as they entered my home…….while Demetrius, one of the young lovers whispers “Are you sure that we are awake? It seems to me that we sleep, we dream.”

    Once inside, they were escorted to the backyard where they were seated.

    A Midsummer's Night Tea  - Pergola

    The tables were adorned with twigs and moss and surrounded by ethereal pink tulle and drapes. Rocks and pine cones accented the table as if my guests were sitting in the forest, just waiting for Puck to show up.

    A Midsummer's Night Tea - backyard table setting
    A Midsummer's Night Tea - backyard table setting

    As the sun set, the yard was gently lit with lights surrounding the guests. The evening ended with Lavender Lace tea and my guests awakening before they left.

    Midsummer Night’s Tea Menu

    The menu was fun to develop. Several items are reminiscent of early English culinary fare and featured many of the characters in the play.

    A Midsummer's Night Tea - burnished menu
    A burnished menu perhaps by the fairies?

    The scone course featured the Queen Fairy Titania’s Currant Scone and Nick Bottom’s Fat Rascal. In Midsummer Night’s Dream, Nick Bottom is a thespian in the play and is frequently laughed at. So in looking for an English bread befitting of Mr. Bottom, I came upon Fat Rascals.

    The tea for this course was Sparkling Sugar Plum. This is a black tea with plum bits and blossoms, spices and crystals that actually glisten and sparkles. It was a perfect choice for this Midsummer Night’s Tea. Even stirred with a fairy spoon.

    A Midsummer's Night Tea - Sugar Plum Fairy Tea
    Sugar Plum Fairy Tea

    The savories continued adorning the names of characters with the fairy King Oberon’s Love Potion Champagne Cocktail, The King’s Meat Pie – a hand held circular meat pie. Wilderness Mushroom Caramelized Onion Pastry accompanied Fairy Peasblossom’s Cucumber Sandwich, that was in the shape of a mushroom.

    When it came to the final course of the sweets, Puck’s Raspberry Fool appropriately took the stage. An old English Elizabethan Lemon Cake was part of the deliciousness and was graced by The Queen’s Four Fairies Meringues. These light meringues were in the shape of forest mushrooms.

    Here are some of the menu recipes:

    NOTE: More of these recipes will be highlighted in future posts

    More whimsy for the evening….

    A Midsummer's Night Tea - Fairy Spoons
    Fairy Spoons, a gift from a guest

    The guests were served in the traditional format of afternoon tea, but with some whimsy to continue with the theme. The ceramic fairy spoons were used to serve the Devonshire Cream and Lemon Curd. Each individual and a dainty reflection of the wooded garden, perfect for a Midsummer Night’s Tea.

    A Midsummer's Night Tea - Servers Outfit of Floral Wreath and Apron

    Further, the service was done with each fairy maiden wearing a wreath of flowers in their hair, along with their usual tea-serving apron and outfit. The evening Midsummer Night’s Tea was served by myself, my daughter and granddaughter. It was a fun evening tea for all involved – both guests and hostesses.

    So as the tea finished, the guests were full and the frivolity had ended, there was no more slumber. The evening conversation had been enjoyed and the mischievous Puck apologized to all saying……

    If we shadows have offended, think but this and all is mended,
    That you have but slumber’d here
    while these visions did appear….

  • Memories,  Uncategorized

    What fills your cup?

    From the title of this post, you might think that I am asking whether you are drinking tea or coffee? What are you steeping? That would be my topic….right? Actually, I am taking a different road and asking…what fills your cup with joy? Sometimes that gleeful feeling or just contentment, joy comes in many forms and may be unique to you. Today, a moment of good reflection that has you ask yourself the question – what fills your cup?

    I like to take time to reflect on what brings me joy and contentment. It helps me to stay focused on priorities and what really matters. In the bible, we are instructed to remember those times when we have been delivered or protected, when we are joyful and content. So I am taking a moment to share with you, what fills my cup in hopes that you might be able to find the same moments. Come along on a short journey that I hope gives you some smiles.

    Here are some things that bring me joy.

    My faith…ultimately centering

    Some time in the morning, to set the stage for the day, to inspire – to encourage – to readjust is critical to me. And doing this through study and time in the bible is key. When I have stepped away or don’t make time for whatever reason, I always find myself running back to this foundation.

    What Fills Your Cup? Morning devotional with tea
    My Familymy sisters

    Family brings me joy. My children, now grown and with families, my sisters who have become my closest friends. Now admittedly, growing up we were not always close, but now – we are joined. We all share a love of afternoon tea and vintage china. Even in a virtual moment, we are crazy together and yet ground each other as we go through life’s journeys. We have each other’s backs….this brings me joy.

    My Grandchildren…and their feet

    Grandchildren fill my cup. I will frequently turn to them, cup my hands in a heart and ask them “What’s filling my cup?” Then pretend to explode and over fill my cup as I point to them. So many things come to mind but one in particular are their little feet. In shoes, in slippers, or barefoot, littles feet bring me joy.

    Banging loudly on my piano, I listen while the little hands gleefully pound out a tune only to see little feet dangling at the bench. I remember that I started the same way in my grandmother’s house. Along with little bump-toe sneakers, a loud concert make me smile.

    What Fills Your Cup? Little Feet in Bumptoe Tenniies at the piano.

    Or just slippers….little chubby feet squeezed into slippers and just enjoying some breakfast. These little feet remind me of old man slippers and I chuckle every time I see this.

    What Fills Your Cup? Little slippered feet at the breakfast table

    Those moments when girls get to be girls, even when they are little, painting toes those favorite colors (of course with glitter) is a special moment. If you have done that before, you know the challenge of little toes…but precious moments of feeling like a big girl….”can you blow on them to make them dry quickly?”

    What Fills Your Cup? Little painted toenails

    What little girl doesn’t enjoy wearing dress-up shoes, even if on the wrong feet. You can hear the scuffing through the house, unbalanced and wobbling as they make their way around probably doing the morning shopping.

    My Afternoon Teas…..let me serve you

    One of my favorite things is to serve tea. Whether breakfast time or afternoon tea, in a group or just together, I love to create the experience for my guests. In the planning, the preparation and the serving, it delights me to see people refreshed. It can be simple or lavish, knowing that you feel pampered or special just fills my cup.

    What Fills Your Cup? Afternoon Tea table for Friends
    My Home…my sanctuary

    I have moved several times in my life and in each house, I find a point of sanctuary, where I can sit and reflect. It is a place that I can have that quiet moment to think, pray, or just pause. With a cup of tea and my feet up….I take a deep breath and I find joy and contentment, a sanctuary for not only myself but for others as well.

    What Fills Your Cup? Feet up and enjoying a moment with tea
    My Stepping Stones….

    Le’ts break this into some pragmatic steps that you might be able to apply to your life. I don’t claim to be an expert – but a sojourner who has found a path. Add to that journey, miles and years and you begin to look back and learn, look forward and continue. Here are some common sense steps that I try to do on a daily basis.

    • Every day….begin to set the stage with a heart of gratitude. When I wake in the morning, I will literally say “Good morning Lord” and “thank you for the day.”
    • A morning time of reflection. I start with spending time alone and in my bible. It focuses me and keeps me level.
    • List out my blessings. Deliberately list out the good – the blessings, the challenging – lessons learned and ….but always end on the blessings. Especially at the end of the day, while I lay in bed and will go through my list..
    • Compartmentalize. During a difficult time in life, a good friend taught me how to envision a box to put those things that were hard in my life. I would deal with them and put them in the box. Then up onto a top shelf went the box, put away. If I am unnecessarily dwelling on things, I learn from it and then toss it into my mental box and put it on my high shelf.
    • Surround myself with positivity. Seems simple and almost offensive at times when all you hear and see is the difficult times in the world, but I know that aligning myself with positive people, identifying those things that work well for me makes me more joyful and ready to help others along the way. Identify those points of negativity and reframe it.
    • Plan my day. I admittedly am a list person even for the routine daily stuff, so planning for me is helpful. As much as possible, plan the day. Idle time is not good for the soul.
    • Don’t take myself too seriously – I think that life in all its seriousness provides us times of humor and for me, that frequently involves laughing at ME. I love to laugh at myself, even making sure that my friends and family know what silly or stupid thing I may have done, wishing them a good belly laugh even at my own expense.
    • There is more than just me in this world. The world is big and there is pain and suffering. Its helpful for me to keep my place in it all in perspective….I guess you might say that you strive for humility. Take care of myself but realize, its not all about me.
    What Fills Your Cup? Pooh and Tigger supporting one another

    Now on to making a cup of tea and readying an afternoon tea, I thank you for coming along….for taking a moment to hopefully be inspired to ask yourself….“What fills my cup?”

  • Memories,  Uncategorized

    An Easy Way To Dry Roses

    Most of us have received a dozen beautiful roses for some occasion. And as the days go by, they just seem to wilt and fade all too quickly. Here is a very easy way to dry roses so you can preserve those special memories.

    You might recall that my son loves to gift me roses for Mother’s Day. The tradition continued this year with an extraordinary collection of beautiful roses. He has done this for years and in fact, I have the first dozen he gave me dried and in a vintage silver water pitcher.

    Here is a tour of this gorgeous bouquet.

    As the days went on, I knew this was one bouquet I was going to preserve. Here are the steps I use – you will be amazed how easy this is.

    Prepare the roses.

    You don’t want to wait too long to do this. The rose will begin to droop, you may begin to lose petals (which can also be dried) and you want the stems to still have integrity without any decomposition. Take off any excess leaves that you don’t want to be in the end bouquet and any petals that you think are too far gone. This particular grouping didn’t have any excess leaves or petals – so I had little prep to do.

    Select a drying rack.

    I like to use my laundry rack. It provides several layers and a large space to dry the roses. I have also used hangers but the rack gives you plenty of room.

    Fresh roses on drying rack
    Fresh flowers on drying rack

    The drying process

    Using a rubber band, secure two roses together. Hang over one of the rungs of the drying rack. If the rose is drooping, gently straighten the bloom into that straight line. I put a towel underneath to catch any leaves that might fall during the drying process.

    Two roses banded together for drying
    Flowers bound together with rubber band

    And let your climate do the rest. The length of time to dry will depend on your climate. I live in an arid climate and so roses dry out quickly but generally you are looking at 1-2 weeks. When dried, the flower should be able to stand up and feel dry to touch.

    Sealing your dried roses

    To further seal and preserve your roses, spray with non-perfumed hair spray or I like to use a matt finish clear spray. You don’t need to drench the complete stem, but spray all sides of the flower. This will dry quickly and then you are ready to enjoy.

    Dried flowers on newspaper ready for spraying
    Dried flowers ready to be sprayed

    The results

    Here’s the results. On the left is the live bouquet and the right is the dried. These roses dried beautifully and though they don’t have the same vibrant colors as the live roses, the dried version have a great array of colors to enjoy. I was very pleased with how these turned out.

    Other drying and preserving methods

    This is one of many ways that you can preserve your flowers and for me, this works particularly well for roses. Here are a few of the other ways you can preserve flowers. You choice of method will depend on the flower that you are wanting to dry.

    Air Drying Method

    We just reviewed the air drying method. Hanging bouquets upside down is the most traditional technique for drying flowers.

    Another variation is to allow your bouquet to dry in the vase. Leave a little water in the base of the vase and then just allow the bouquet to dry. This method works best for baby’s breath, lavender or hydrangeas.

    Dried roses off rack
    Dried roses off rack
    Silica Gel

    If you want your flowers to look just like they did in your garden, try using silica gel. The sandy-like substance can be found at craft stores and works best with sturdy flowers like zinnias or roses. Bury your blooms in a large container of silica gel. In a few days to a week, gently uncover vibrant, preserved flowers.  Don’t over dry them – they will become brittle.

    Pressed Method

    Many of us will remember doing this in grade school. While this method can be time-consuming, there’s little effort involved and the results are consistently wonderful. Take a heavy book, line a page with parchment or wax paper and arrange flowers face down so they don’t overlap. Close the book and leave untouched for seven to ten days. Once all the moisture is gone and they have a papery texture. This works great for flowers that will flatten well – daisies or violets are great suggestions.

    Microwave

    Take the flower you want to dry and place between two coffee filters. Then place on a plate and top with another plate. Microwave for 1 minute. Repeat until you achieve your desired result.

    Whatever method you use, preserving your special flowers allows you to reflect on the beautiful memories of that time. Now ready to reflect and enjoy with a nice cup of tea.

    Dried bouquet with teapot and teacup, ready for service.

    “Dried roses are proof of the memories which are still wet in my eyes”

  • Single slice Wacky Cake with Whipped Cream and Fresh Fruit
    Memories,  Recipes

    WACKY CAKE – Not just a crazy recipe!

    Wacky Cake – not just a crazy recipe. Also known as Depression cake, Crazy Cake, Joe Cake and WWII cake and has been around since rationing occurred during WWII. As a young girl, I remember my mother making this cake and telling me the story of how and why this cake came to be, at least in her family. It was not only a favorite but also a clever cake during austere times. Among her other WWII stories, this cake became a delicious childhood memory.

    Shortages come and go, and this Wacky Cake is a great recipe to have on hand. This cake is not overly sweet, dense and a very moist cake that can be made from normal kitchen items that you likely just have on hand. And the best secret, its made without eggs, butter or milk! Wacky Cake – not just a crazy recipe! Let’s make this simple and delicious cake.

    Following my routine description process, here’s the ingredients

    • All purpose flour
    • Cocoa Powder
    • Sugar
    • Baking Soda
    • Salt
    • Water
    • Oil
    • Vanilla
    • Red Vinegar

    Assemble the dry ingredients

    In a large bowl, measure the flour, cocoa, sugar, baking soda and salt. Whisk the ingredients together and set aside.

    Prepare the liquids

    Measure the water, oil, vanilla and vinegar. The vinegar combined with the soda make the leavening in this cake. The use of the red vinegar helps to enhance the dark color of the cake once baked. You can use white vinegar if that’s what you have – there is no change in the flavor of the cake.

    Liquid ingredients used in the Wacky Cake recipe.  Vanilla, water, oil and red vinegar.
    Liquid ingredients

    Put the Batter Together

    So as simple as it sounds, pour all the liquids into the dry ingredients and mix well. I like to use a whisk and spatula. The batter will look like a milk chocolate cake but it will turn very dark when baked.

    Preheat the oven to 350 degrees. Prepare the pan. I like to use a bundt pan, so I spray the pan and then dust with cocoa powder. My mom used to always use a 9 x 13 pan. Pour the batter into the prepared pan and into the oven!

    Bake for 45 minutes or until a tester comes out clean. This cake bakes close to this time and springs back to touch when done. This recipe creates a nice rounded cake with that desired crack in the top! Though this looks like a milk chocolate cake, the actual cake is very dark chocolate in color (as you can see in the prepared pictures).

    Final baked Wacky cake in bundt pan.
    Finished Baked Cake

    Here’s how to enjoy it

    This cake is very versatile. Its not only easy and quick to put together, it gives you lots of ways to serve. I like to dust the cake with powdered sugar, slice and serve with whipped cream and fresh fruit. For the bundt cake, you can put a nice vanilla glaze. Take 1 cup powdered sugar and 2-3 tablespoons of milk, one teaspoon of vanilla. Mix together and drizzle over the cake.

    Single slice of wacky cake served with shipped cream and fresh blueberries and strawberries.
    Ready to enjoy…topped with whipped cream and fresh fruit

    If you bake this in a 9 x 13 like my mother would do, you can put a chocolate buttercream frosting on it. The contrast of a milk chocolate buttercream against this dark cake is amazing.

    Sliced and serving with fresh fruit.  Ready to serve tea for two.
    Sliced with fresh fruit and ready for Tea for Two!

    But if nothing else, this cake is delicious just plain. The stories and vintage history make this a special cake. Enjoy!

    Sliced Wacky Cake and Fresh Fruit
    Print Pin
    5 from 6 votes

    Wacky Cake

    This is a very moist chocolate cake, also known as Depression Cake. The novel thing about this cake is that it does not contain any eggs, milk or butter.
    Course Dessert
    Cuisine American
    Keyword bittersweet chocolate, chocolate cake, Eggless chocolate cake
    Prep Time 15 minutes
    Cook Time 45 minutes
    Total Time 1 hour
    Servings 16 servings

    Ingredients

    • 3 cups all purpose flour
    • 4 Tbsp cocoa
    • 2 tsp baking soda
    • 2 cups sugar
    • 1 tsp salt
    • 2 cups water
    • 2 tsp vanilla
    • 2 Tbsp red vinegar Can use white vinegar but the red vinegar gives the cake a deeper chocolate color. Does not affect the flavor.
    • 1 tsp salt
    • ¾ cup corn or canola oil

    Instructions

    • Preheat oven to 350°. Prepare bundt pan or 9×13 pan. Spray with cooking spray and dust with cocoa powder.
    • Mix the dry ingredients in bowl.
    • Pour in liquid ingredients. Mix well.
    • Pour into prepared pan.
    • Bake for 45 minutes or until a tester comes out clean.
    • Let the cake cool on a rack for 20 minutes. If using bundt pan, remove from pan and allow to finish cooling on rack.

    Notes

    This cake can be topped with whipped cream, dusted with powder sugar, buttercream frosting or a light glaze.  Whipped cream and fruit  is delicious.  Just as good – eat it plain!
  • Beauty and the Beast Entrance Table with Rose Under Glass
    Enjoying Together,  Memories,  Recipes

    Beauty and the Beast Afternoon Tea Party

    Beauty and the Beast Afternoon Tea - Mrs Pots and Chip

    “Be our guest, be our guest…..” The tune is instantly in your head. That’s what was going through my thoughts when I was asked to host a Beauty and the Beast Afternoon Tea Party. This party was to be held in honor of the motion picture release of Beauty and the Beast in 2017 and would have 2 young ladies as well as their mothers and aunts in attendance. How fun and what a treat for these young ladies.

    I used the same planning, preparation and production steps that I used in the How To have a Valentine’s Tea Party https://teastheseason3.com/how-to-have-a-valentines-tea-party/ Here’s how it went together…..

    How to begin the planning

    As requested, this was going to be a theme afternoon tea party…..specifically Beauty and the Beast. I asked the same simple questions as I do with any tea party preparation. These are guidelines and considerations for you. The focus of the party was going to be on the two young ladies who were the guests of honor. Their aunt was the requestor of the event, so I met with her several times prior to the actual tea party. And I must admit, I pulled out the old animated movie to help get my creative juices flowing. I won’t tell you if I danced and sang as I put this one together.

    Beauty and the Beast Tile
    Beauty and the Beast Tile
    • Pick the day and time of day you want to have your tea party. If you are having an afternoon tea, this will include savories, scones and sweets. So your guests will want to come prepared to enjoy a full serving of treats. This tea was going to be prior to the movie but at lunch time, so the guests would be ready to eat.
    • Determine how long your tea party will be. My tea parties are generally 2 hours long. The hostess agreed to the same length of time for this tea party – 2 hours.
    • Determine how many guests will be coming to your party. This will impact your location and your menu development. This party was going to have 8 people, to include the 2 guests of honor. This is a nice size to prepare for.
    • Pick out your invitations. Will you use email? Text? General mail? I generally use either email or text and there are many vendors that can provide you with easy electronic invitations such as Smile Box http://www.smilebox.com or Evite http://www.evite.com. Make sure to have an RSVP and ask if there are any food allergies or food preferences (gluten free for example). These invitations were taken care of by the aunt. I took care of the menu development.
    • Outline if you are going to have any activities. There are several tea party games that you can use. My guests generally are just full of conversation and we don’t have games. In this case, the guests of honor were younger and would need to have some form of entertainment. A two hour lunch would likely be too long for them to just sit. In coordination with the aunt, activity bags were made for the young ladies that reflected the theme of the party. They were delighted.

    Menu Development

    As in many afternoon teas, there are three courses – savories, breads, and sweets. I like to have 4-5 savories (small bite size morsels, one of which is a cucumber sandwich of sorts), 2 scones accompanied by cream and lemon curd, and 4 sweets to end the tea. I generally have a different tea for each course.

    This menu needed to meet both the young ladies palette but also be able to satisfy the adults. I wanted this to be a fun and luxurious experience for all.

    I have listed each course with comments on the selections. I have included the recipes in the next section.

    Beauty and the Beast Afternoon Tea - Menu
    Beauty and the Beast Afternoon Tea Menu

    Savories

    • Cogsworth Cocktail (adjusted for the younger needs) – This was simply a Proseco Cranberry Cocktail. For the young ladies, it was seltzer water and cranberry juice. But served in a champagne flute for celebration.
    • Quiche Lorraine ala Lumiere – small bite size Quiche Lorraine
    • BLT Tower – Small stacked bacon / lettuce / tomato sandwich
    • Cucumber Sandwich with Tomato Rose
    • Gaston’s Meatball in Sweet Sauce – simple meatball, skewered with a cocktail sword and barbecue sauce
    • Vegetables with Herb Dressing – Carrots and Celery in a cup with Herb Dressing at bottom of cup. Easy for little hands.
    • Margaret’s Orchard Tea for the young guests – This is an herbal tea, served with a touch of sugar is a great first tea for littles
    • English Breakfast for the adults

    Scones

    • Mrs. Pots’ Currant Scone
    • Chip’s Cinnamon Scone
    • Lemon Curd / Devonshire Cream
    • Sparkling Sugar Plum Tea This is a delightful black tea that has an iridescence to it. Guests of all ages smile with this – it sparkles in your teacup.

    Desserts

    • The Grey StuffThis was the classic Grey Stuff.
    • Belle’s Sweetheart Cookie
    • Apple Rose
    • Fruit with Honey Dressing
    • Lemon Souffle TeaThis tea is a Rooibos tea, so is naturally decaffeinated. It has a light lemon flavor rich as a baked souffle. Pairs nicely with a dessert portion of tea.

    Prepping Ahead

    Planning and the ability to prep ahead is so critical for a smooth and successful afternoon tea. Here are some of the recipes that I was able to use and those in particular that I made ahead of time.

    Beauty and the Beast Afternoon Tea - Food Tier
    Beauty and the Beast Afternoon Food Tier – Scones and Savories

    In the top tier, you can see the scones – Mrs. Pots Currant Scone, Chip’s Cinnamon Scone. On the second tier, Gaston’s Meatball, Quiche Lorraine ala Lumiere, and BLT. On the third, Cucumber Sandwich with Tomato Rose and Vegetables and Herb Dressing.

    Setting the Stage

    Entering and Greeting Guests

    As always, you want to set the stage for your guests to begin their tea party experience. In this case, my guests were entering into the story of Belle, a book reading beauty. I wanted this to begin from the moment they would walk up to the door. I opted to make large over-sized flowers out of newspaper. And of course, the guests were greeted….asking them to “Be Our Guest” as they entered.

    Here’s the instructions to make your own newspaper flowers.

    Beauty and the Beast Afternoon Tea - Rose Under Glass
    Entrance table for guests – Rose Under Glass

    Upon entering my home, the guests were greeted with the classic dying flowers in a glass dome. Surrounded by white and black china, the fallen rose petals were a reminder of the Beast’s connection to the rose.

    Place Setting

    The place setting featured a single plate, teacup, and silverware. The napkin was rolled to resemble Lumiere and tied with a blue organza bow.

    Table Setting

    Beauty and the Beast Afternoon Tea - Table setting
    Beauty and the Beast Afternoon Tea - Table Setting

    The table setting reflected Belle’s love of books. I used three different colors of tablecloths – red, yellow, and blue. Down the center of the table I took pages of maps from old books – this provided the table runner. For the centerpieces, I used old children’s books (actually heirlooms from my father). I stacked them and then placed candles on top. Enough to give interest but not too high to block conversation. And of course, rose petals through out. The chairs were each tied with a yellow satin bow to pull in Belle’s yellow ball dress.

    Adding more to the fantasy, I took a small stool and covered it to look like the enchanted footstool. Topped with the Disney children’s book, the stool rested underneath the piano, waiting to become a puppy once again.

    Another reminder of our heroine, a tray of books and teacups graced with a pair of white gloves, told our guests Belle was around, reading and waiting for her prince charming.

    Beauty and the Beast Afternoon Tea - Belle's Books Ready for Reading
    Belle’s Books Ready for Reading

    My guests came and enjoyed, with the two young ladies coming in full Belle costumes. Finishing with the dessert course, my guests readied themselves for their premier and feasted on Belle’s Sweetheart Cookie with fruit and honey, Apple Rose pastry, and yes….as Lumiere would sing “Try the Grey Stuff, its deeelicious….if you don’t believe me – ask the deeeeshes!” And as they say, they all lived happily ever after.

    Beauty and the Beast Afternoon Tea - Dessert Plate
    Dessert Plate